Chants of Sennaar is an indie game about learning new languages. If you want to succeed in this challenging game, you'll most likely need a hand during your playthrough. You can find answers to every puzzle in Chants of Sennaar in the walkthrough below, as well as info on how to unlock all achievements.
Complete Chants of Sennaar Walkthrough Guide (All Endings)
In order to complete Chants of Sennaar and get all the achievements, you'll need to complete several languages, solve a whole bunch of puzzles, and complete your journals. Here is how to get through the entire game and grab everything you need to 100% this challenging puzzle title.
Chapter 1: The Abbey and the Devotees
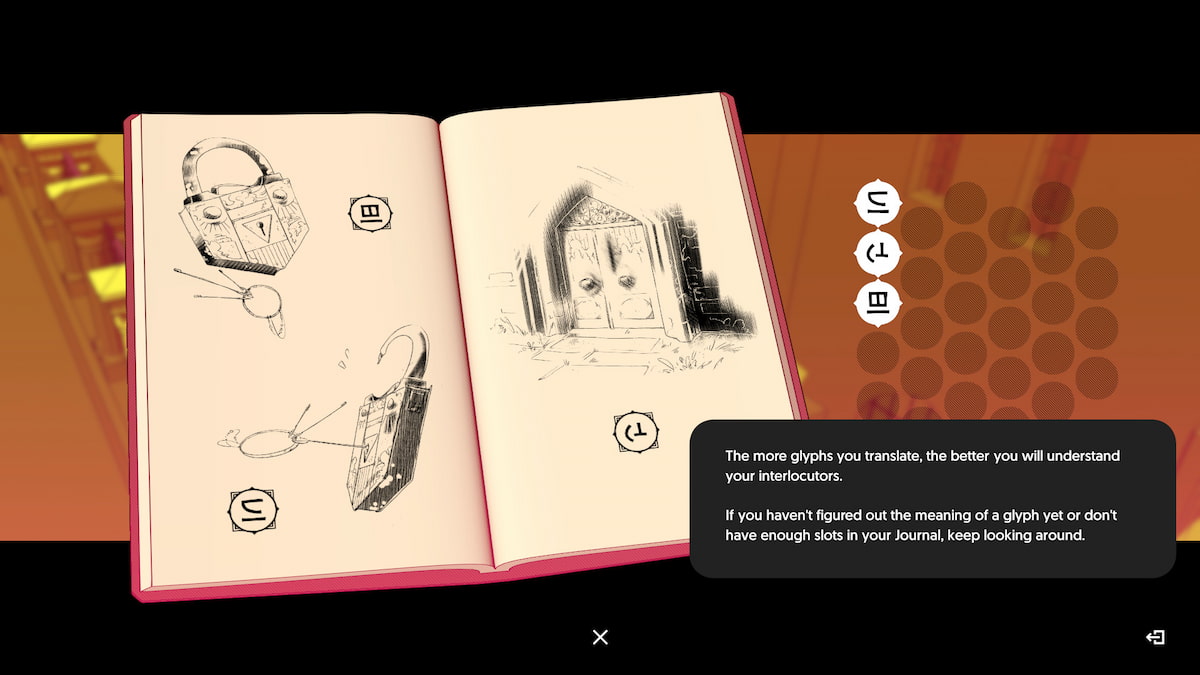
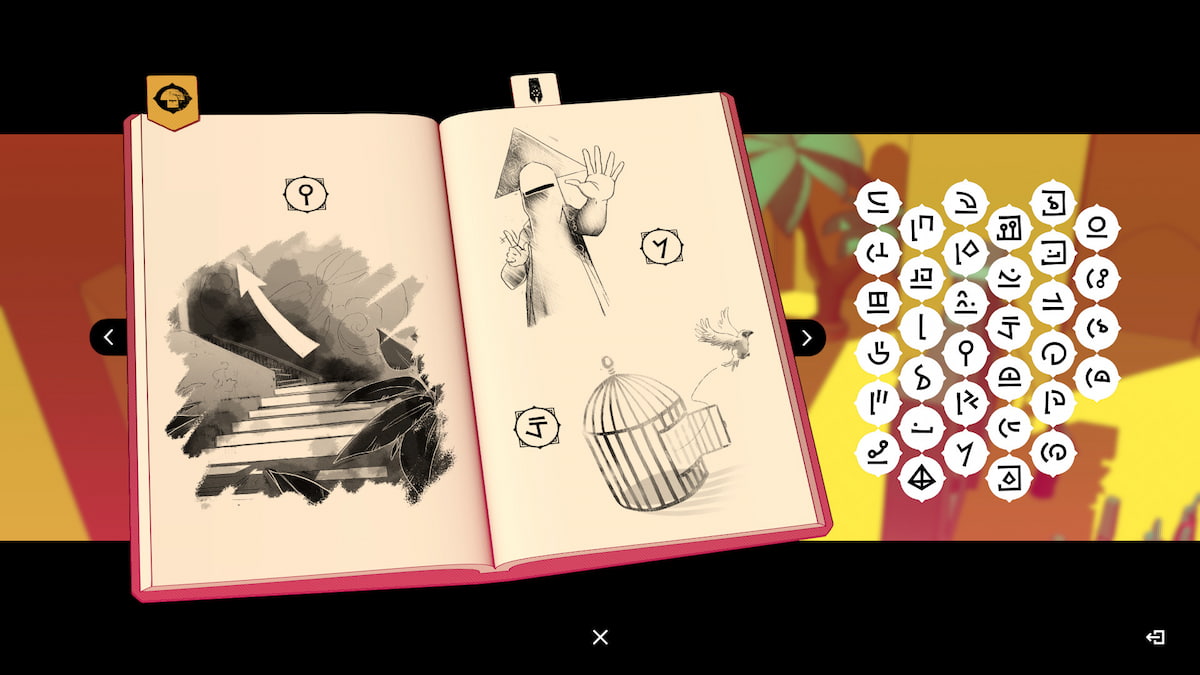
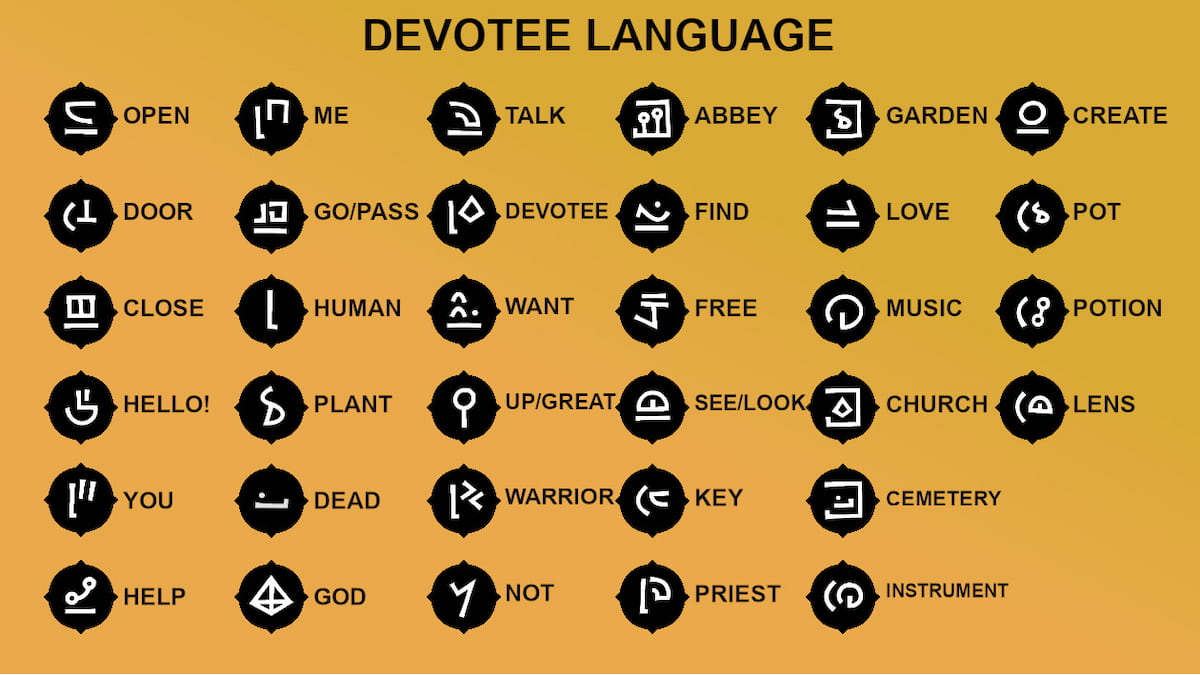
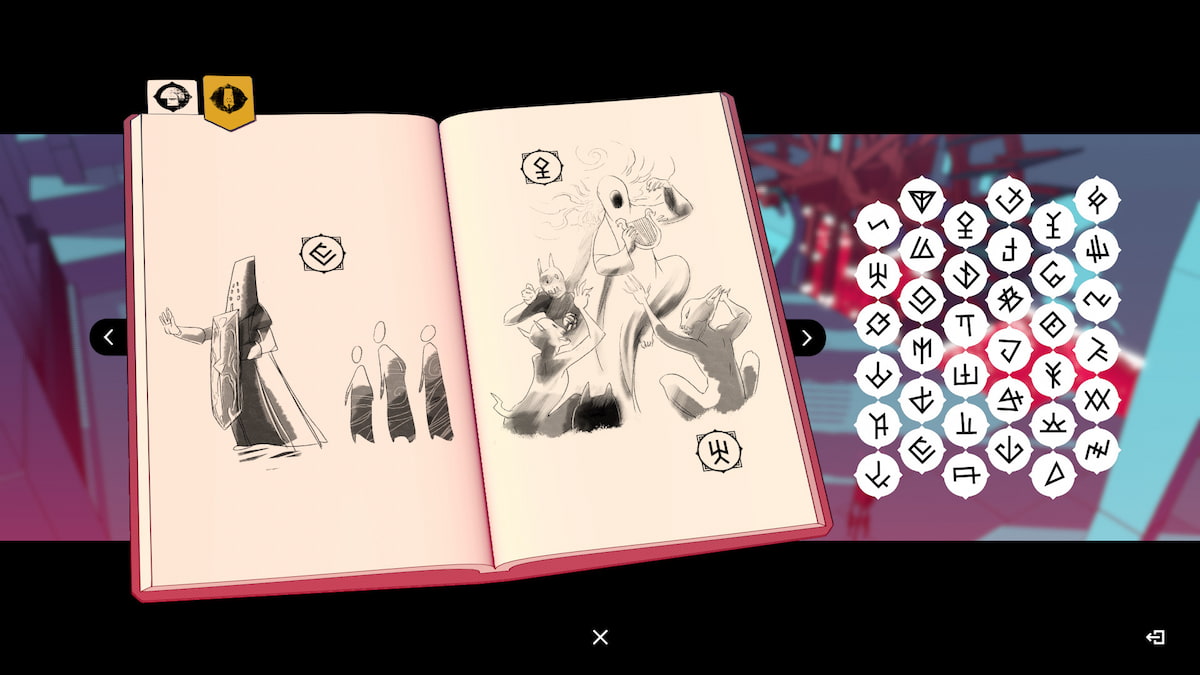
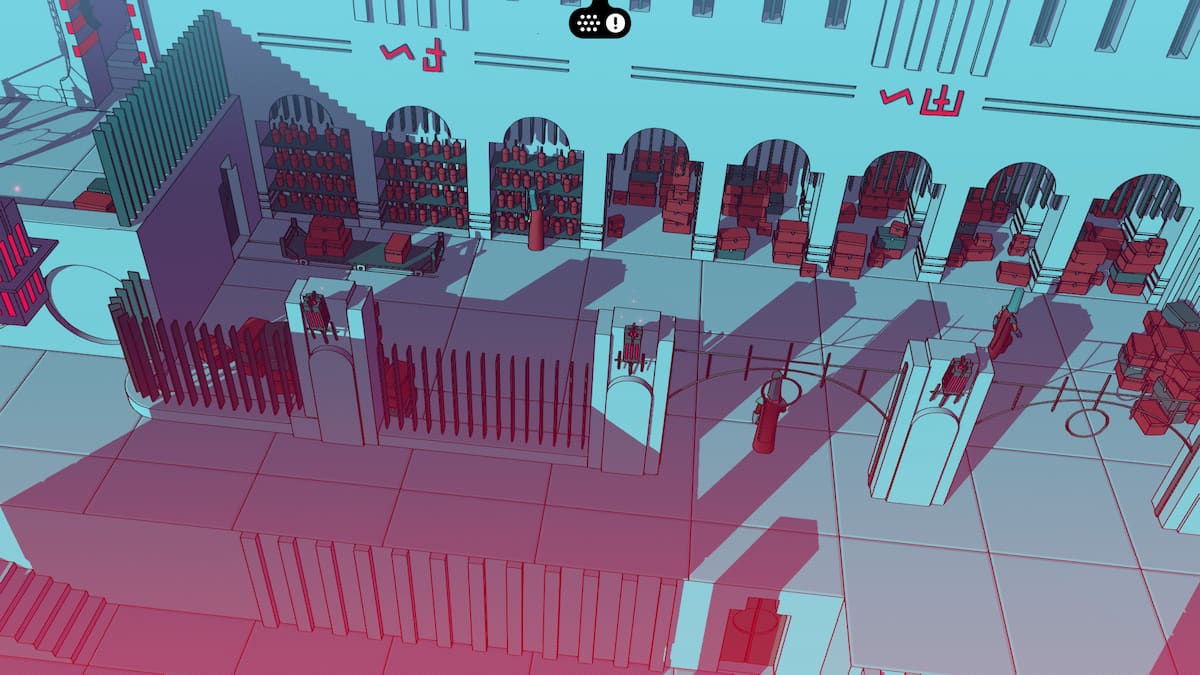
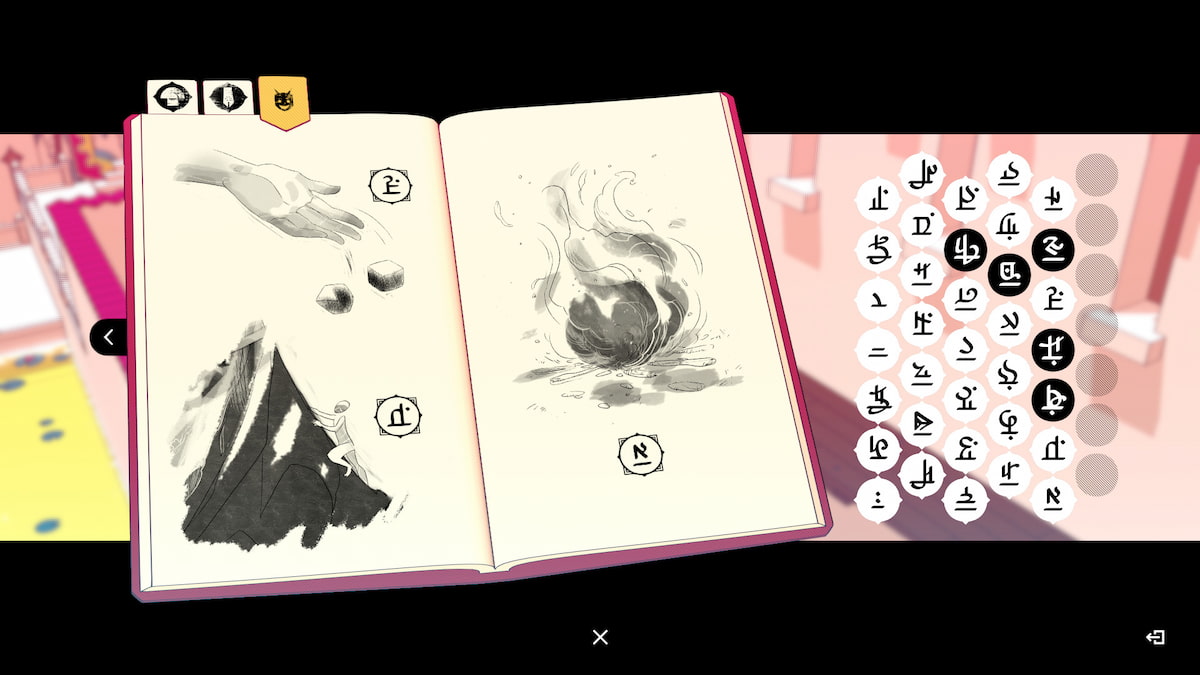
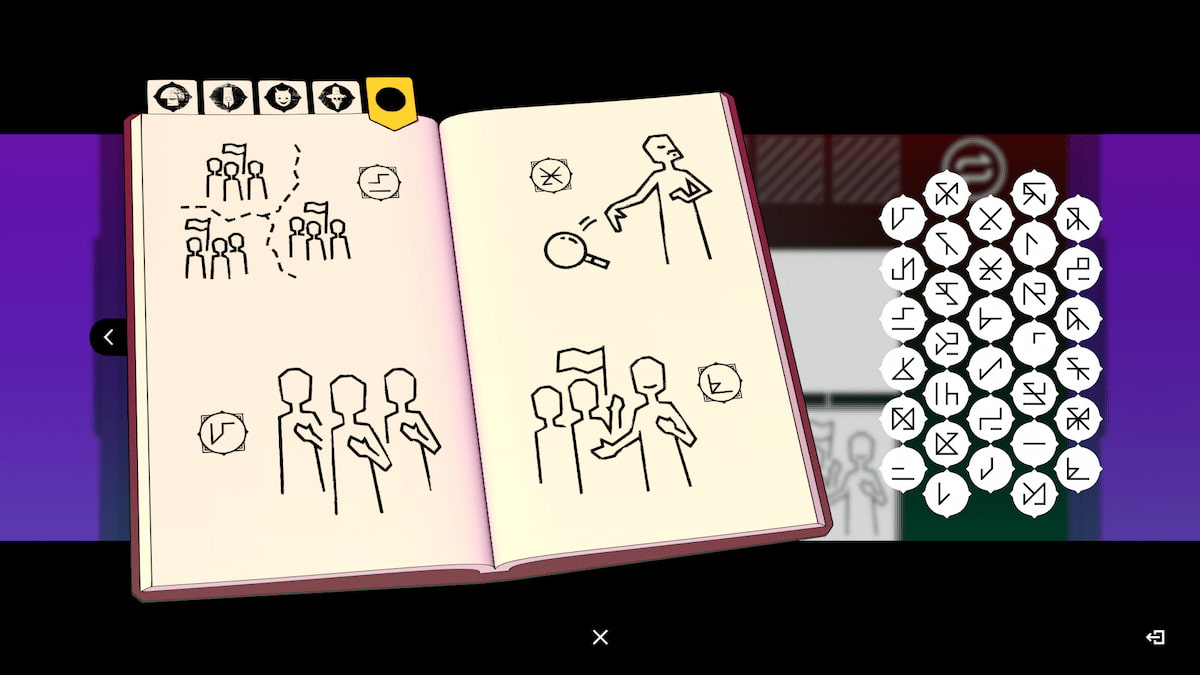
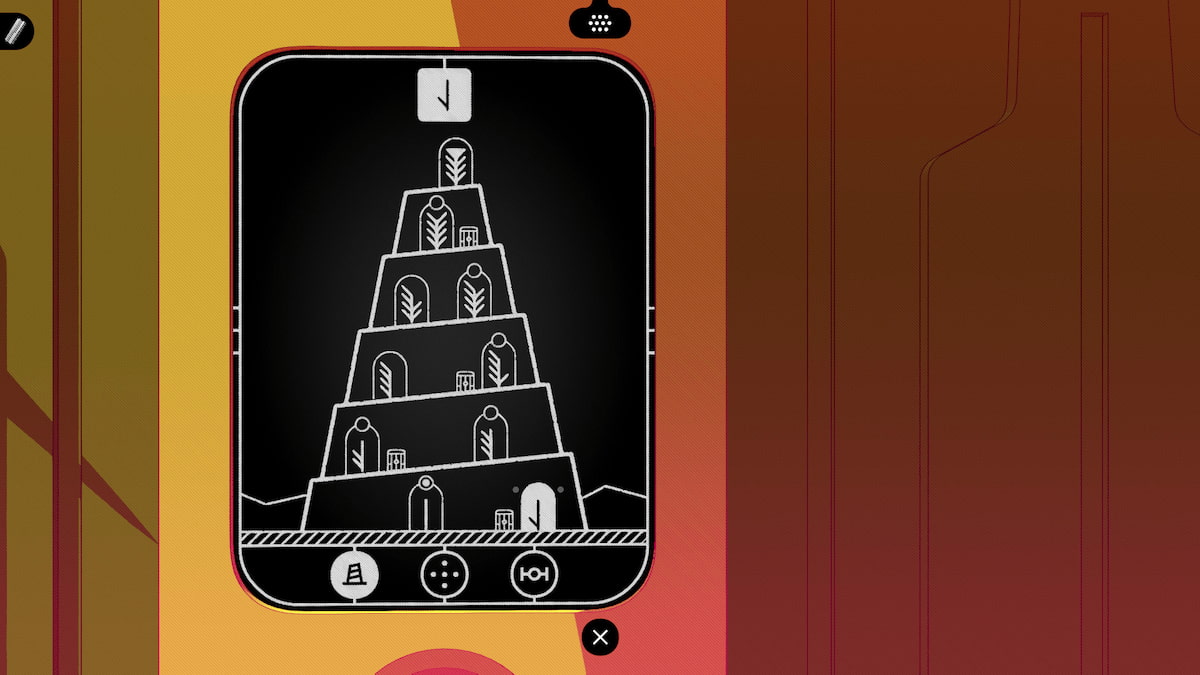
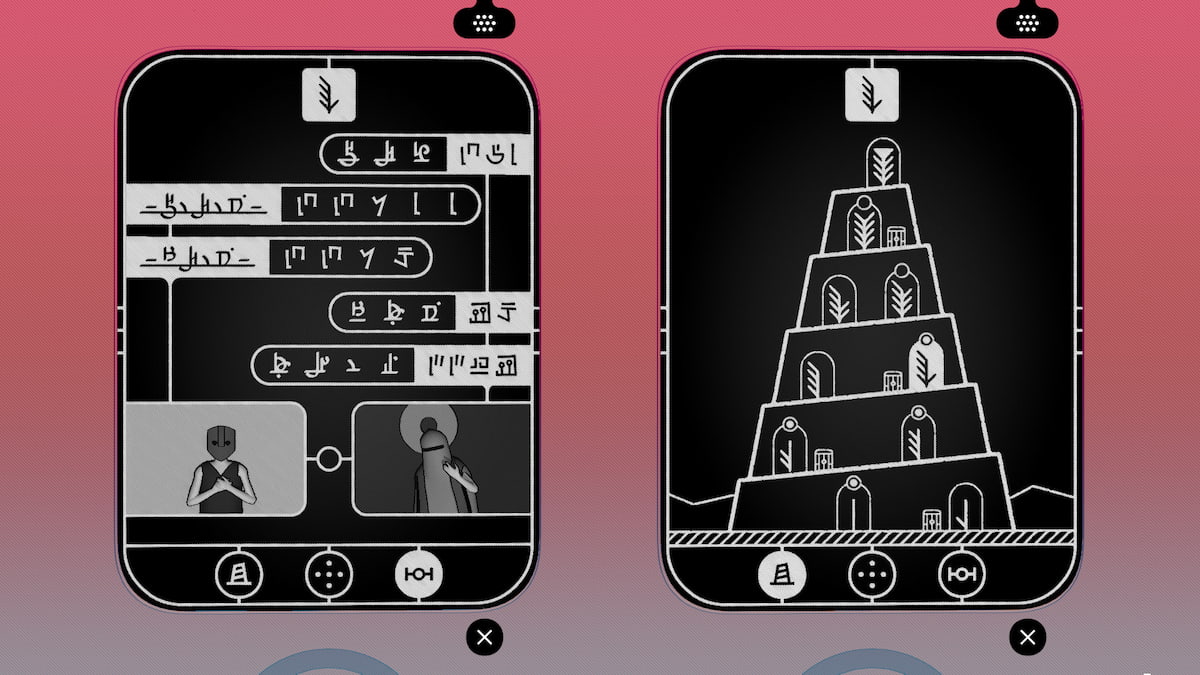
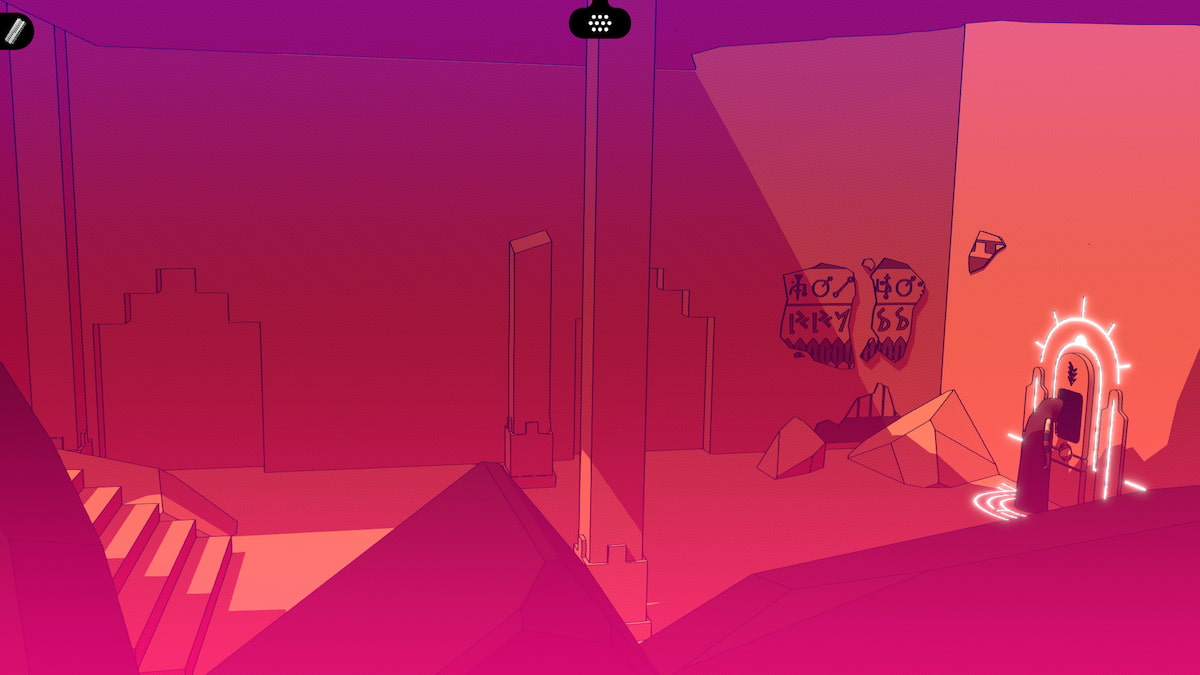
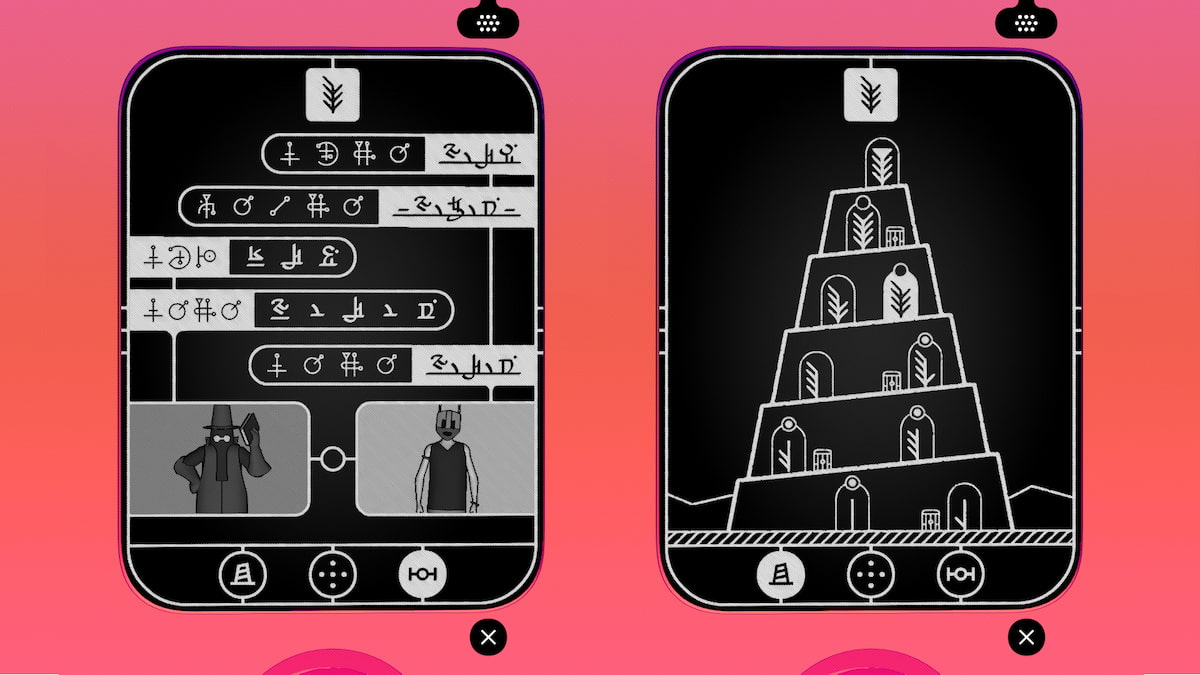
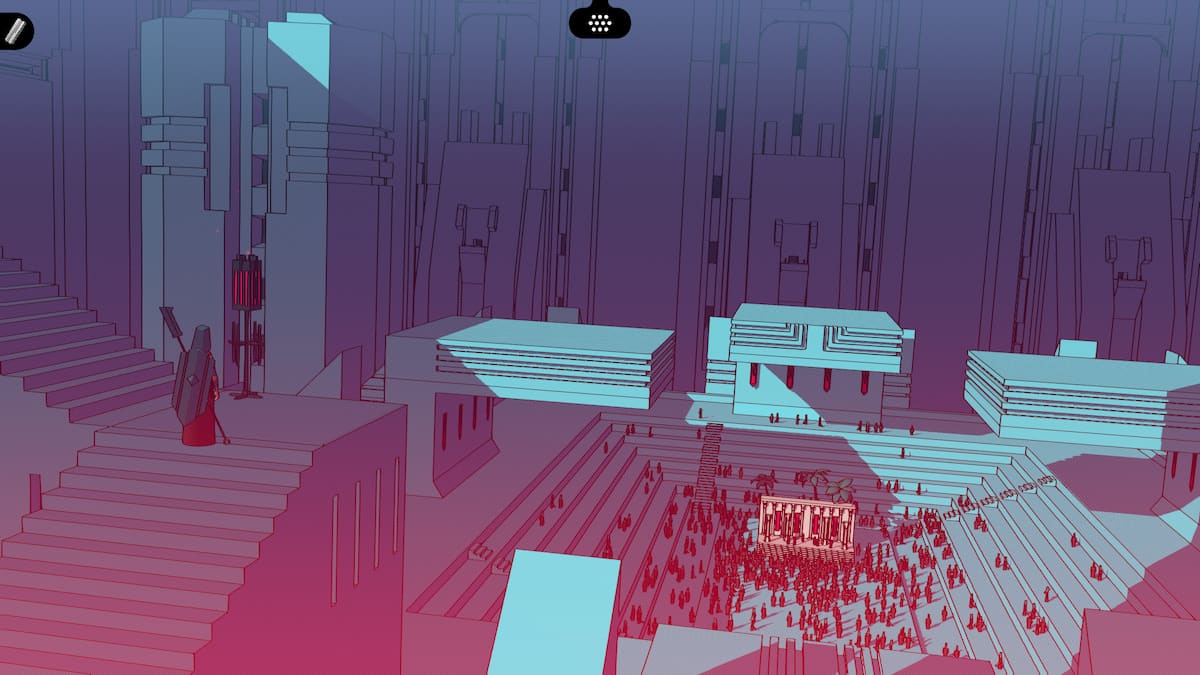
The first location you come across in Chants of Sennaar is the Abbey location. In it, you will meet a tribe of people called the Devotees, which have a language unique to them. In order to get through this area, you'll need to collect all 34 glyphs and put them in your journal.
The Tutorial puzzles and glyphs
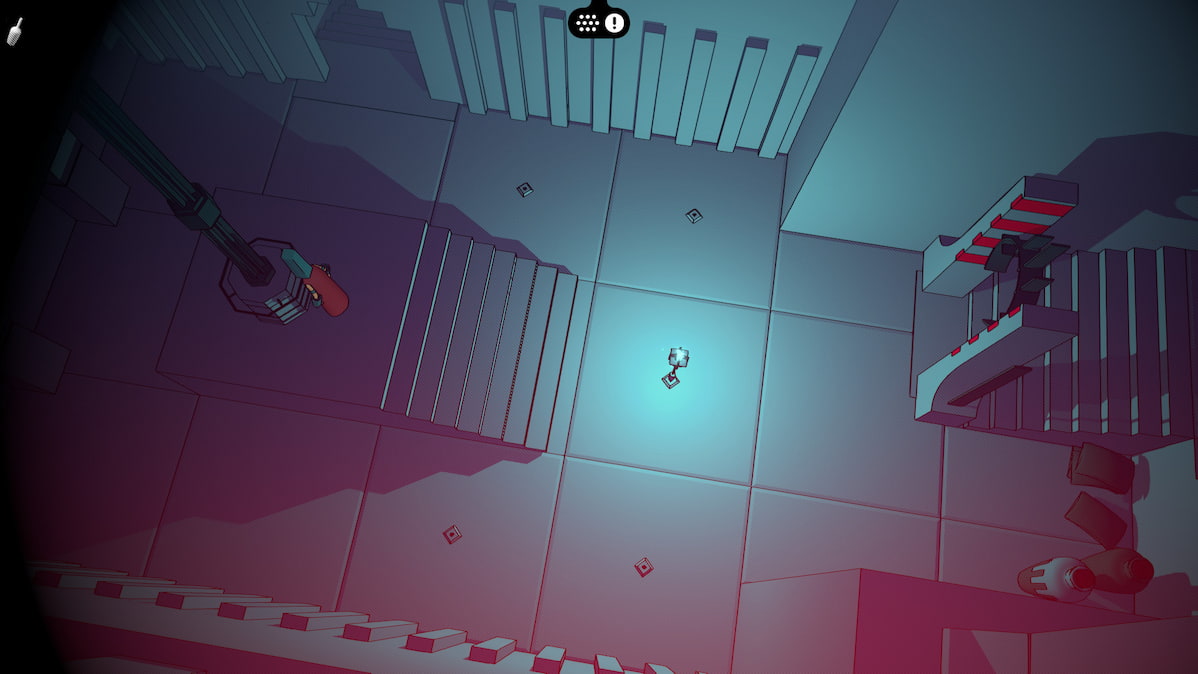
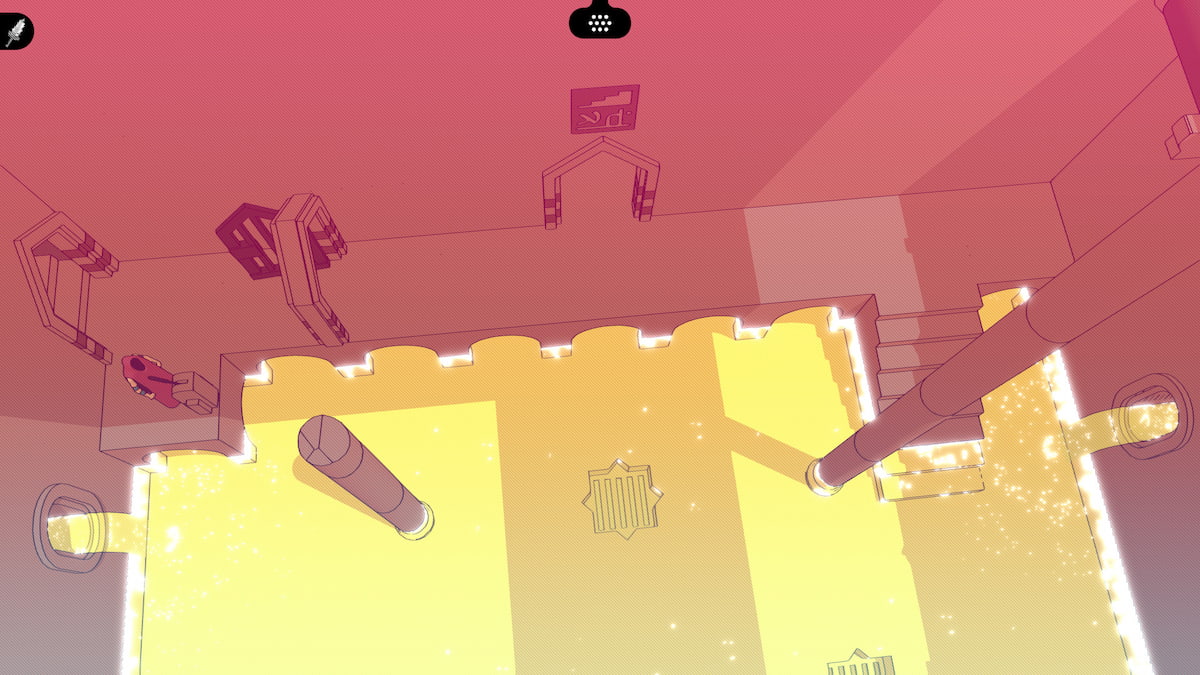
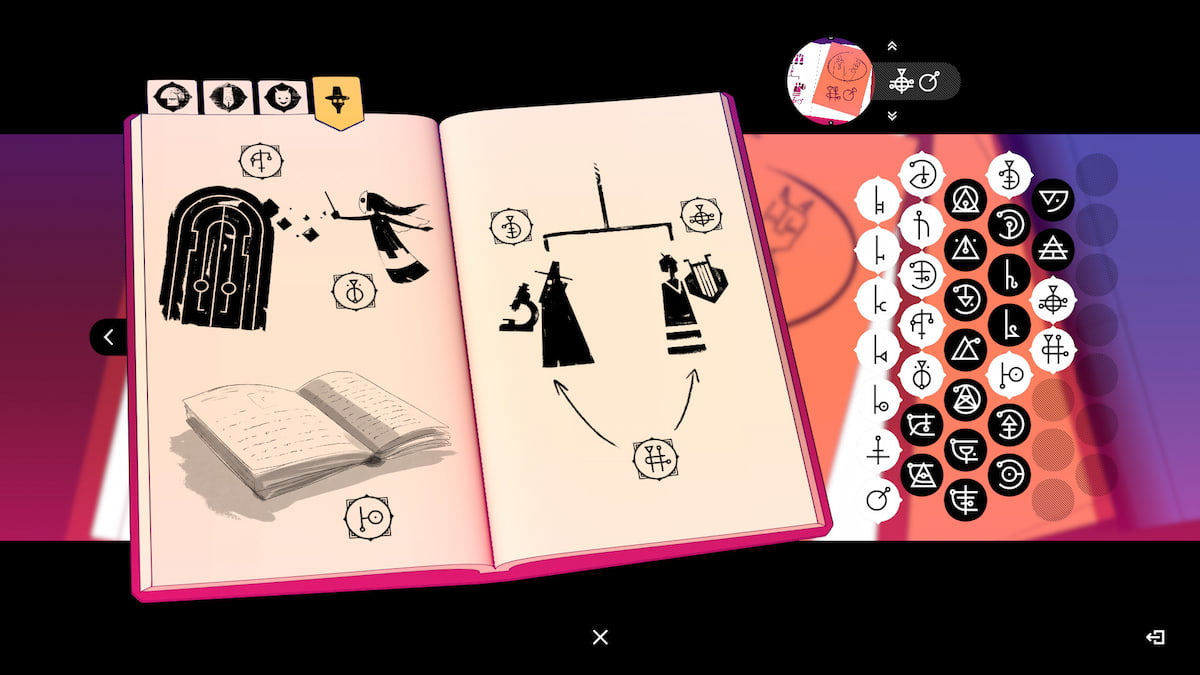
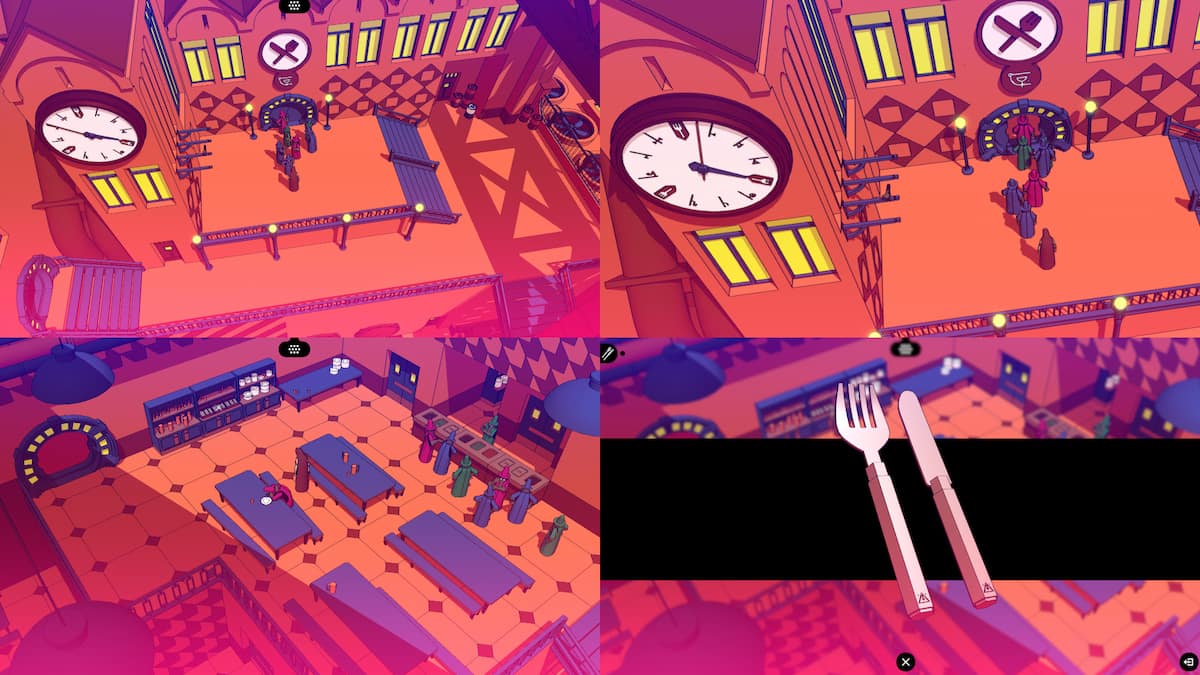
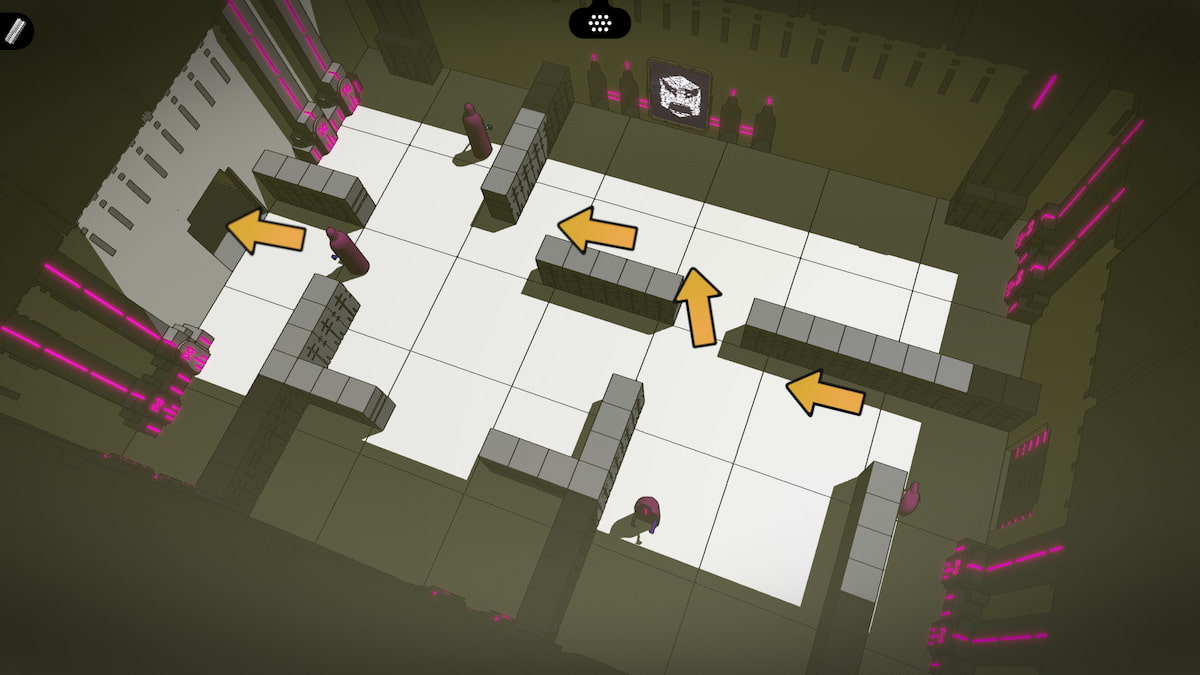
After leaving the starting area, the first puzzle you'll come across is the door opening. This will give you the first glimpse into the language, and you'll need to take note of the door mechanism and what it does. When you push it up, the door opens, and down the door closes. Once you interact with the sign by the mechanism, you can mark the words for "open," "close," and "door."
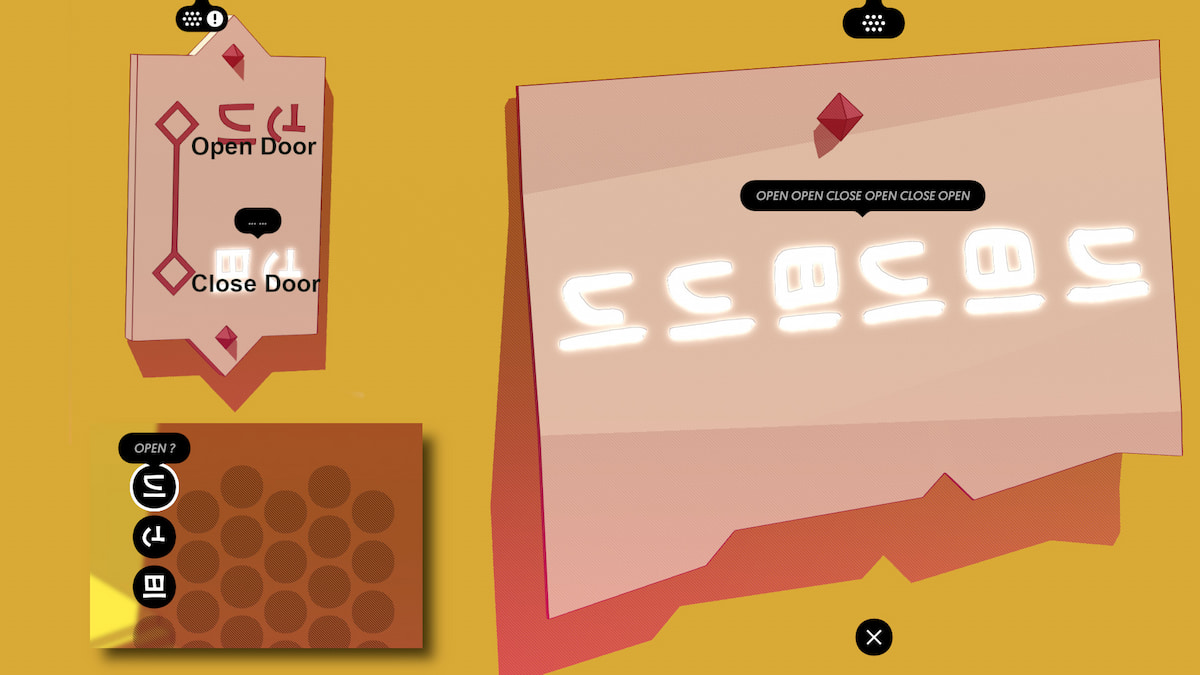
When you get to the next puzzle, you'll now know the words for "open" and "close," so you can figure out which order to open and close the water spouts. As in the screenshot above, these are OPEN, OPEN, CLOSE, OPEN, CLOSE, OPEN. Open or close the spouts in that order to empty the water out and continue on your way.
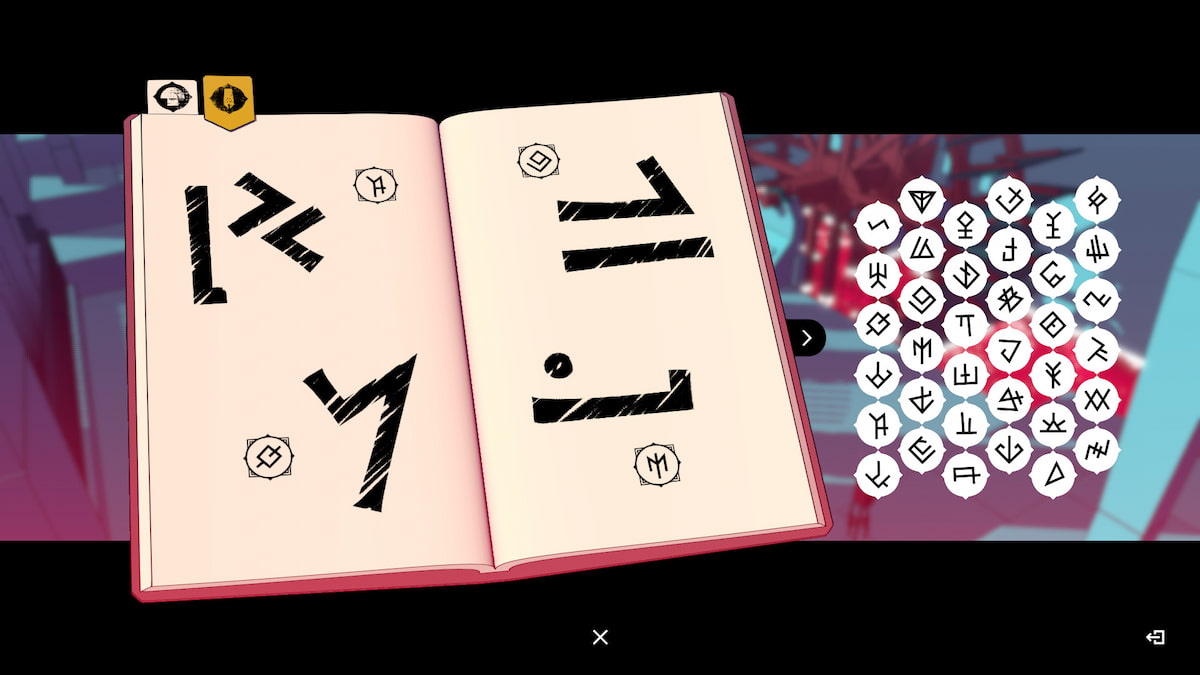
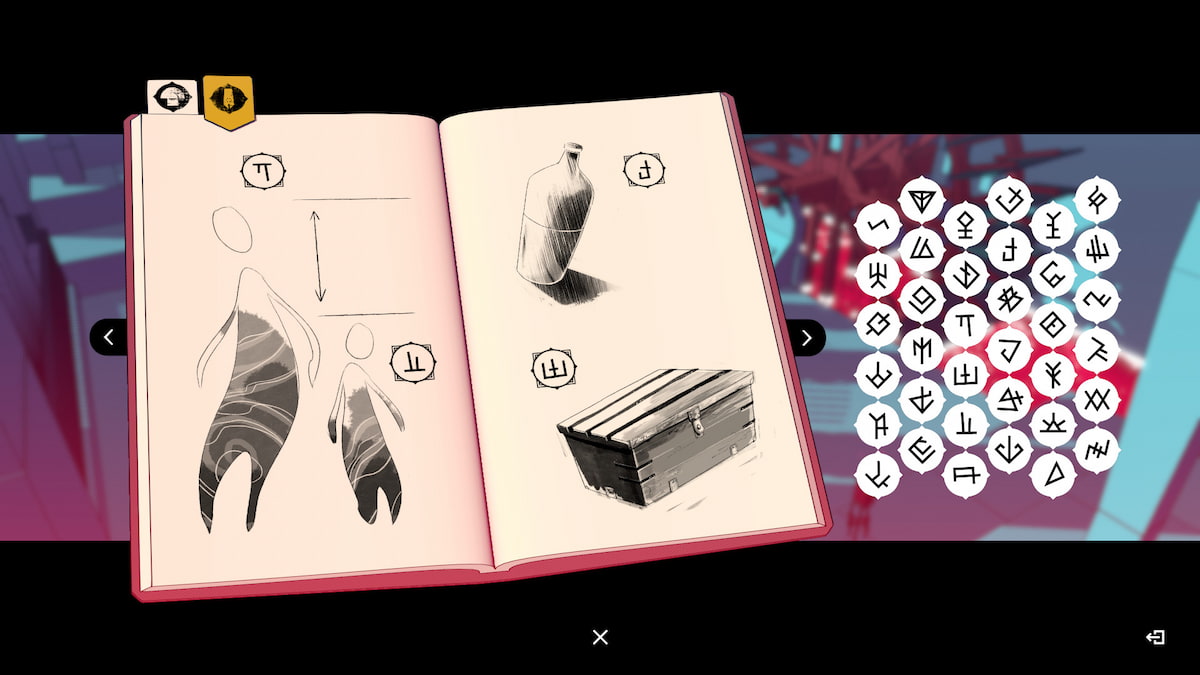
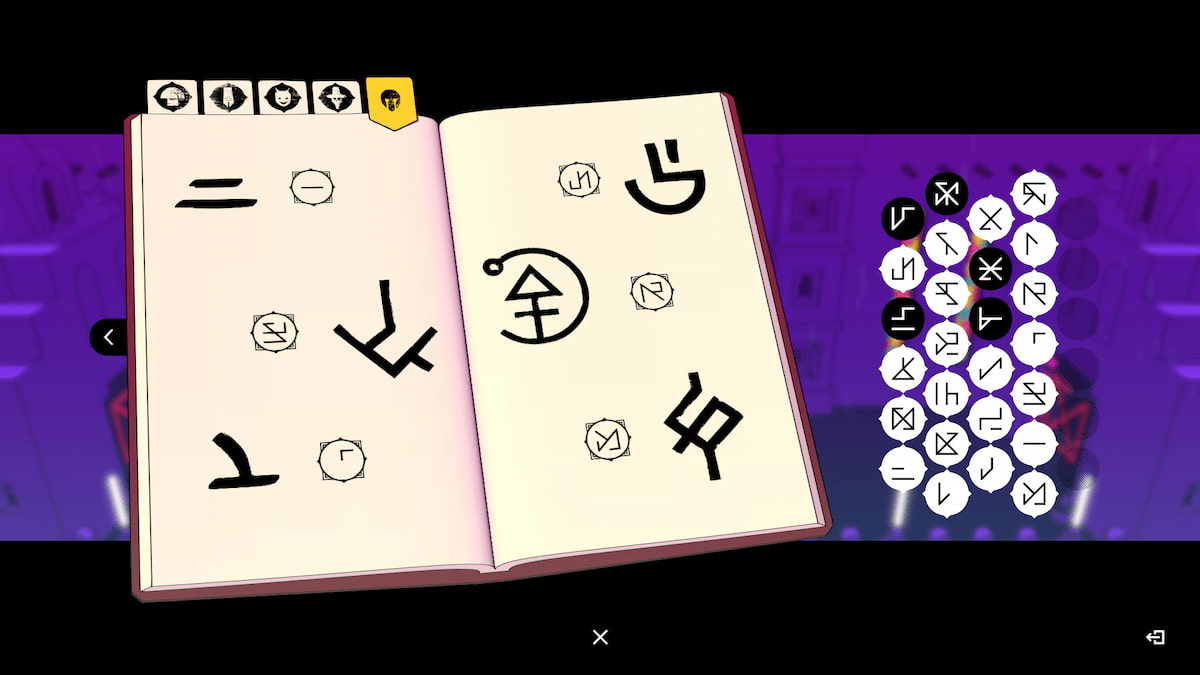
Glyphs: Open, Close, Door
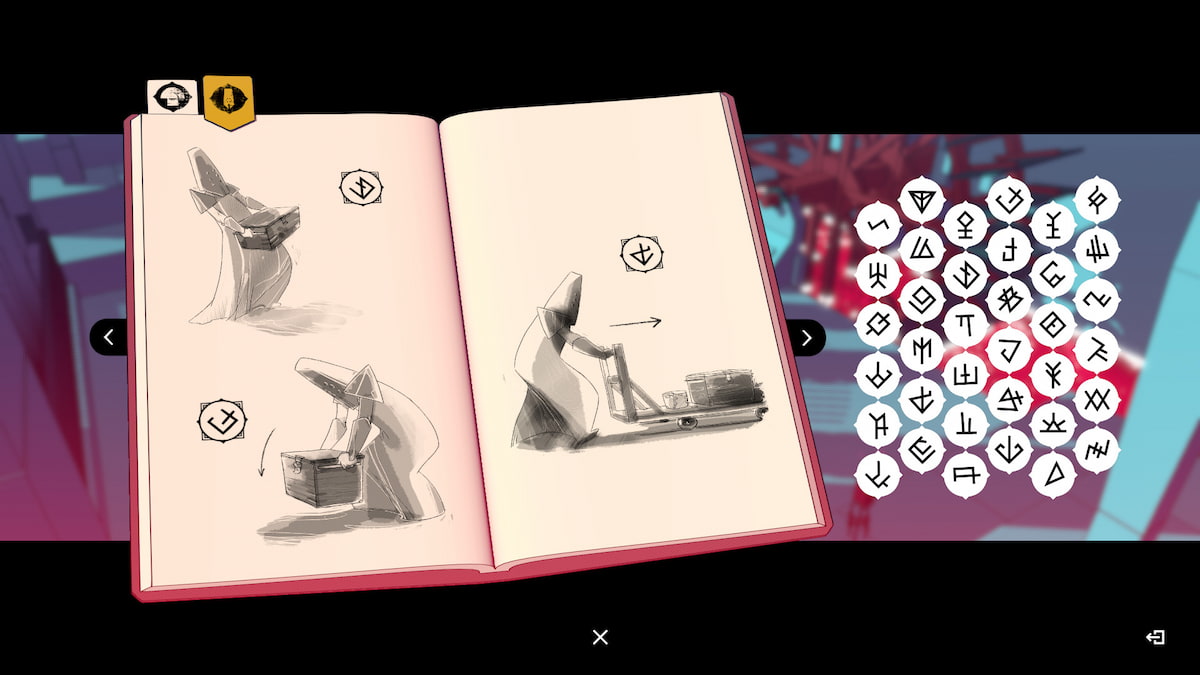
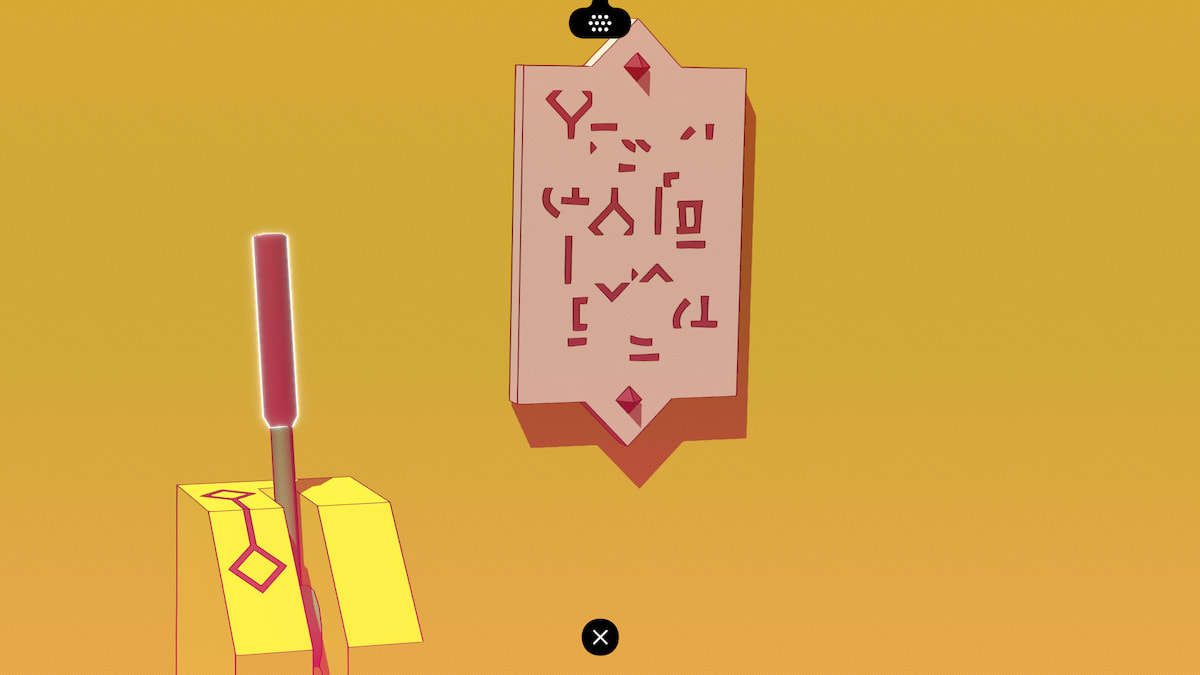
Afterwards, you will have the opportunity to add these to your journal as words you have learned. Plug the three symbols in for Close, Open, then Door by the drawing depicting each one of these pictures. Your journal should look like this when you are done:
Achievement: That's the Spirit
Get this achievement when you fill in this first page.
Waterway tutorial puzzle with a friend
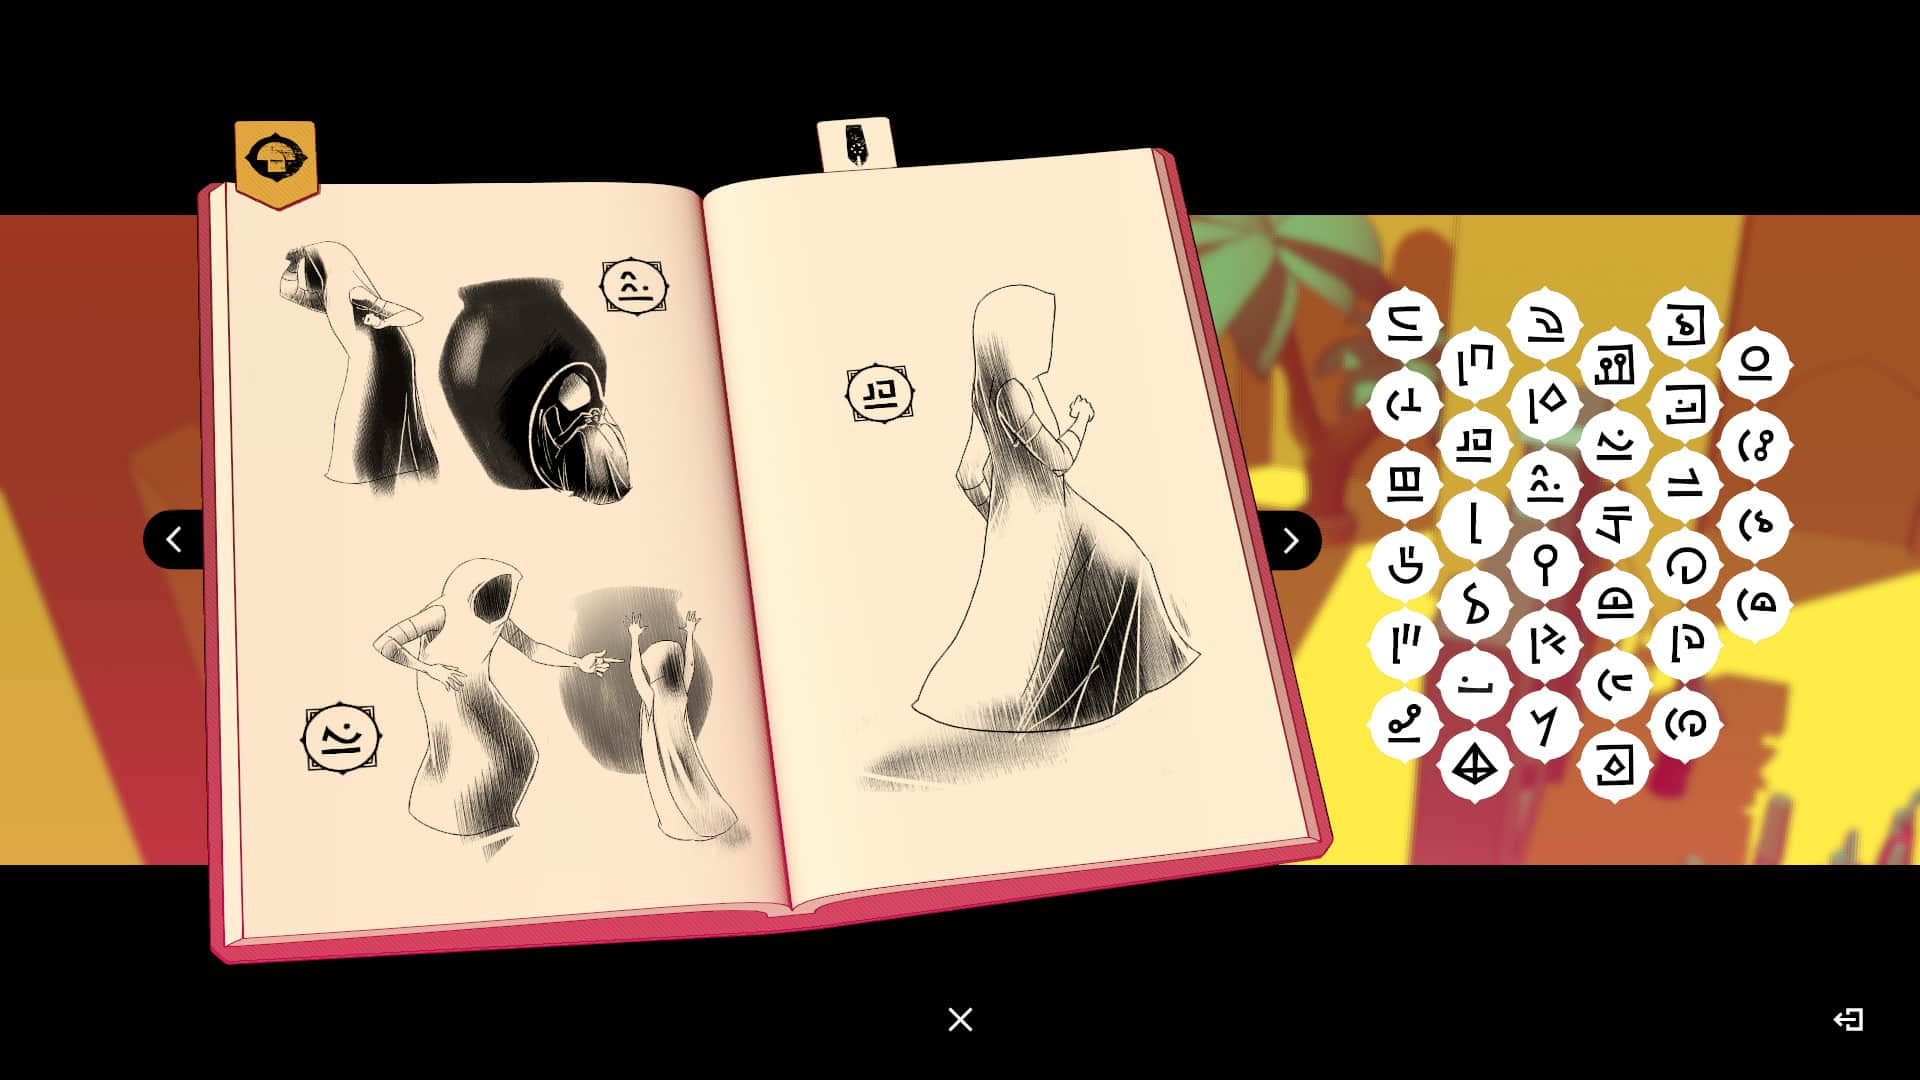
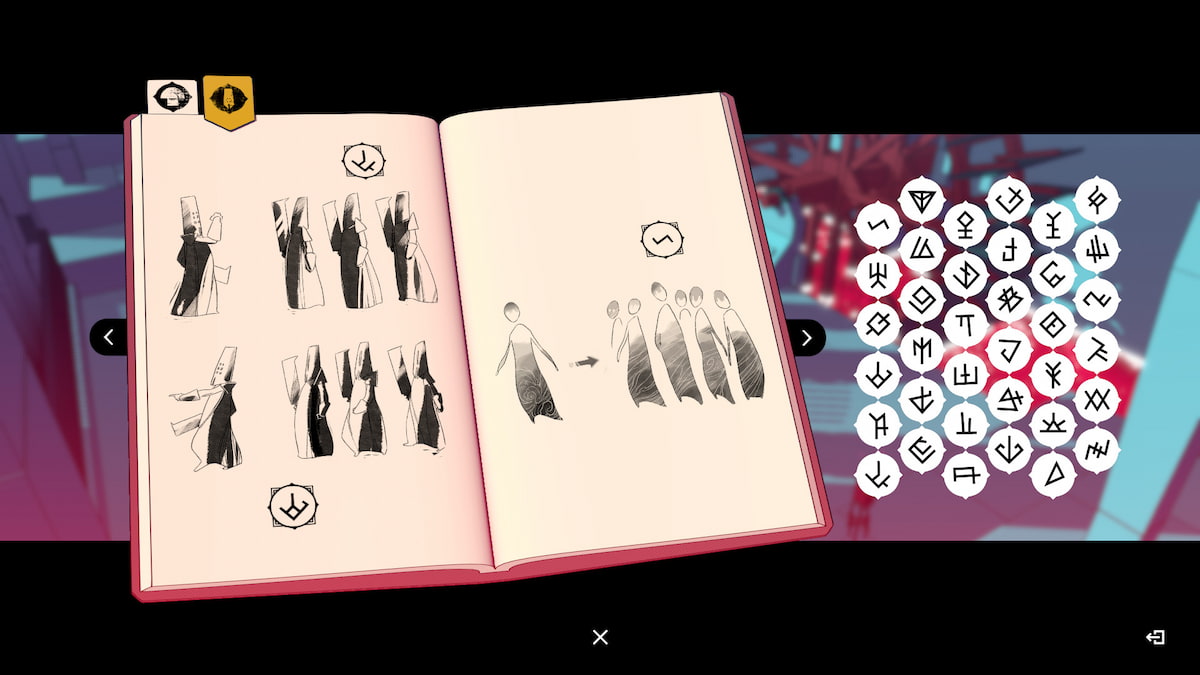
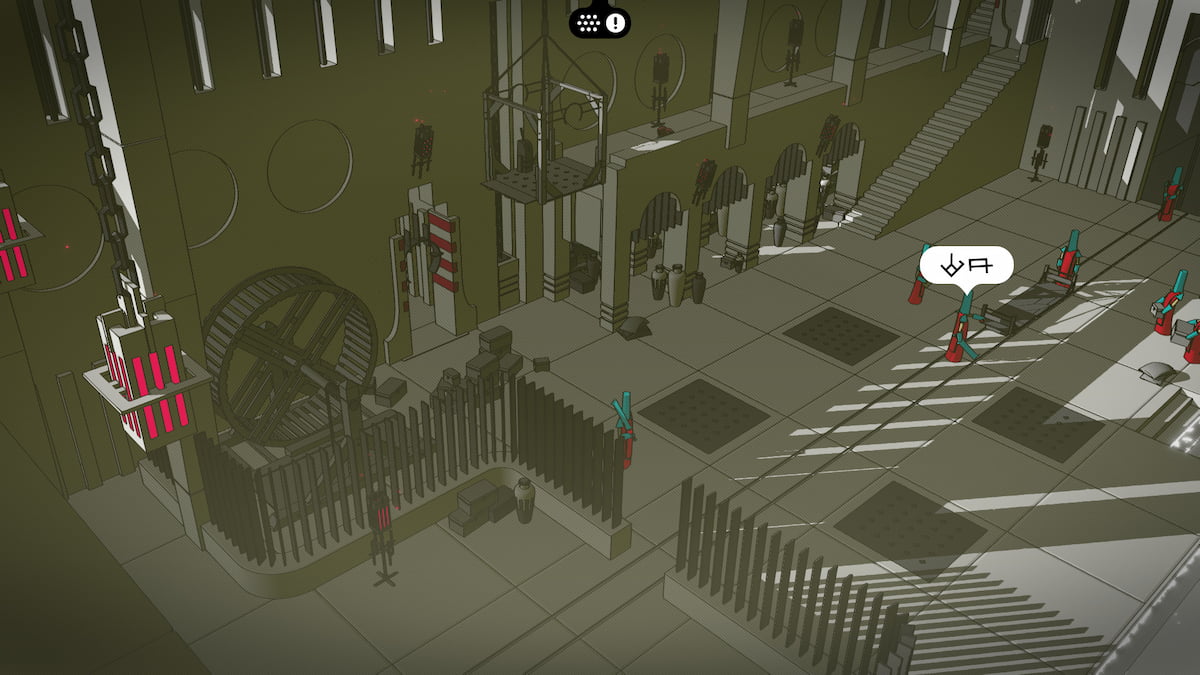
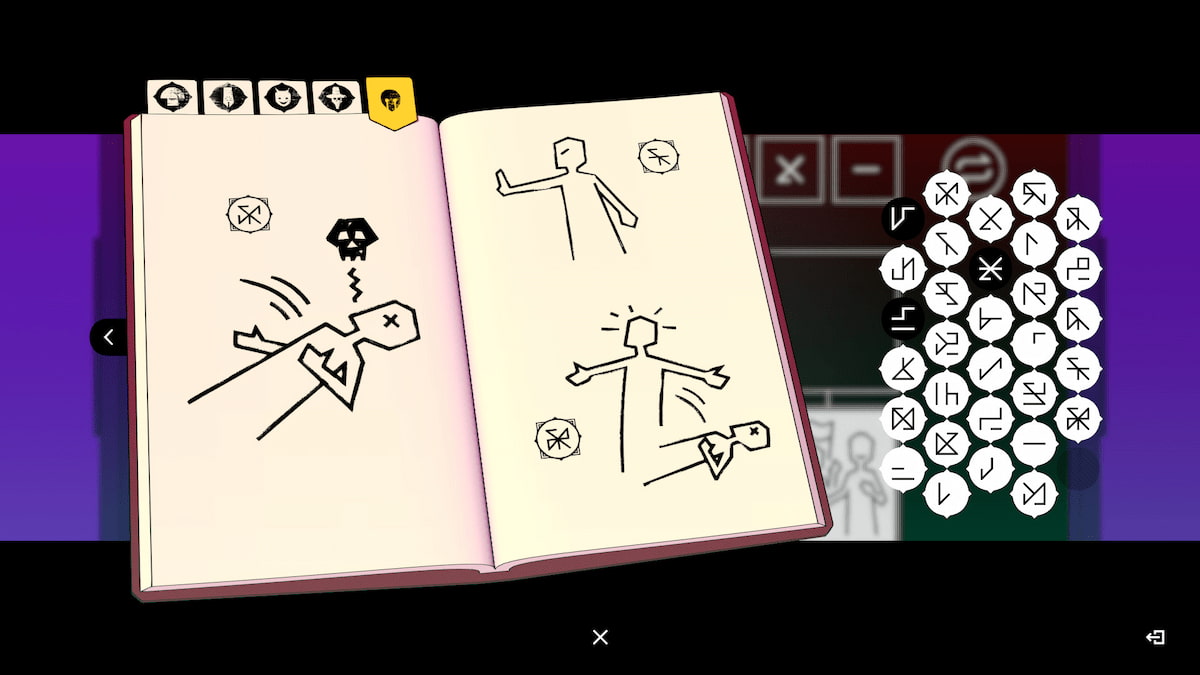
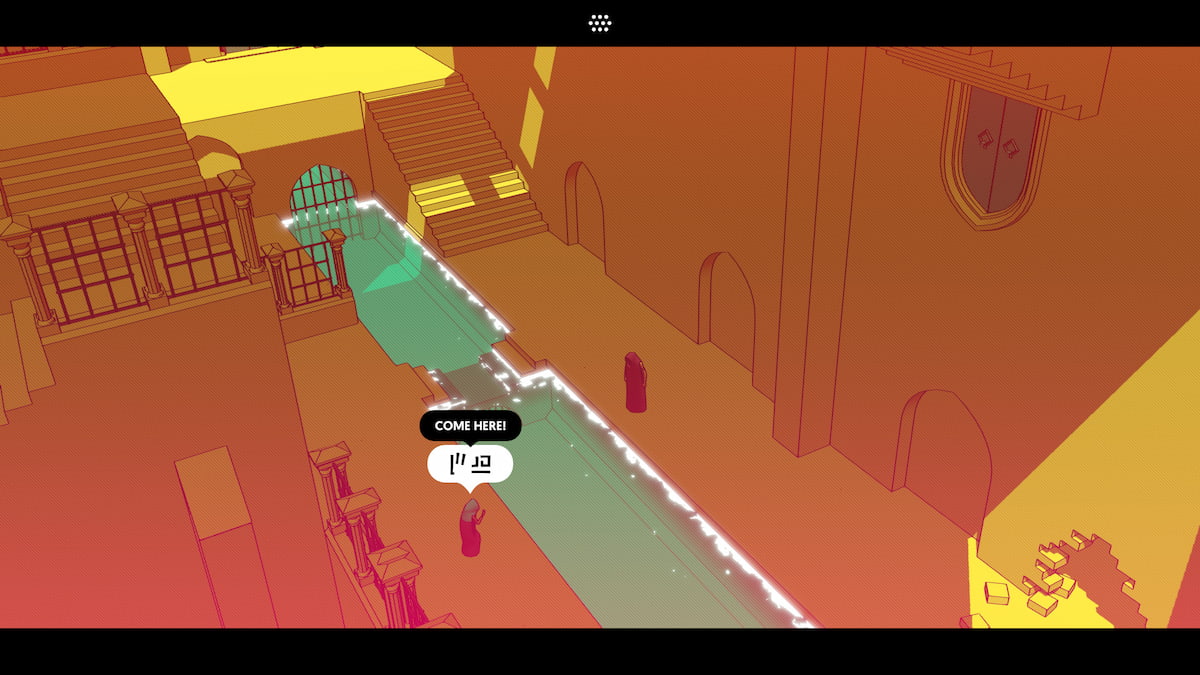
Head to the next section, and you will meet a person. It will be our first time interacting with another person, but thankfully, they will speak in symbols. Since we already know the words for open, close, and door, we can determine that the other person is first greeting you, then is asking you to open your door. You can rewatch the other person's actions and word by click on the twenty-sided shape where the person was standing.
Glyphs: Greetings, You, Me

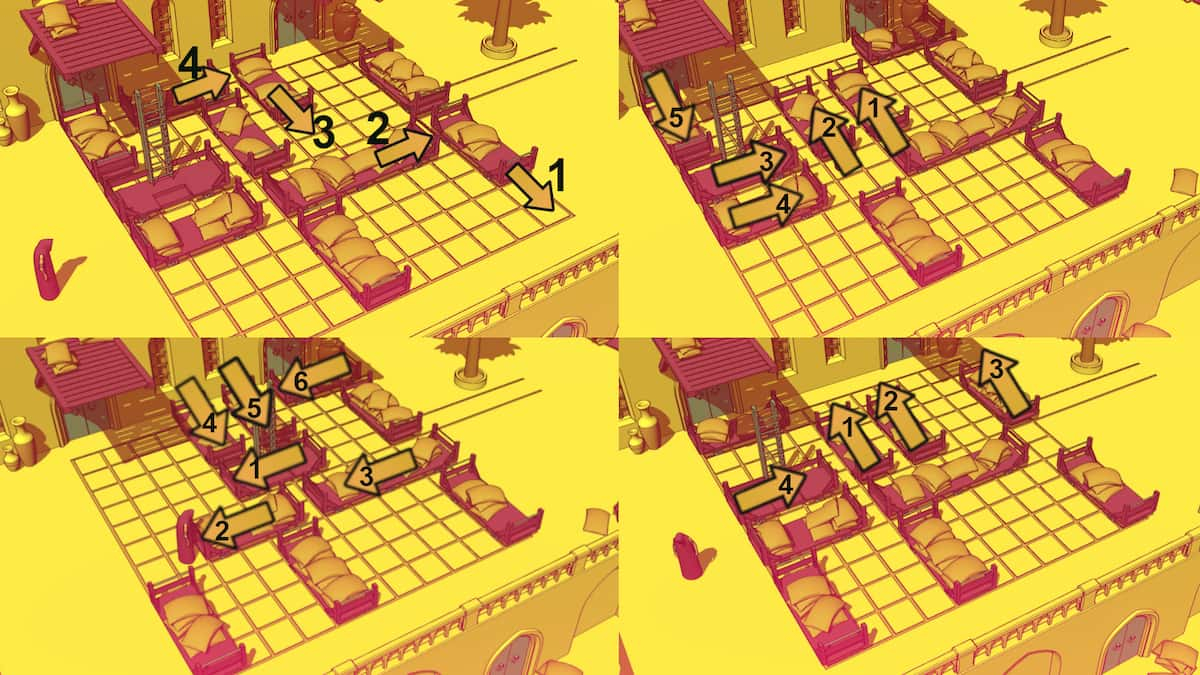
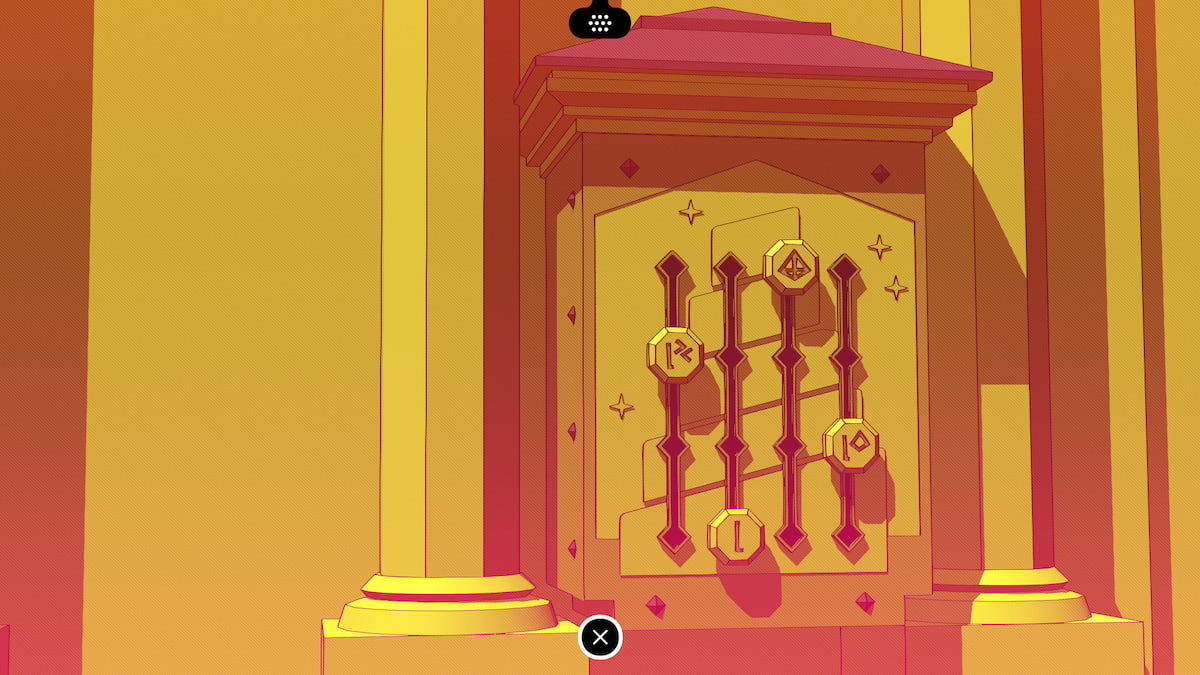
In order to get through this puzzle, you will need to first open the pathways for yourself, then your friend. When they prompt you to open the doors, they are asking you to pull the levers in front of you. They will then pull the levers needed to get you through the puzzle as well. First, you'll need to pull the lever in front of you so you can both walk to the next section, then they will pull the lever in front of them. After that, you will both head up some stairs to get to the next portion of this waterways puzzle.
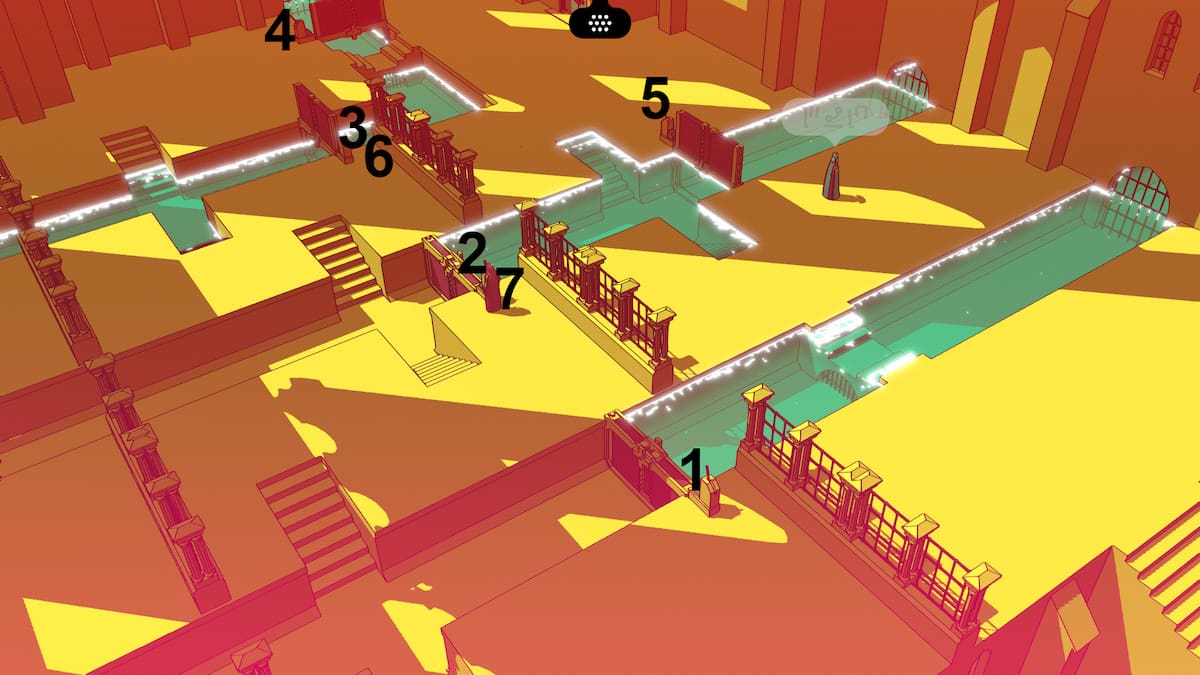
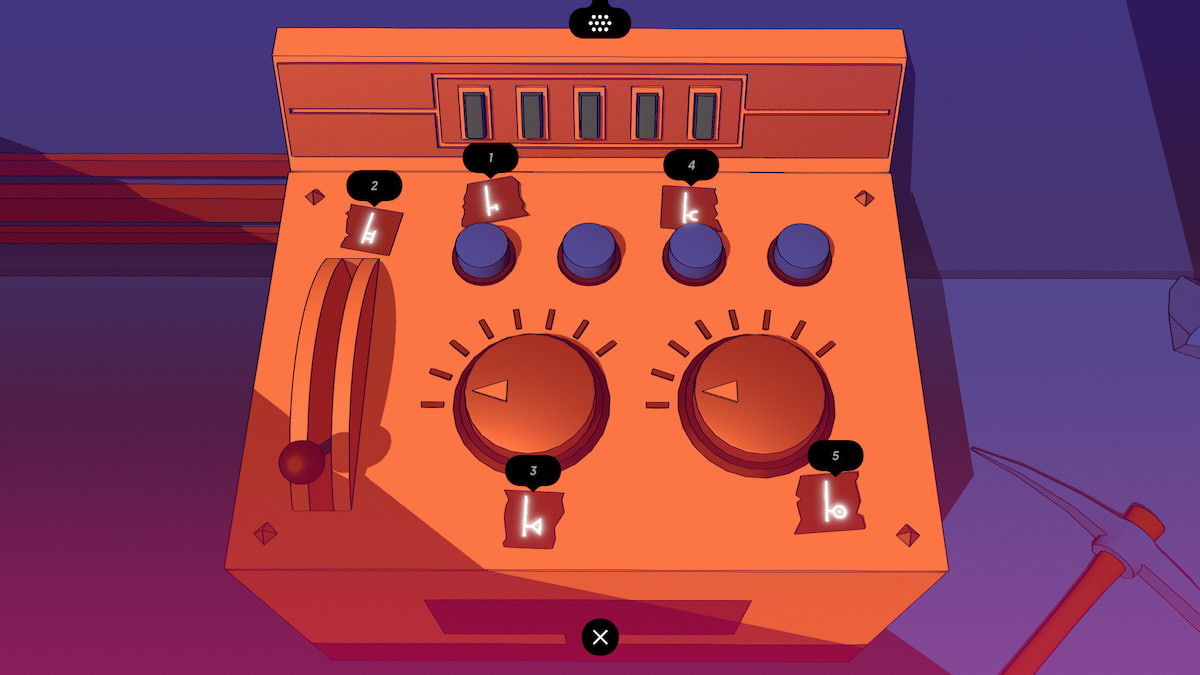
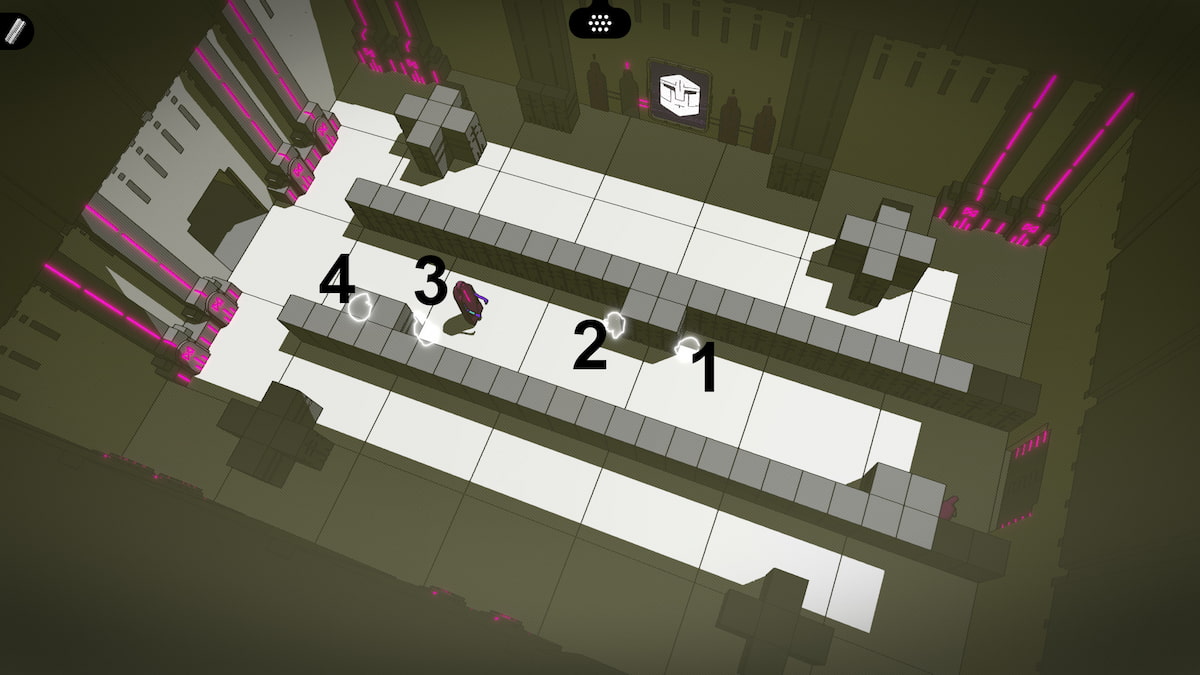
You'll need to pull the lever in front of you (the lever labelled 1 in the image above), then 2, 3, 4, and then return to the third lever and pull it again (6). Pull lever 5. Pull the second lever one more time (7) then you both will be able to get through the whole area. Your friend will then open the door at the top of the screen, allowing you to head to the next area. If you still need help, here is a quick video I made of the puzzle.
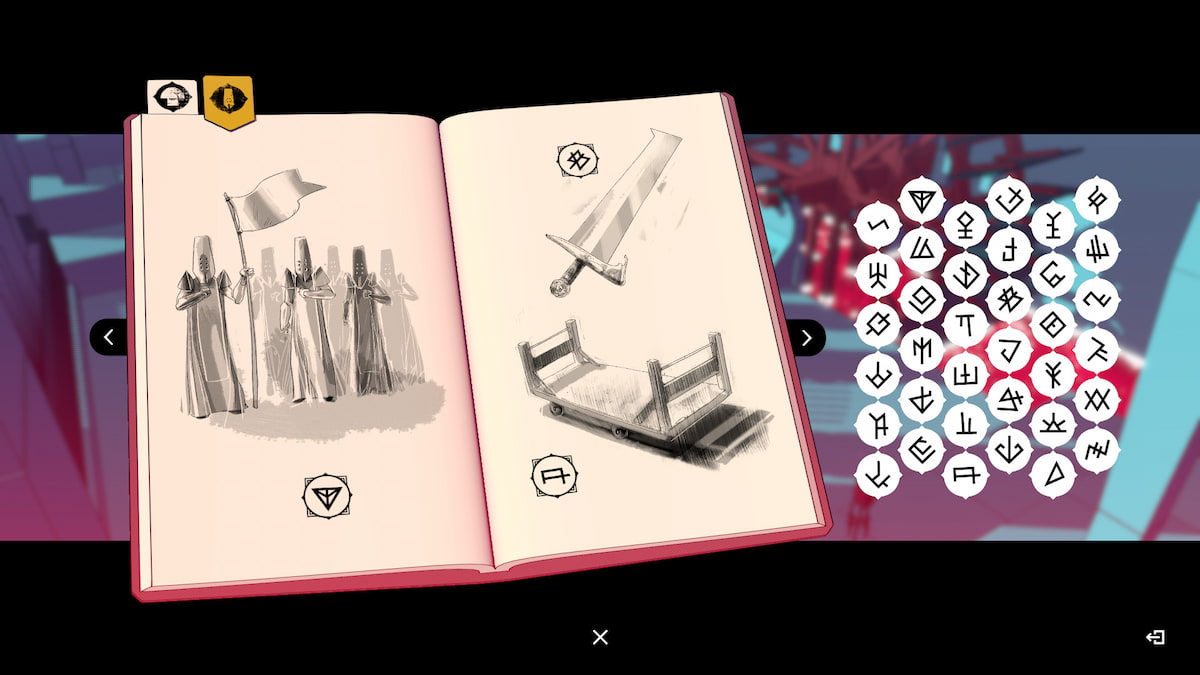
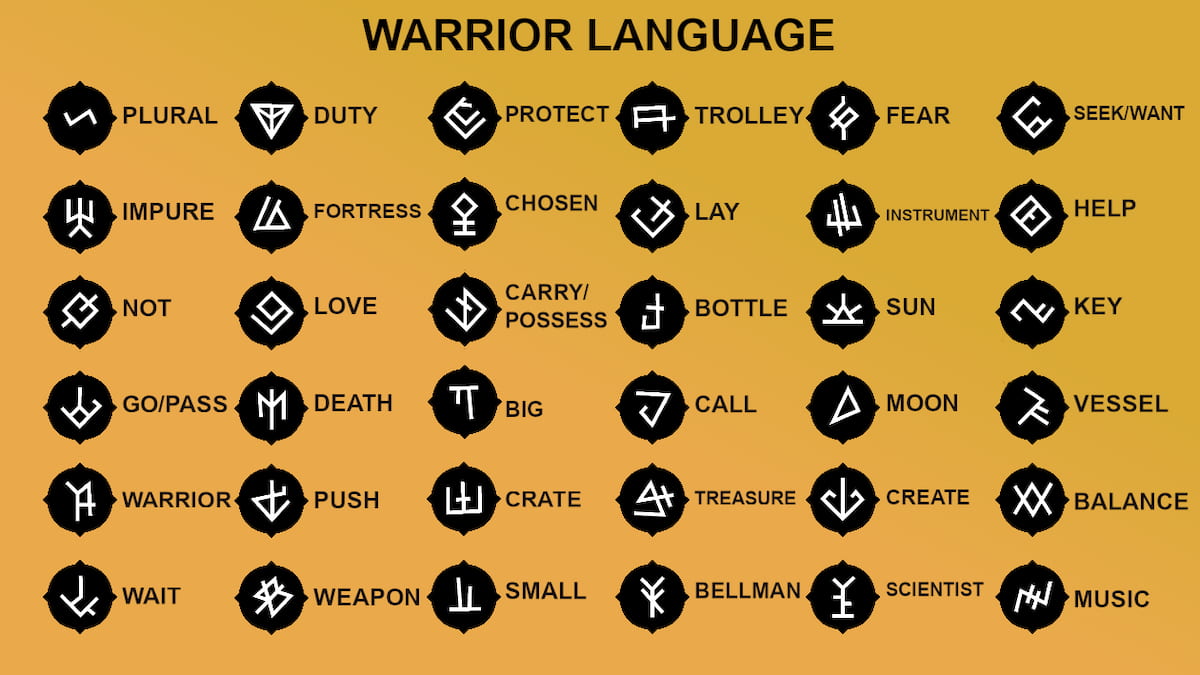
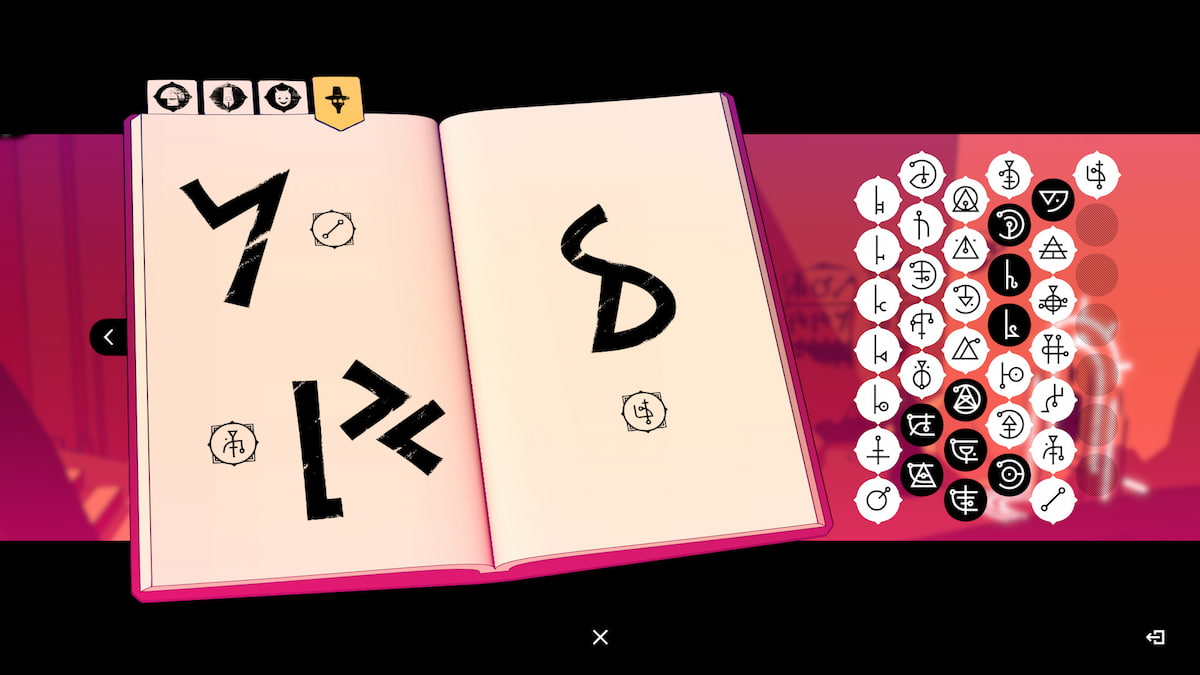
Glyphs: Man/Human, Devotee, Warrior, God

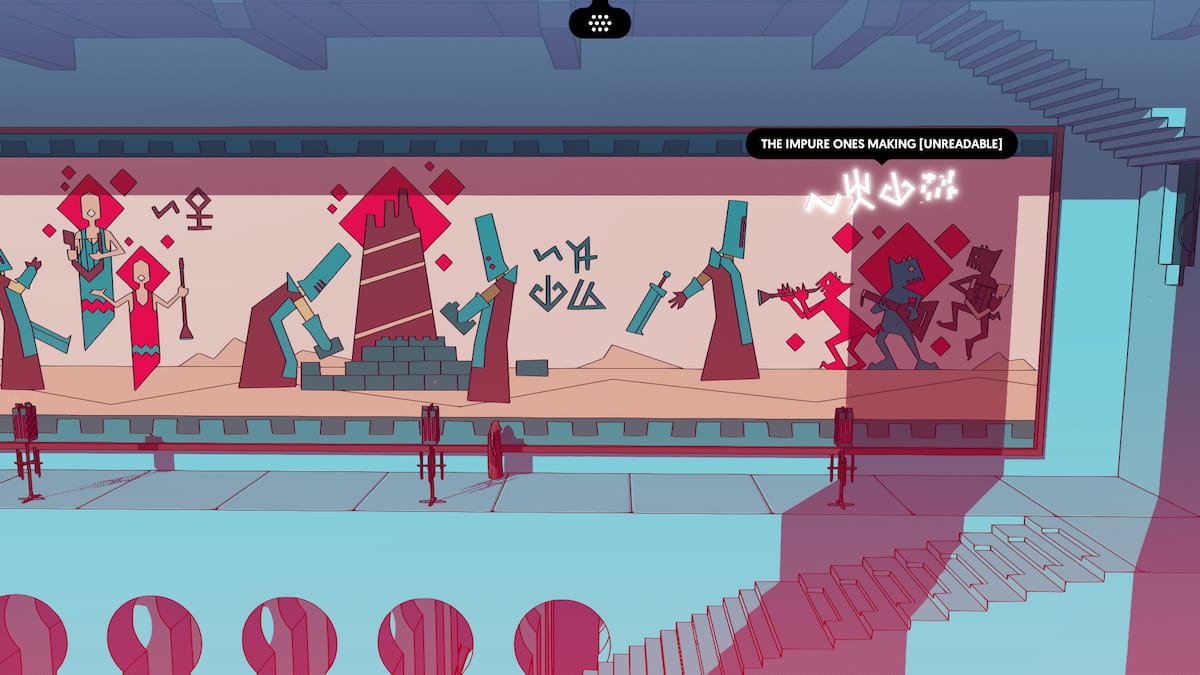
There are several new Glyphs you can learn if you interact with all the murals on the wall. These glyphs can also be found while playing the basic card game with the person in the main square. Once you have these, you will be able to unlock the church pretty easily as well. But first, you'll need to be able to get into the Abbey proper.
First Fast Travel Point: Front Gates
Outside of the Abbey, if you head down these stairs to the right on the same screen with the first Warriors you have met, you'll come across a Fast Travel point. Unlocking this doesn't do anything for you yet, but you will need it later. So make sure to interact with it before you move on.
Outside the Abbey
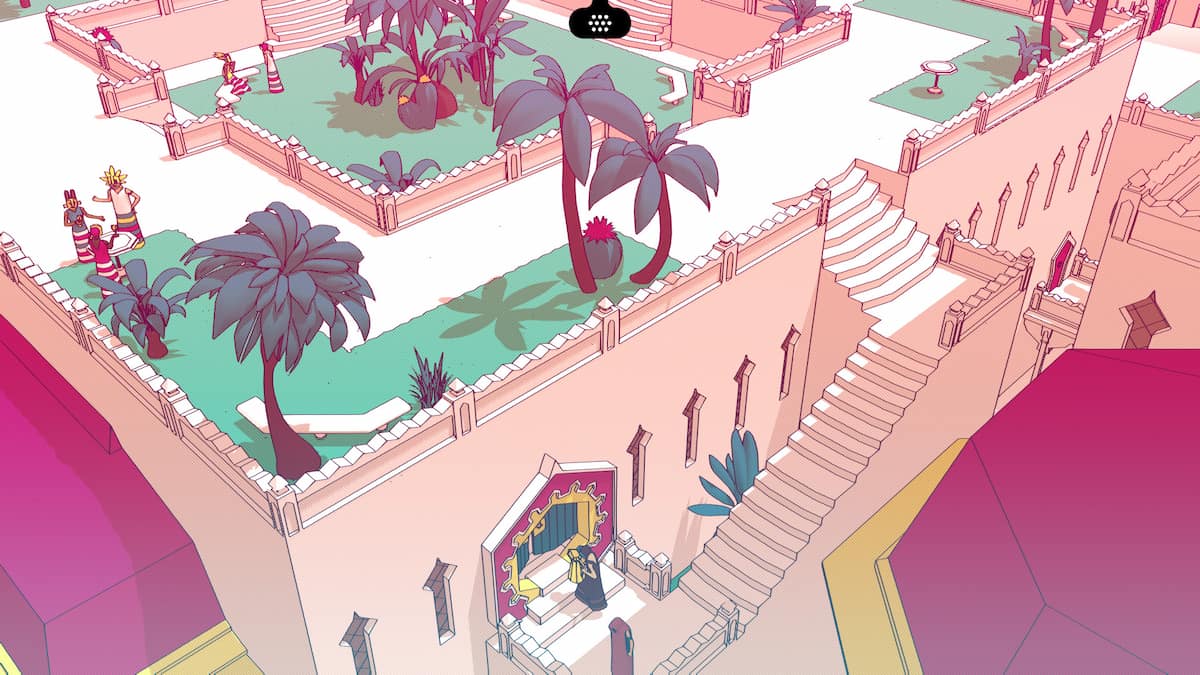
Once you get to the door of the Abbey, you will notice that the Devotee inside refuses to let you in. This means that you'll have to find an alternate entrance. Walk south from the Abbey's front door (after petting the kitten!), and a cutscene will play on the balcony here.
Achievement: Rascal
Ring the bell and annoy the guard three times at the front door of the Abbey.
This youth is asking you to play hide-and-seek with them; follow them out and find them in the main square where the Warriors are keeping the Devotees locked out of their religious building. The youth will then run away again, asking you to find them. They will be in the area between the murals, near the person that only says "Hello!" The last place they will hide will be down the stairs right outside the Abbey door. If you interact with the kid here, they will show you a way to seek into the Abbey.
Achievement: Welcome to the Tower
Reach the Abbey
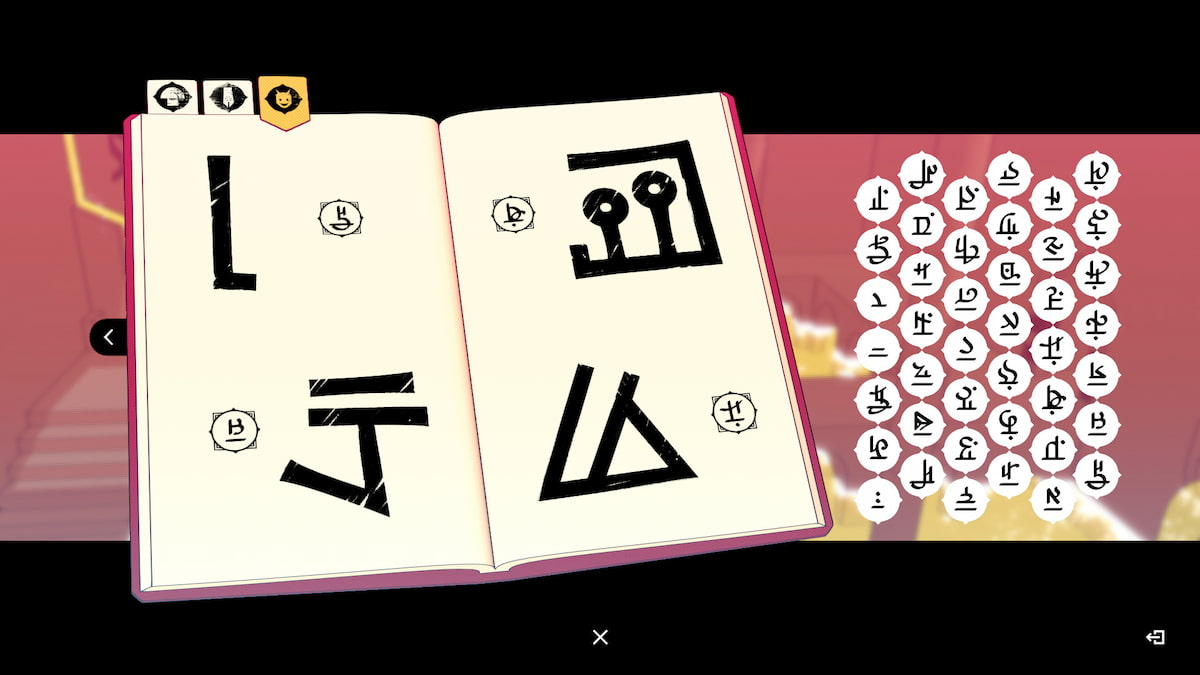
Glyphs: Seek, Find, Go
After you finish playing Hide and Seek with the child, you will get a page to fill out with the Devotee words for seek, find, and go. This is what the finished page will look like.
The beginning of the Abbey
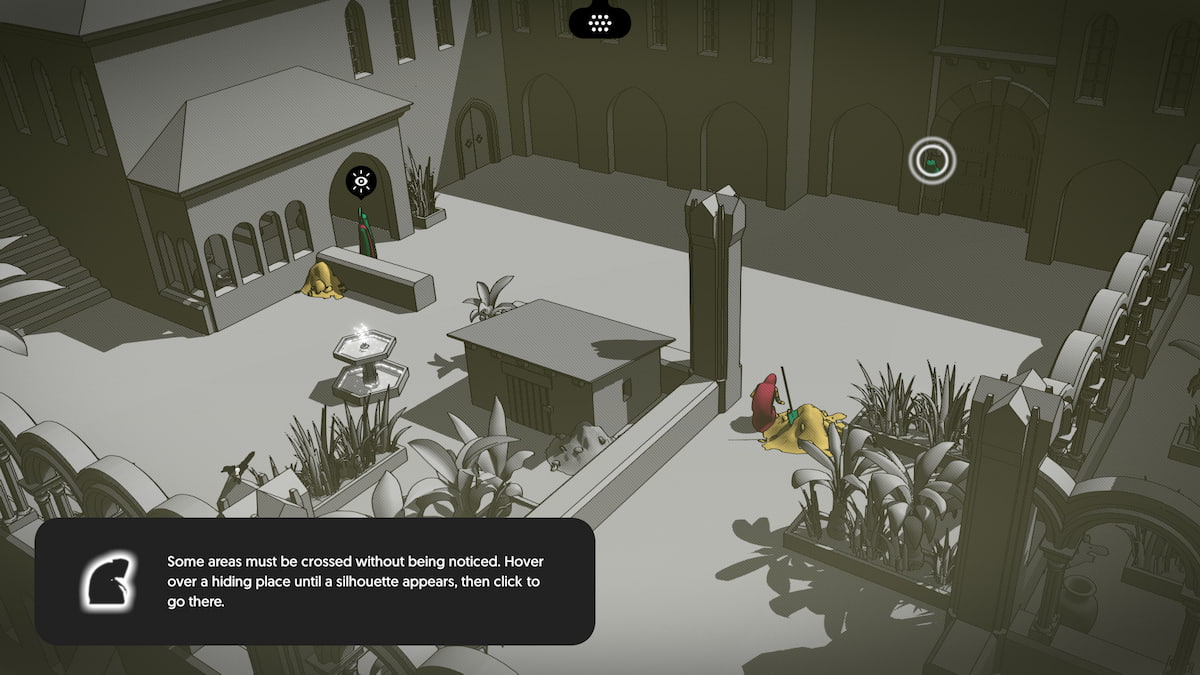
Once you duck inside the hole in the wall the child showed you to get inside the Abbey, you will need to sneak by the door guard. The child will show you how; you need to interact with the stones on the ground, then throw one at the bell. Once the Devotee on guard is distracted, you can sneak up the stairs on the left side of the screen.
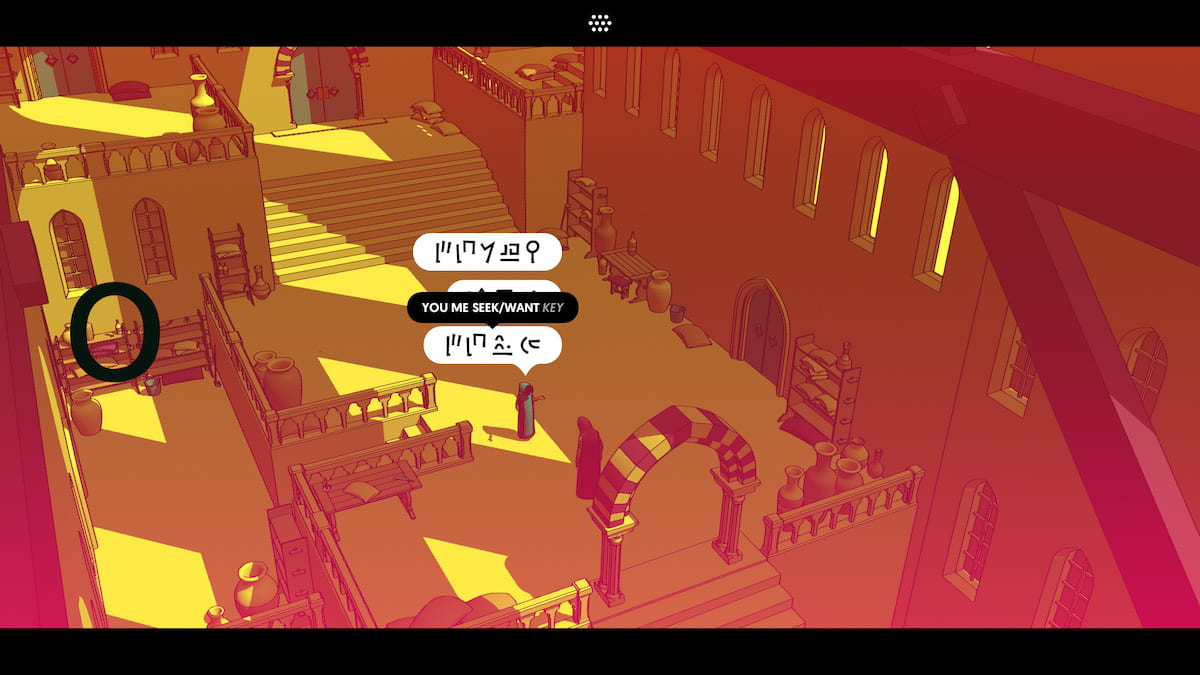
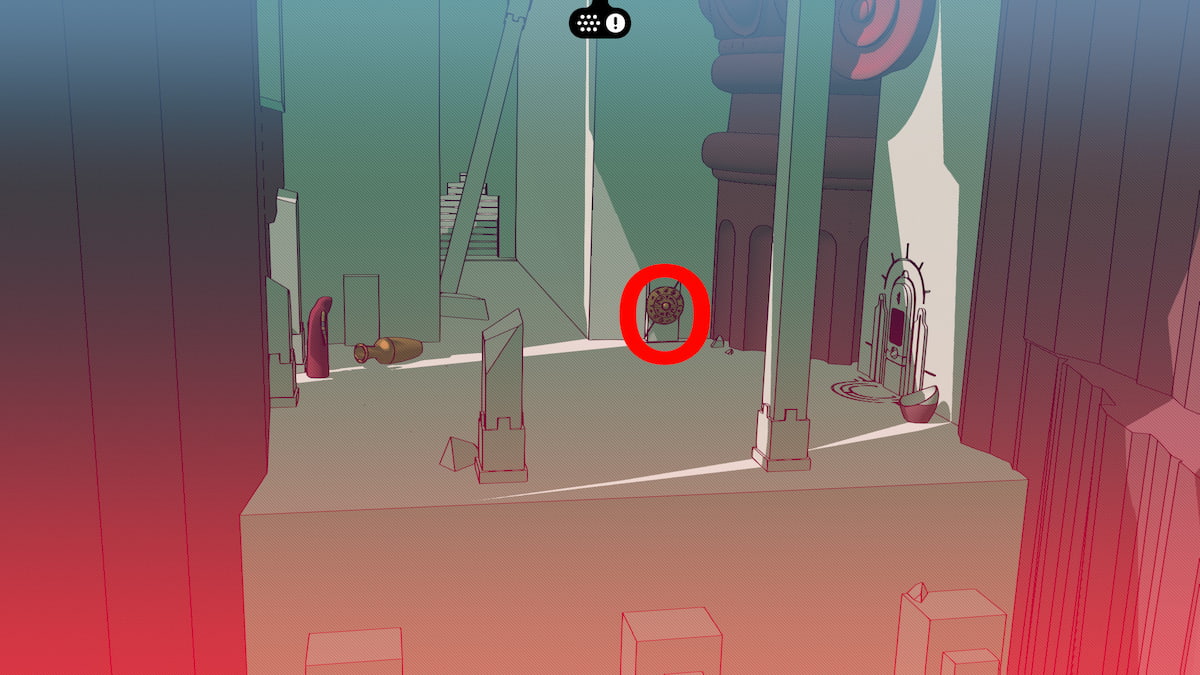
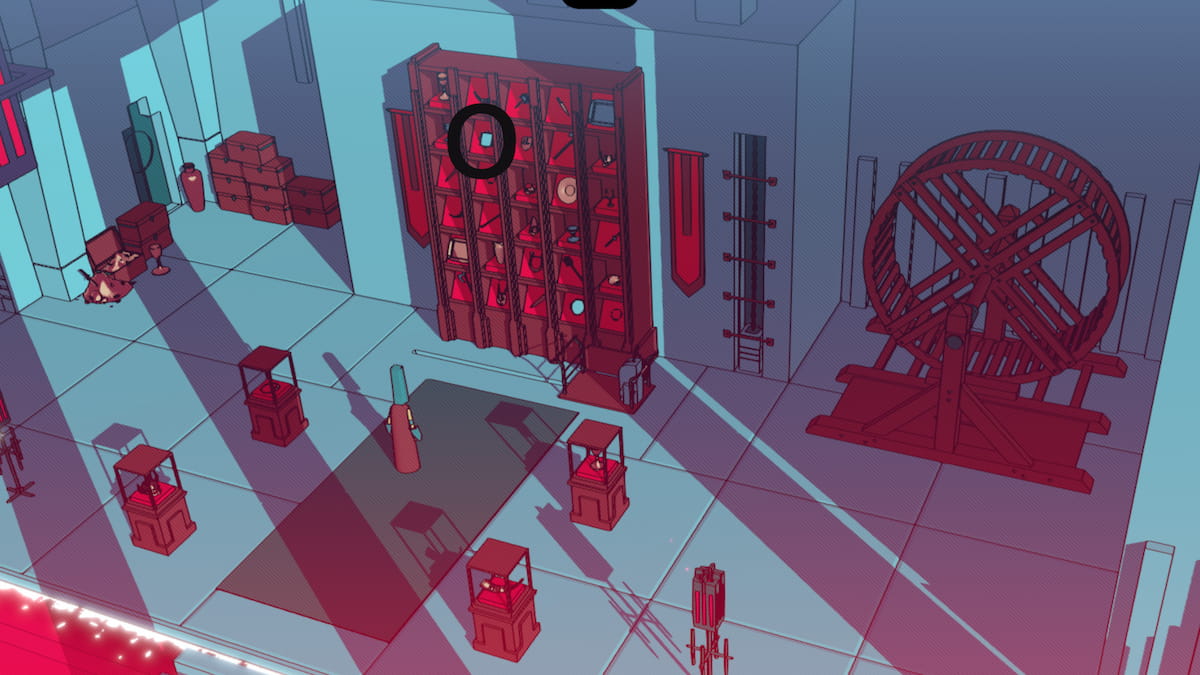
In the next screen, the youth will ask you to help find a key to get inside the door. The key will be hidden on the top of a shelf on the left side of the screen. Look for something that glitters if you are having trouble finding it. It is circled in black in the screenshot below.
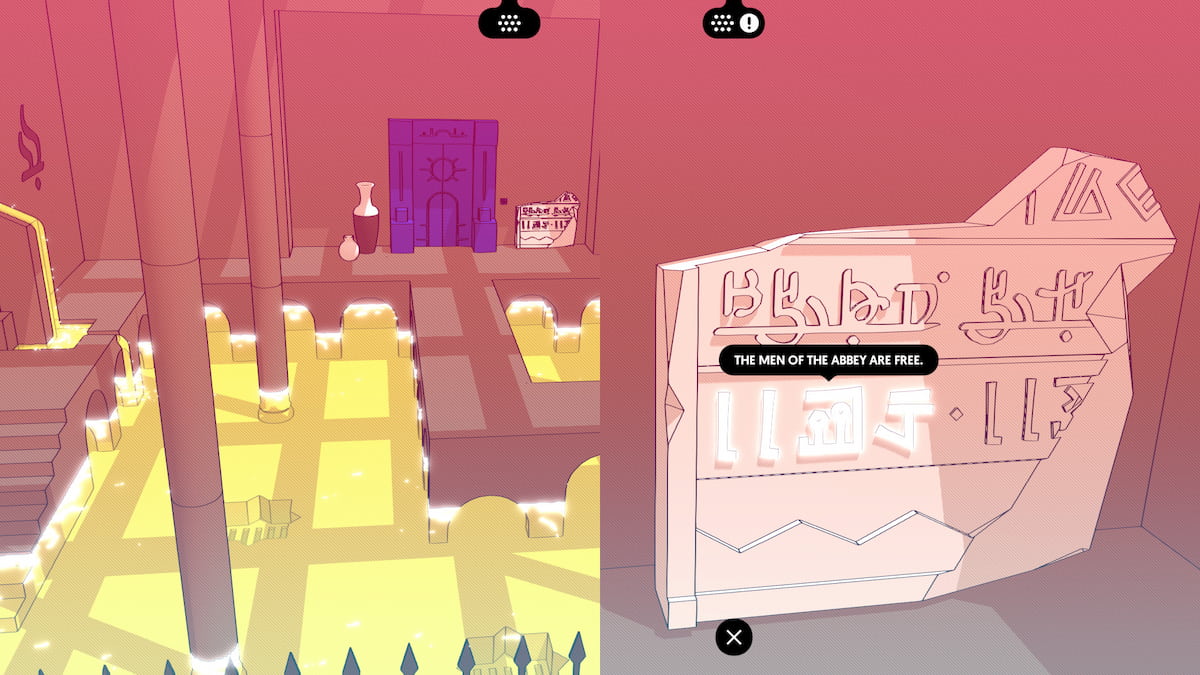
Glyphs: Up, Not, Free
After the child leaves you when you are both in the Abbey proper, you will get a page with three new symbols on it: the Devotee words for Up, Not, and Free. Fill them in like the page above to complete this page and unlock these words.
The Trolley problem
After getting the key, you can interact with the door, then use the key on it. This will allow you to head into the Abbey proper, where there are plenty more puzzles to be found. Head across the courtyard, going into the door at the right of the screen. Next, keep heading right until you come across this Trolley Puzzle. The point of this puzzle is be able to push the ladder over to the right until you climb onto it to get the item out of the bird's nest inside the tree.
Move the trolley pieces in order of the pictures above. I have also included a video below to make moving these a little more intuitive. Once you have moved the ladder over to the tree, you will be able to pick up the coin that is inside of the bird's nest in the tree. Here is a video of the solution of this puzzle.
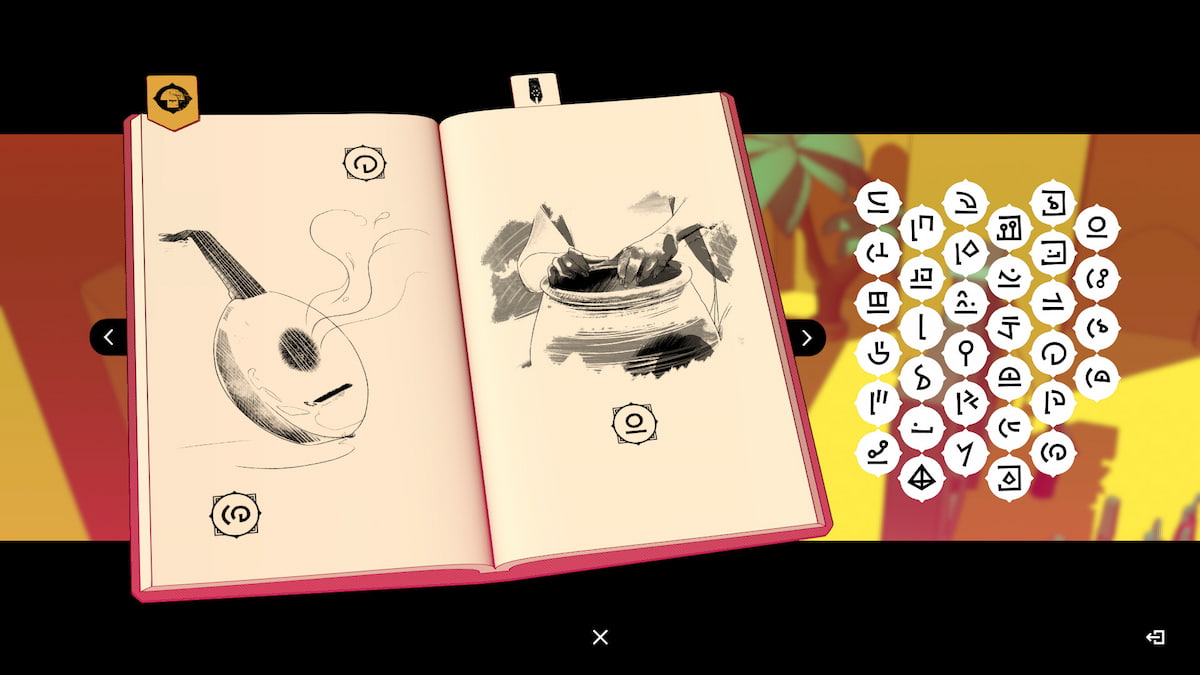
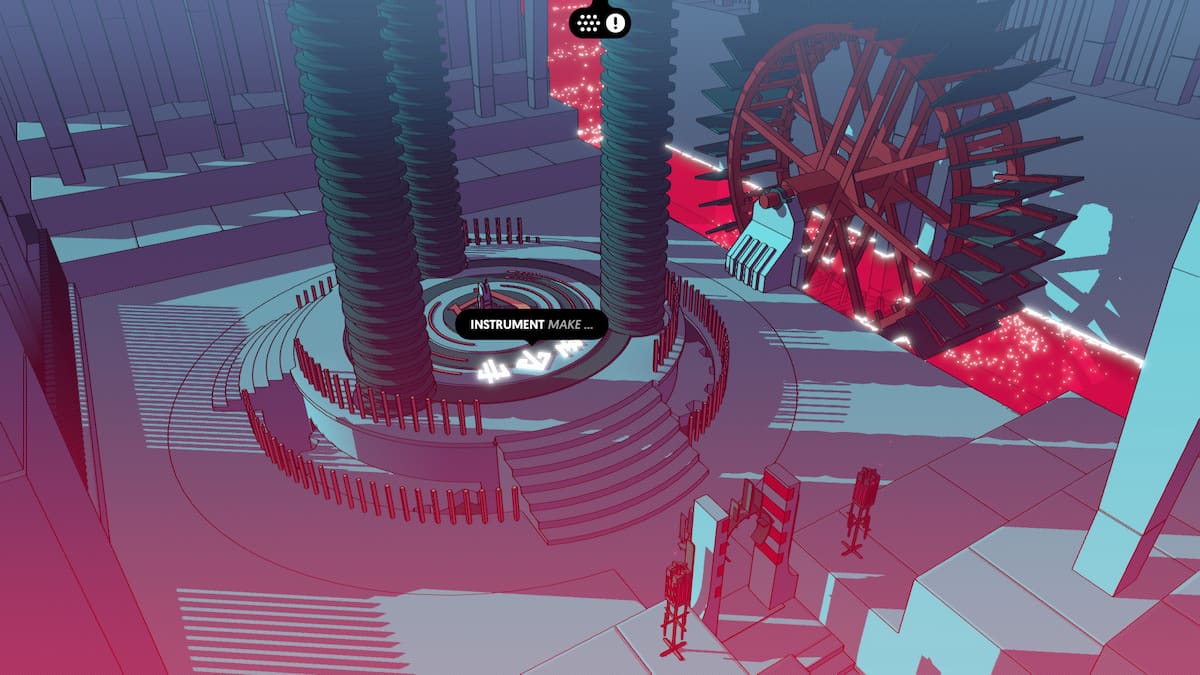
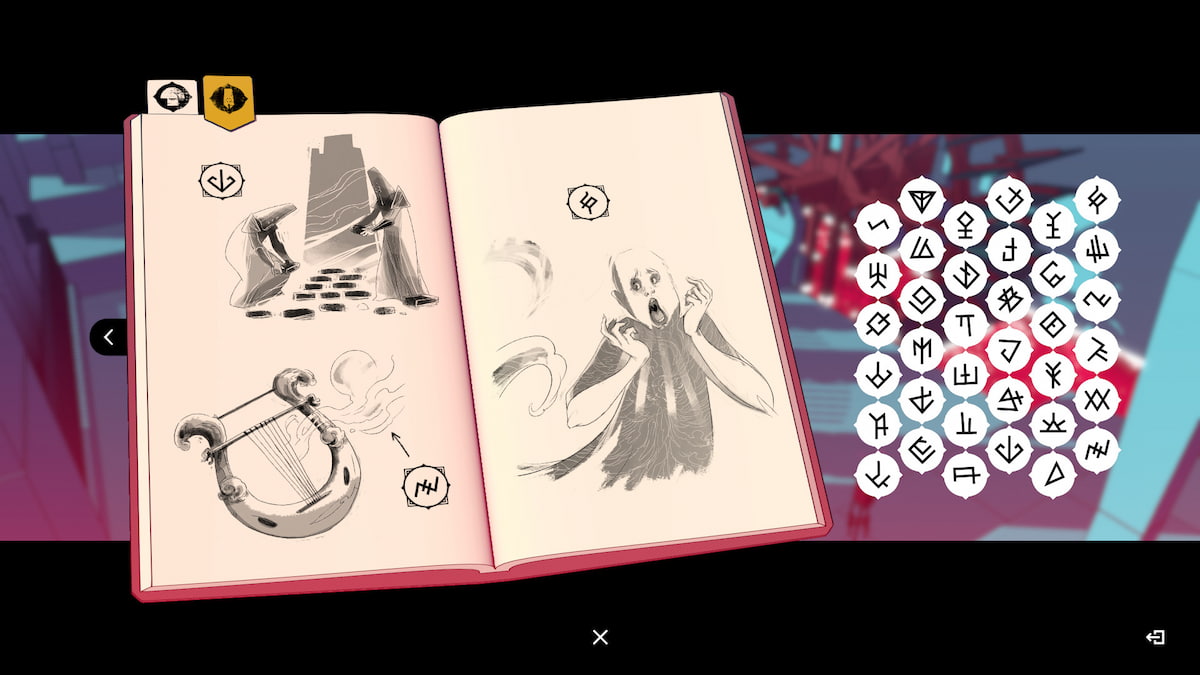
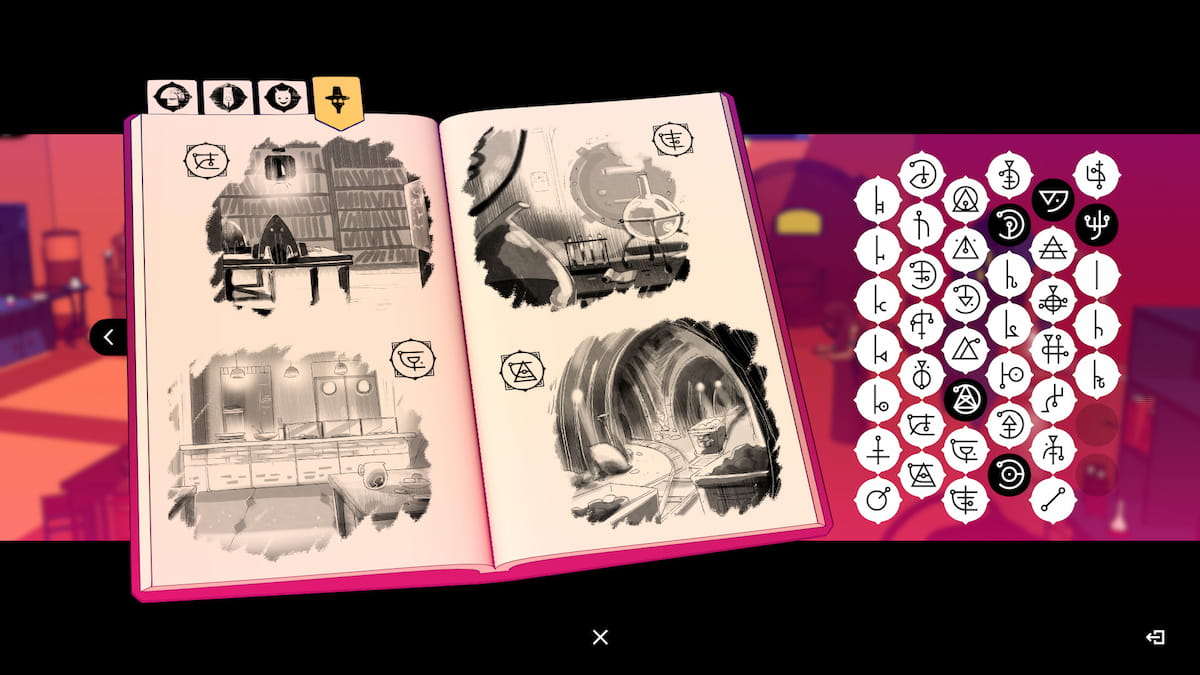
Glyphs: Music, Instrument, Make
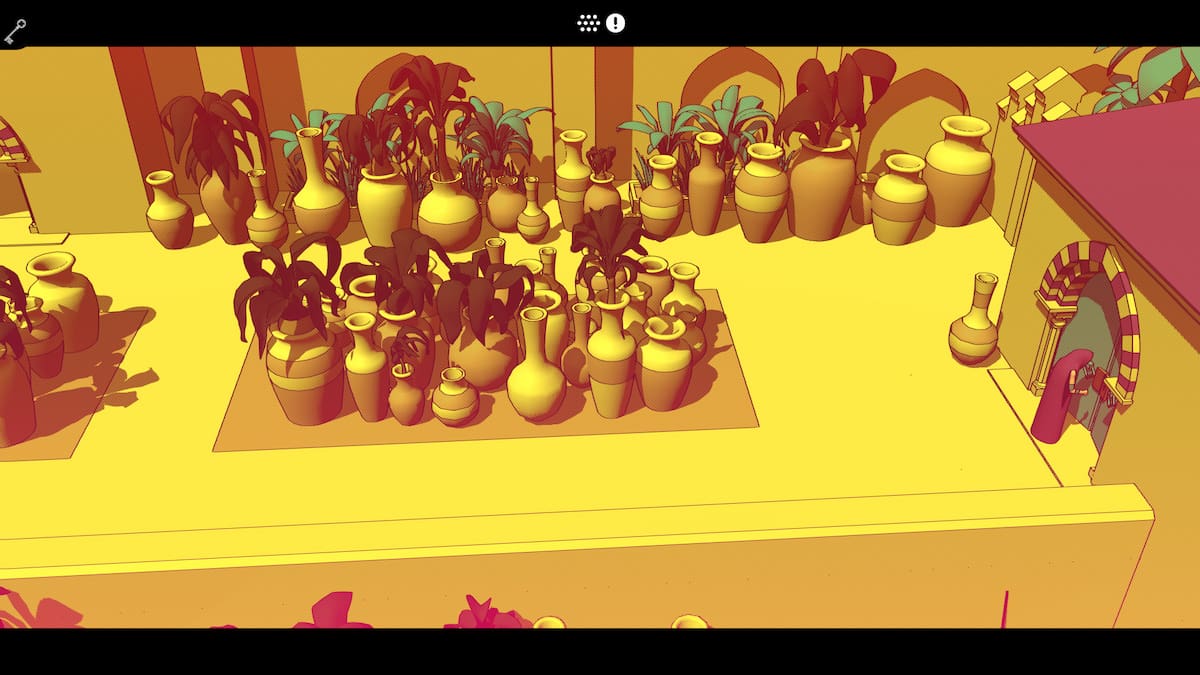
Next up, head south from the Trolley screen and chat with the people on this screen to get more glyphs to fill in. This page will appear if you have talked with the musical instrument maker, the pottery maker, and the signs on their doors. You can also interact with the keys sign as well as the potions sign to fill in later.
Getting into the Church puzzle
After you have interacted with everything you can find around the Abbey, head to the front of the church. Here, you will meet a Beggar who is looking for help. Give the Beggar the coin from the Trolley Puzzle.
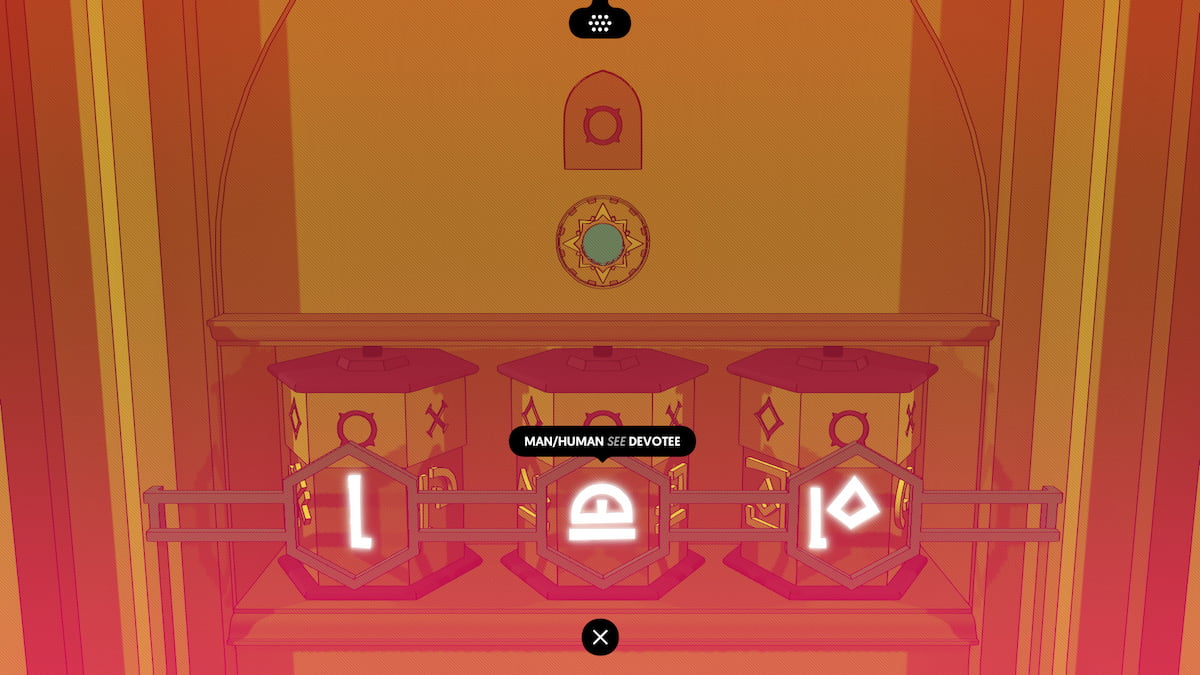
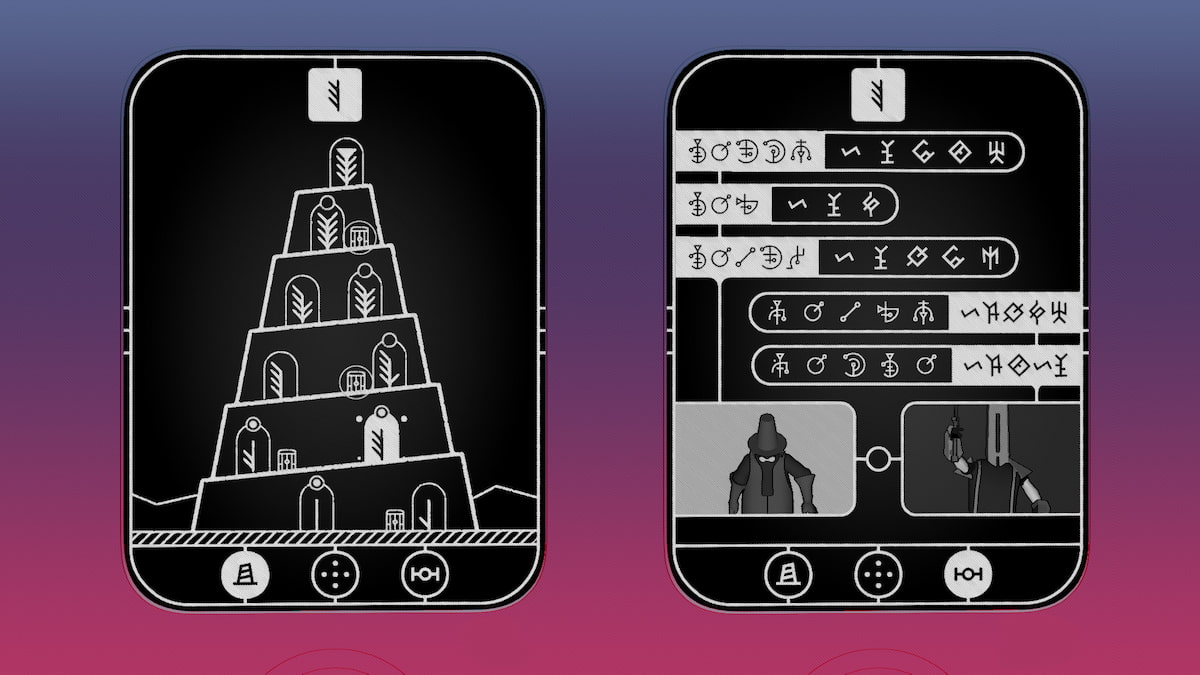
There is a puzzle on the church door to get inside, and it shows four glyphs you should have filled out by now. Man is the lowest glyph, underneath Devotee, which is second lowest. The second highest will be Warrior, and the highest on the list is God. This hierarchy is displayed during the card game in the square if you have tried it out. It will look like this when you complete it:
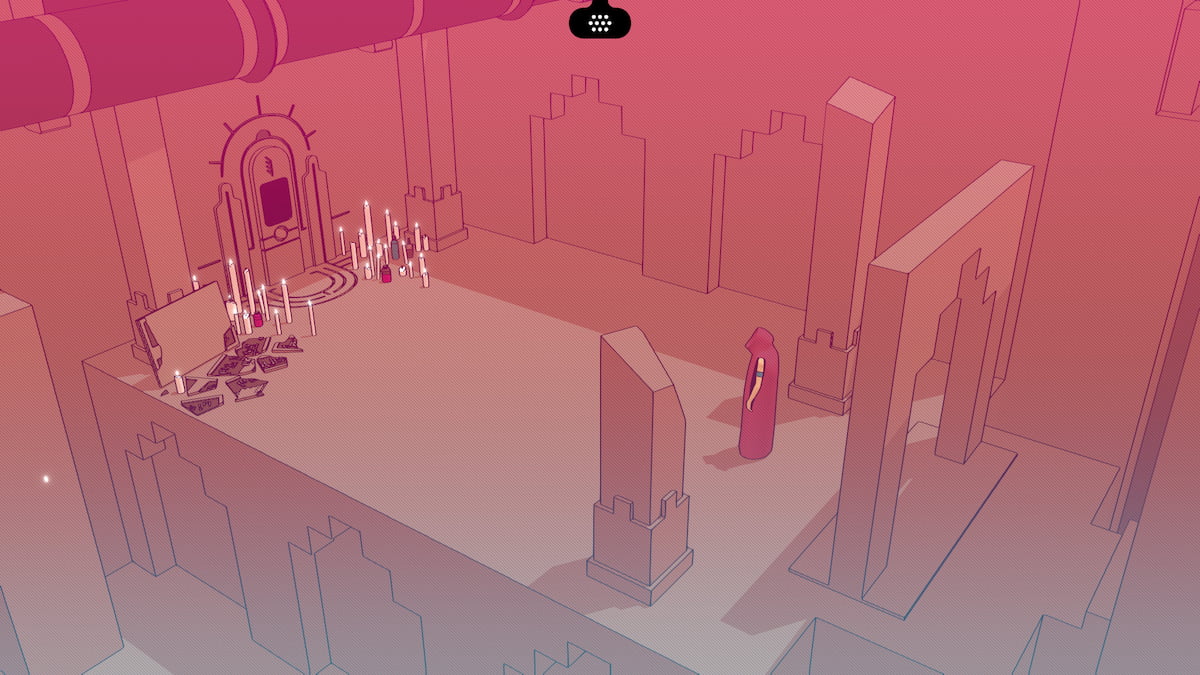
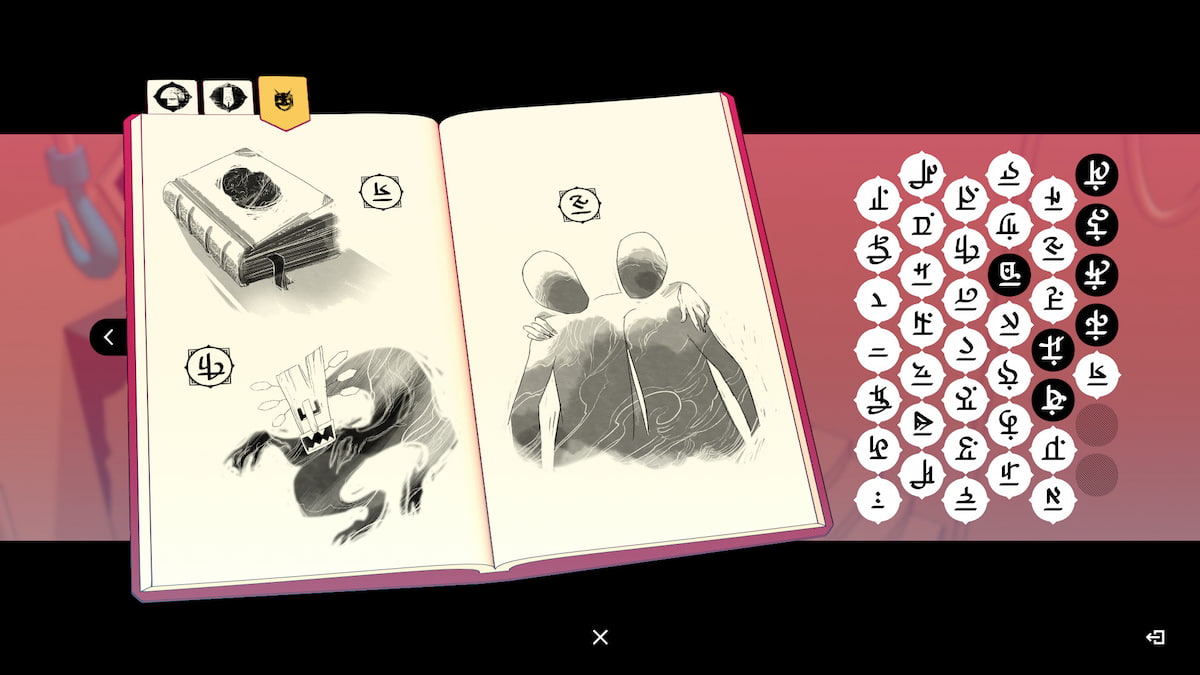
This will automatically open the church's door. Head inside and speak with everyone, then look at the mural of the Preacher behind the altar to learn the glyph for Preacher. This will unlock the page for Preacher, Death, and Plant in your glyph book.
Glyph: Preacher, Death, Plant
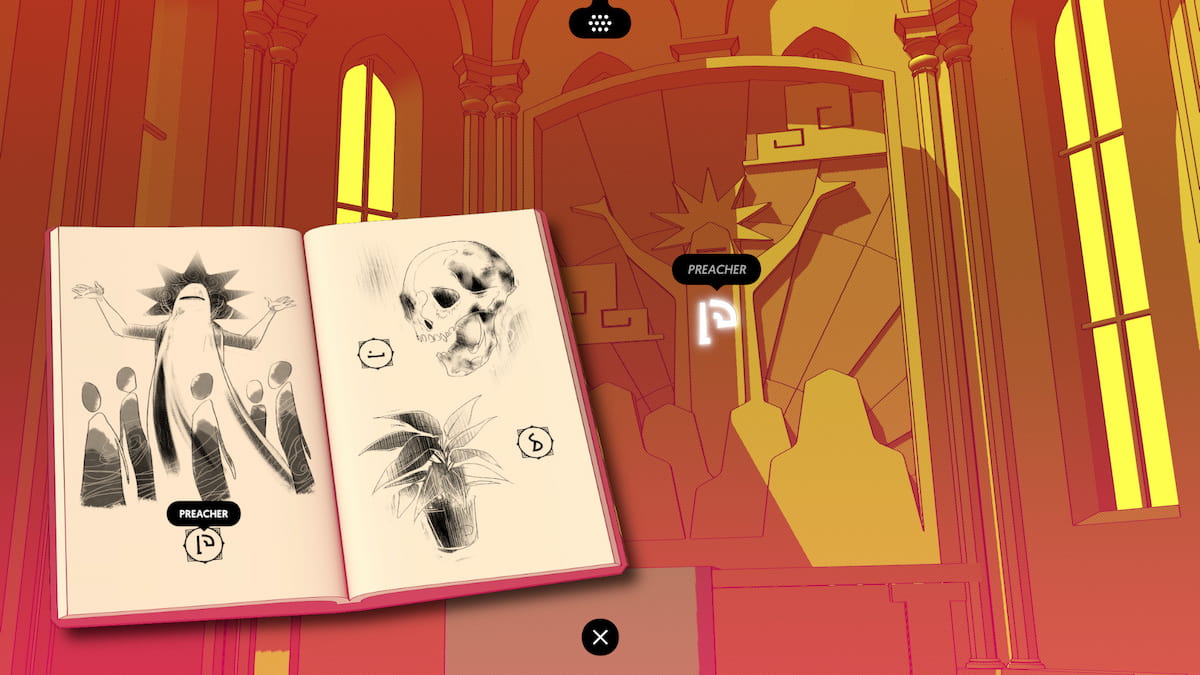
If you have interacted with the Preacher statue behind the altar in the church, and the person standing in the garden, you should get the glyph page for Preacher, Death, and Plant. It needs to be filled out like the screenshot above.
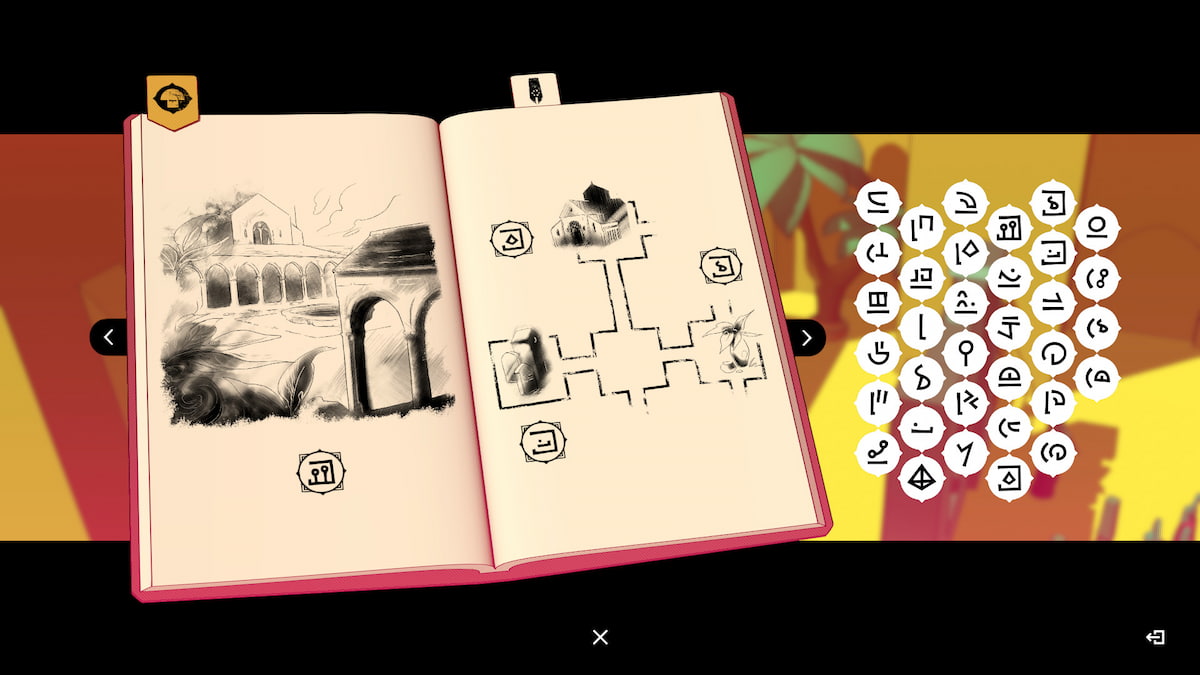
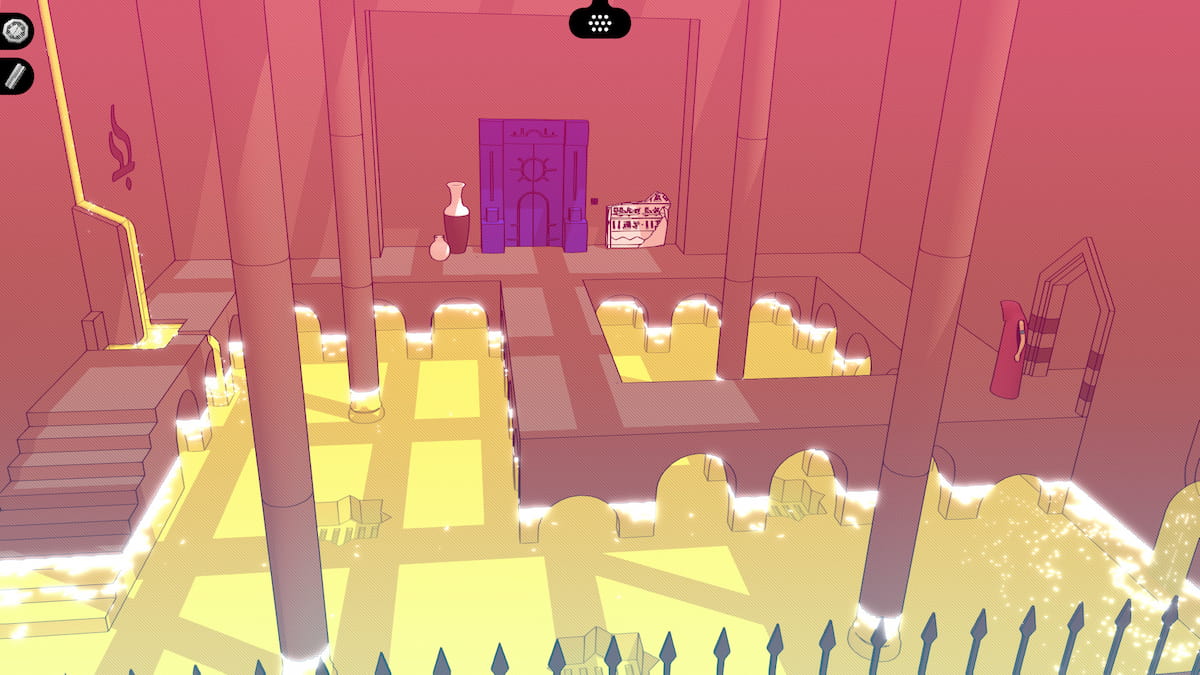
The locked door in the Gardens
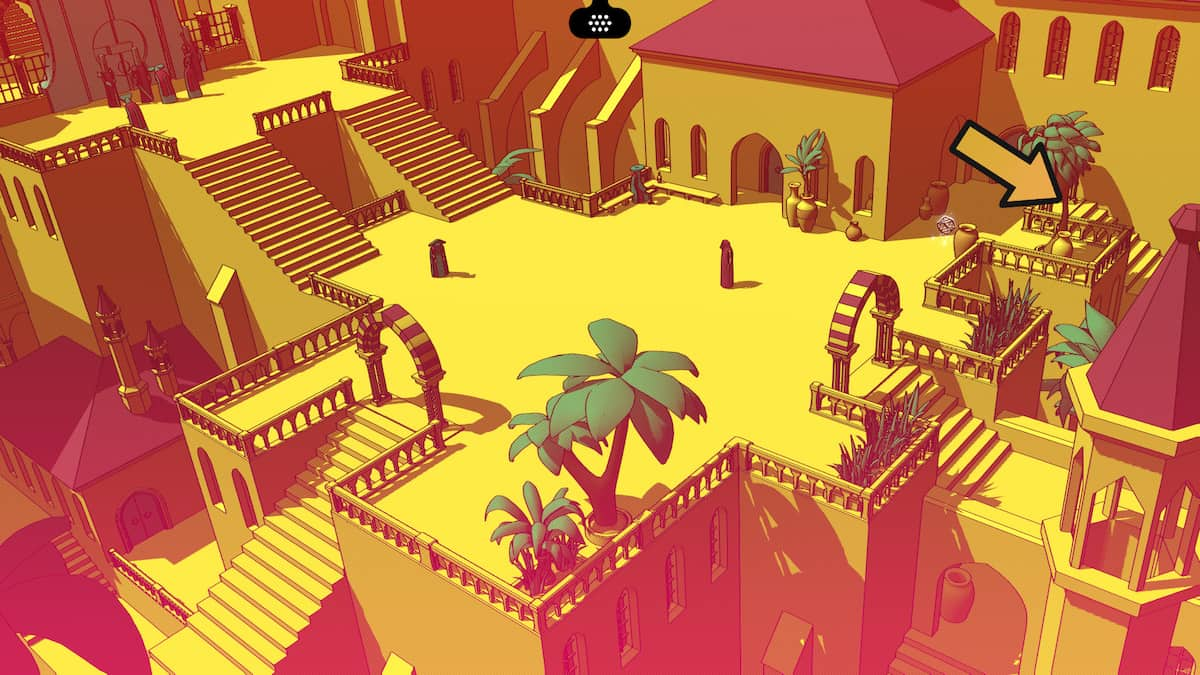
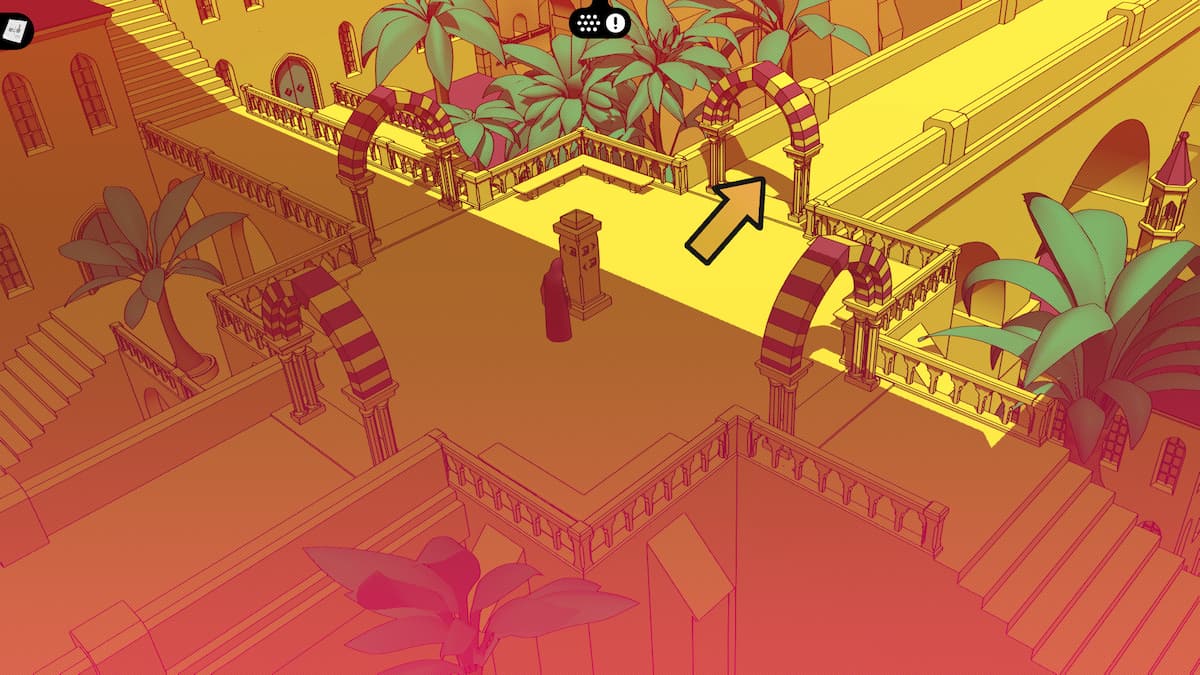
Now that you have spoken to everyone inside, leave, and the Beggar will offer to help you. They will offer you a piece of paper, and they will tell you where to find the Preacher. Take the piece of paper, and head to the Gardens. To get there, head south from the Beggar, then go northeast in the hub.
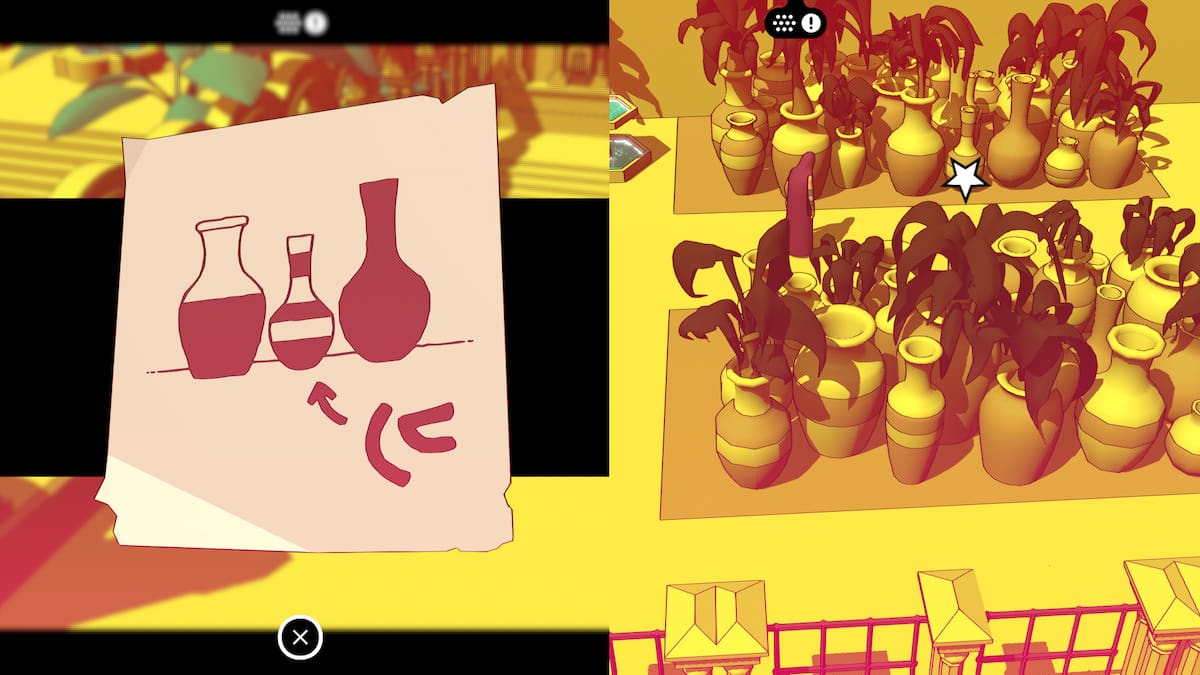
This will drop you in the bottom floor of the Gardens, and you will be able to find the three pots you are looking for here. Head to the right until you pass the stairs and the fountain, and look for these three pots in the upper part. It is starred below. Underneath, you will be able to find a Key.
With the key found under this pot, you can finally unlock the Preacher's Garden Room. Go up the stairs, then head right until you find this locked door. Interact with it and use the key to open it up; go inside. Interact with the desk to read the Preacher's Note, then pick up the Lens.
Glyphs: Lens, Key, Pot, Potion
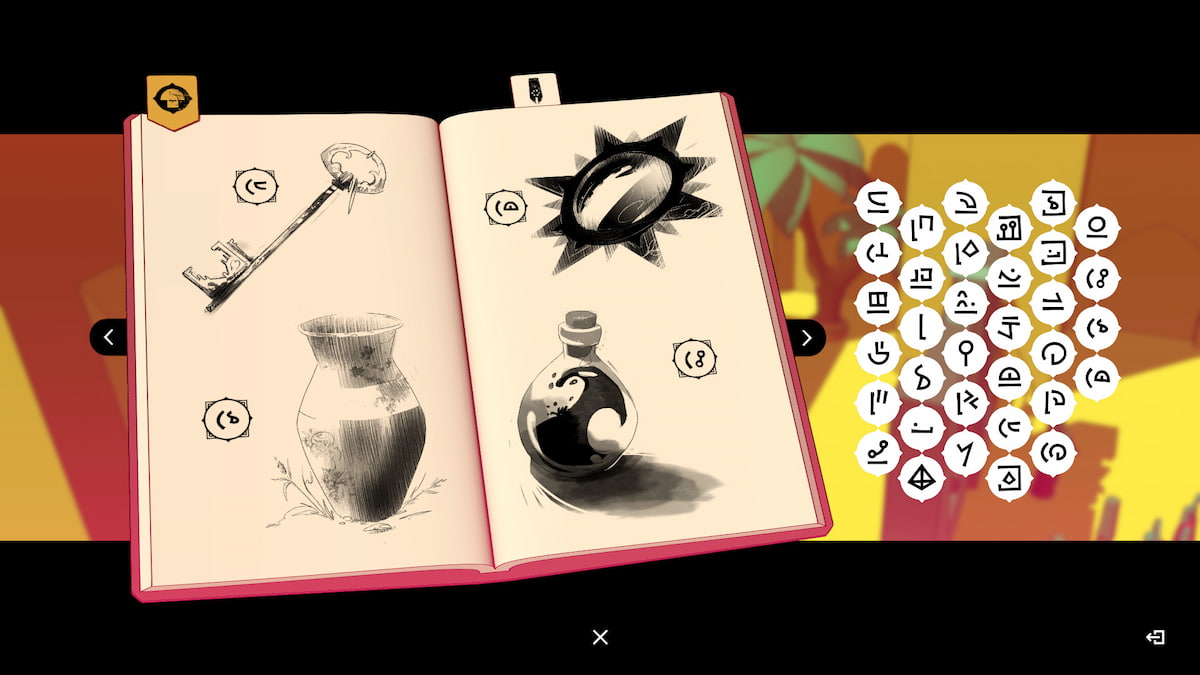
If you have interacted with the pottery maker, the potions signs, and the lens in the Preacher's locked garden room, you will get this page with Pot, Potion, Key, and Lens on it. You will need to fill in this page like I have above to complete it.
Using the Lens inside the Church
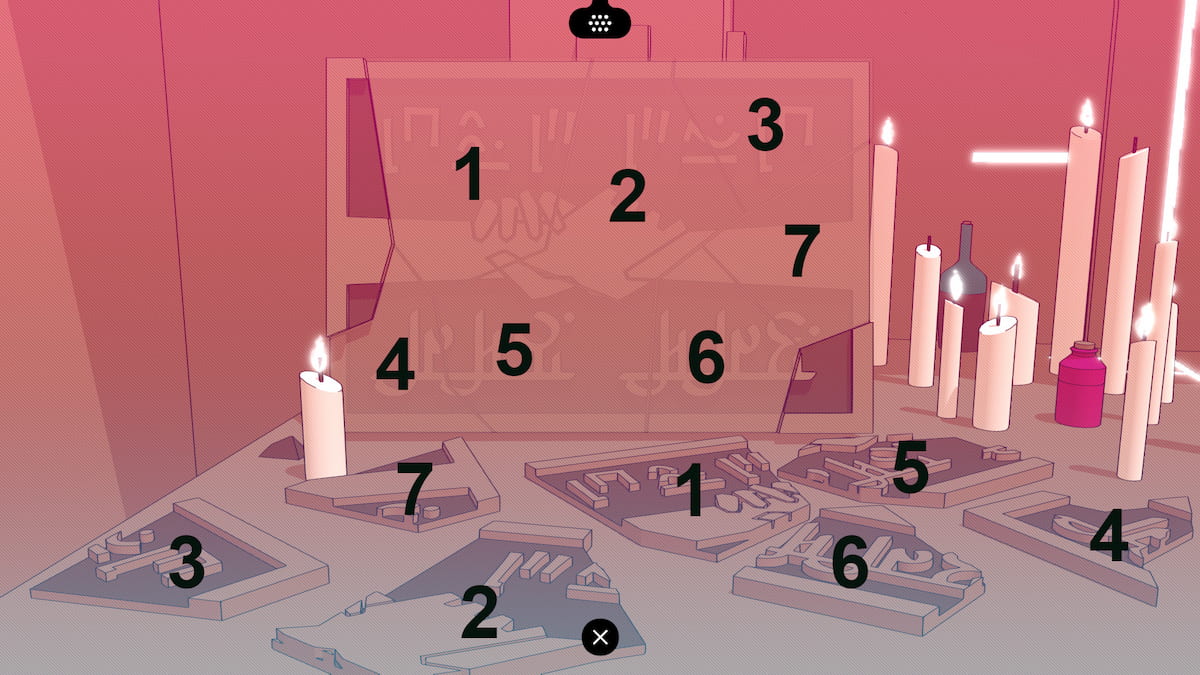
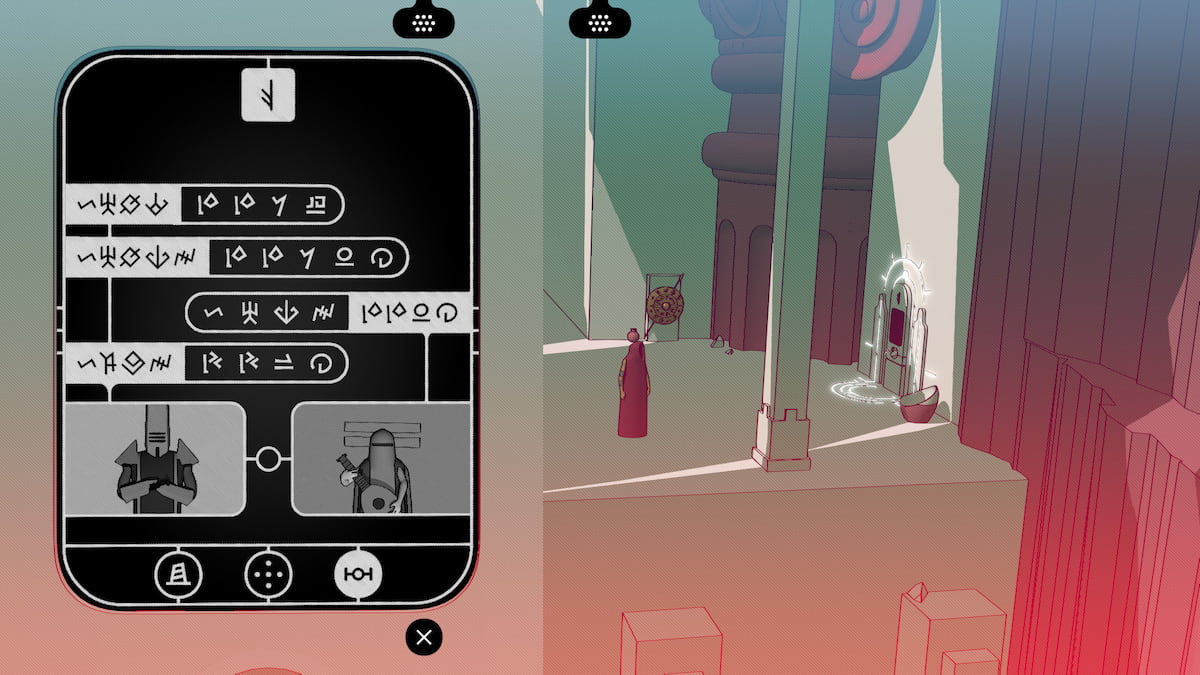
Head back to the Beggar and the Church entrance now that you have the Lens. Go inside the church and follow the priests that walk around the area into the forbidden areas on either side of the church. There will be four mural puzzles on the walls. Use the Lens to open the little door on top of the puzzle, then match the symbols on the three spinning Prayer Wheels. Once all three Prayer Wheels match the symbol up top, a bar will come up to show that you have done it correctly.
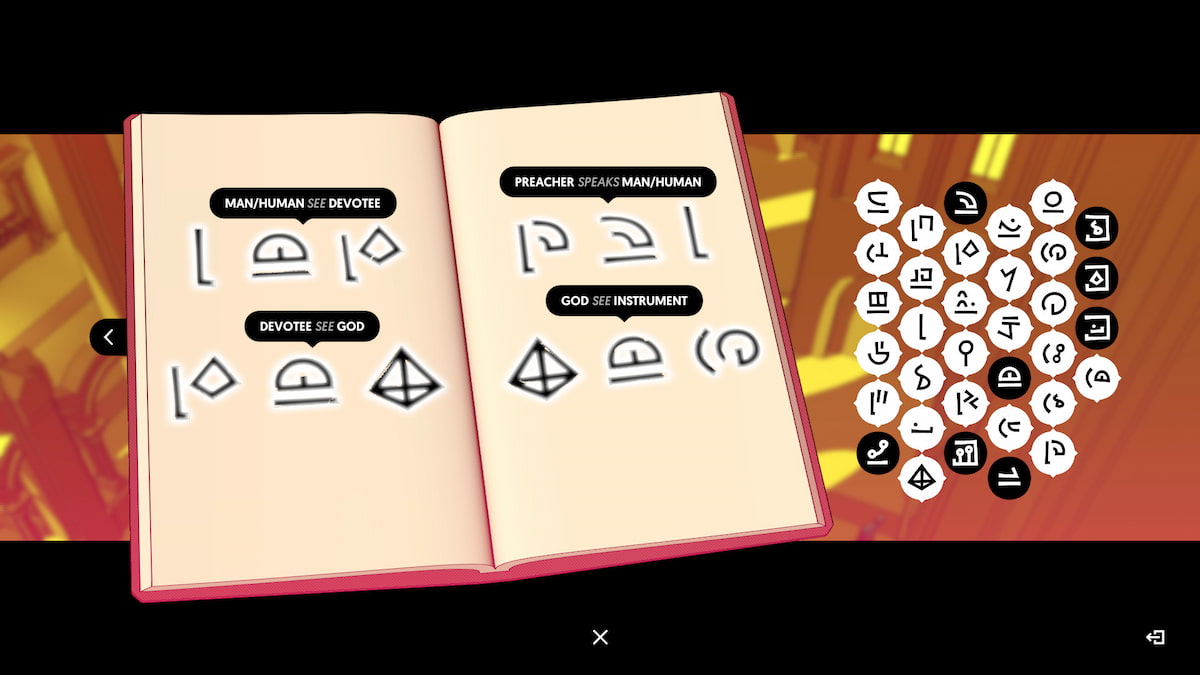
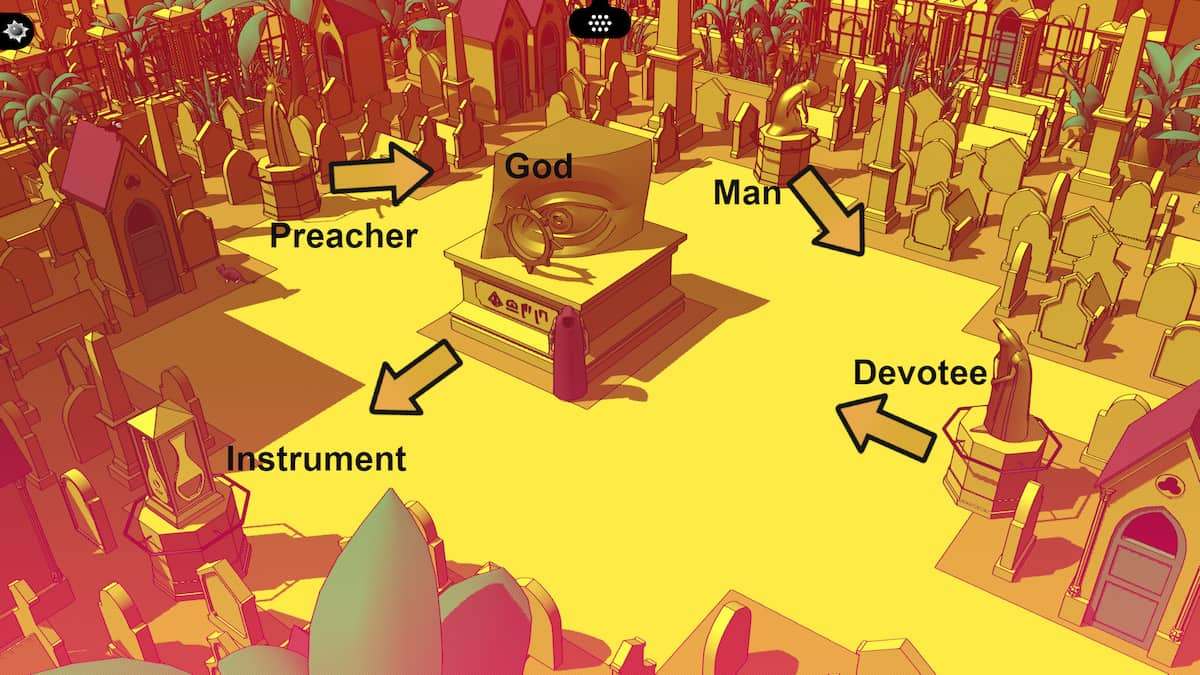
When all four of the puzzles are done, you'll have the answer to the Cemetery Puzzle. "The Man looks at the Devotee, the Devotee looks at God, the Preacher speaks to the man, and God looks at an Instrument." You will need to head out of the Church, then south to the hub, then go west to find the Cemetery.
Second Fast Travel Point: Cemetery
Along the way to the Cemetery, you can find the second fast travel point; you can't do anything with it but turn it on, but you might need it later, so you should make sure to interact with it before you head into the Cemetery area.

Glyphs: Cemetery, Abbey, Garden, Church
As you walk into the Cemetery area, if you have already interacted with the road sign in the center of the hub, you will get the page for Cemetery, Abbey, Garden, and Church. It will look like this when completed:
The Cemetery puzzle solution in the Abbey
The Lens puzzle above gave us the answers to the Cemetery puzzle. You'll need to turn the statues so that the "Man looks at the Devotee, the Devotee looks at God, the Preacher speaks to the man, and God looks at an Instrument." So you need to turn the Preacher to face the man, the Man to face the Devotee, the Devotee toward the God statue in the center, and turn the final statue so the musical instrument so it is facing God's eye. Once the God statue moves, you can get down into the next area.
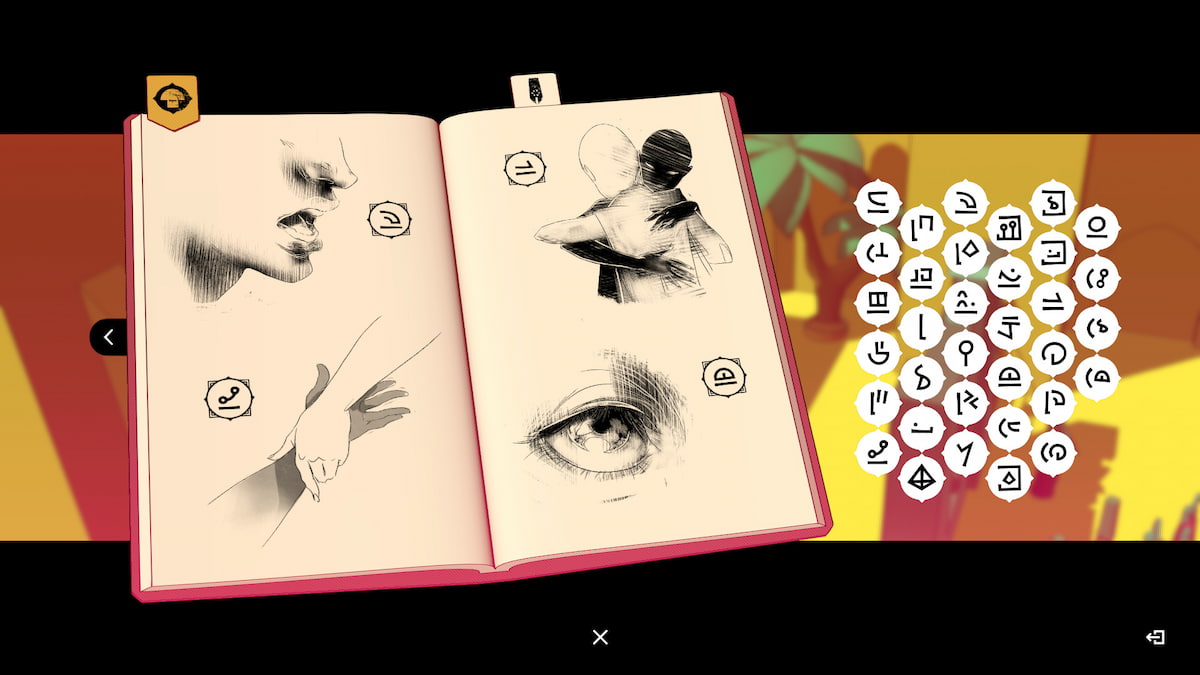
Glyphs: Help, Like, See, Speak
The last glyphs page will appear when you have interacted with the statue in the Cemetery, as long as you have completed all the other interactions above. If you are still missing this page, you should go around and interact with the other statues in the Abbey with words carved below them.
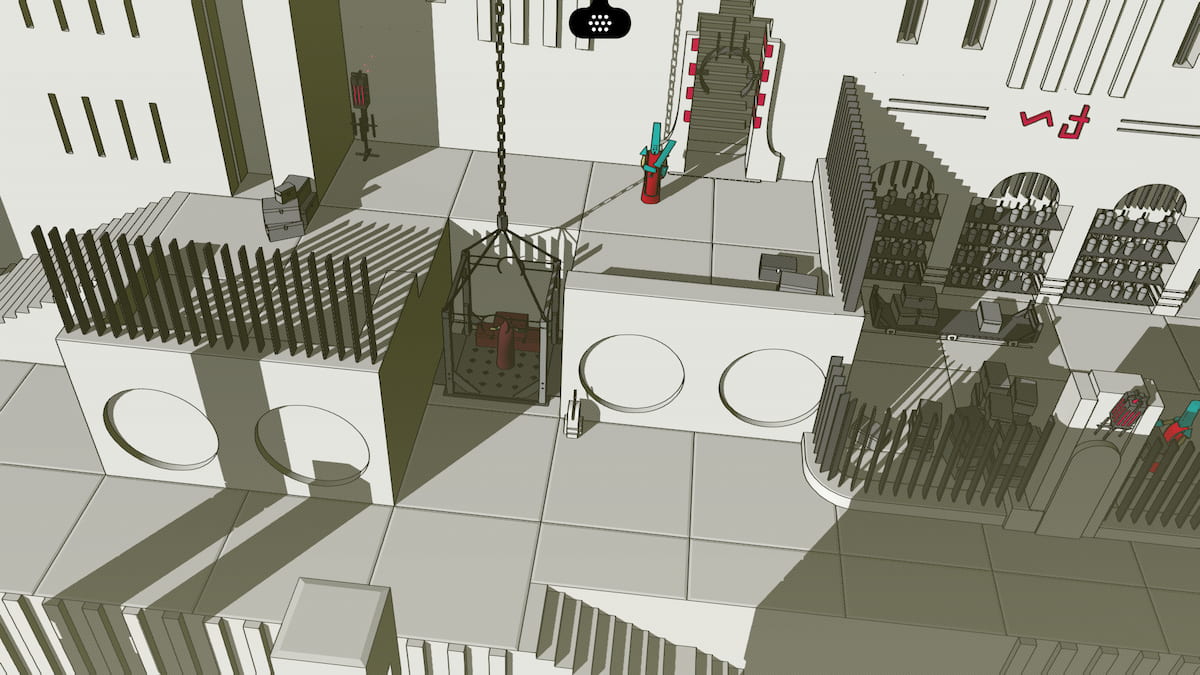
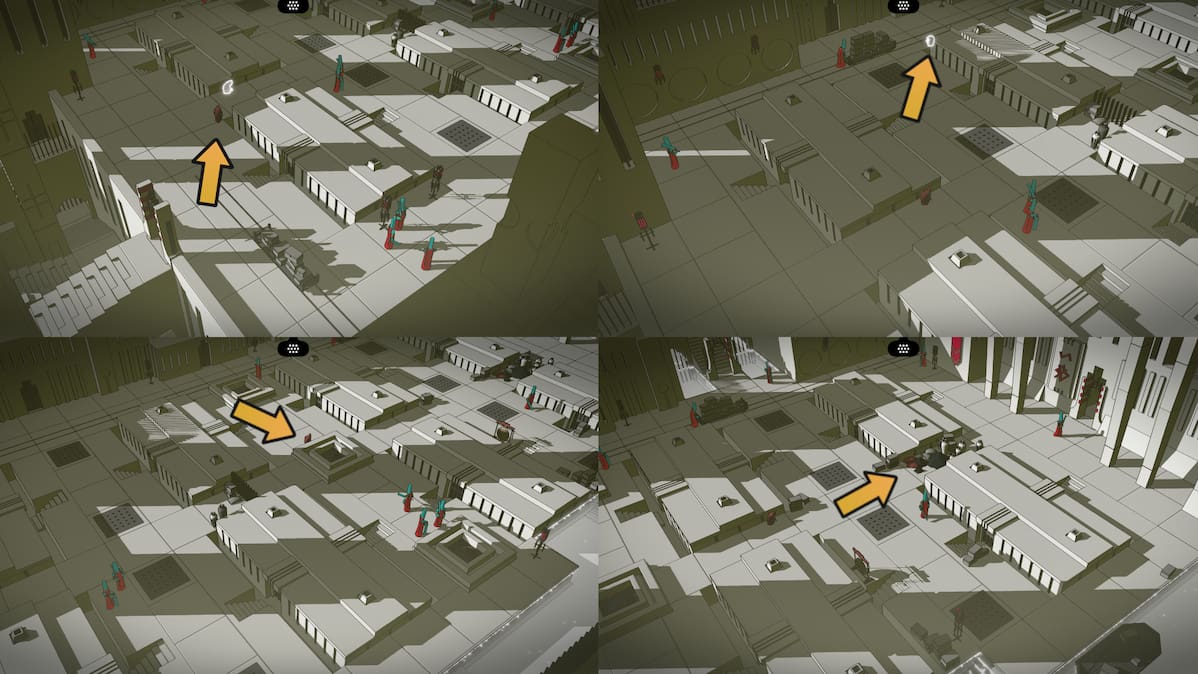
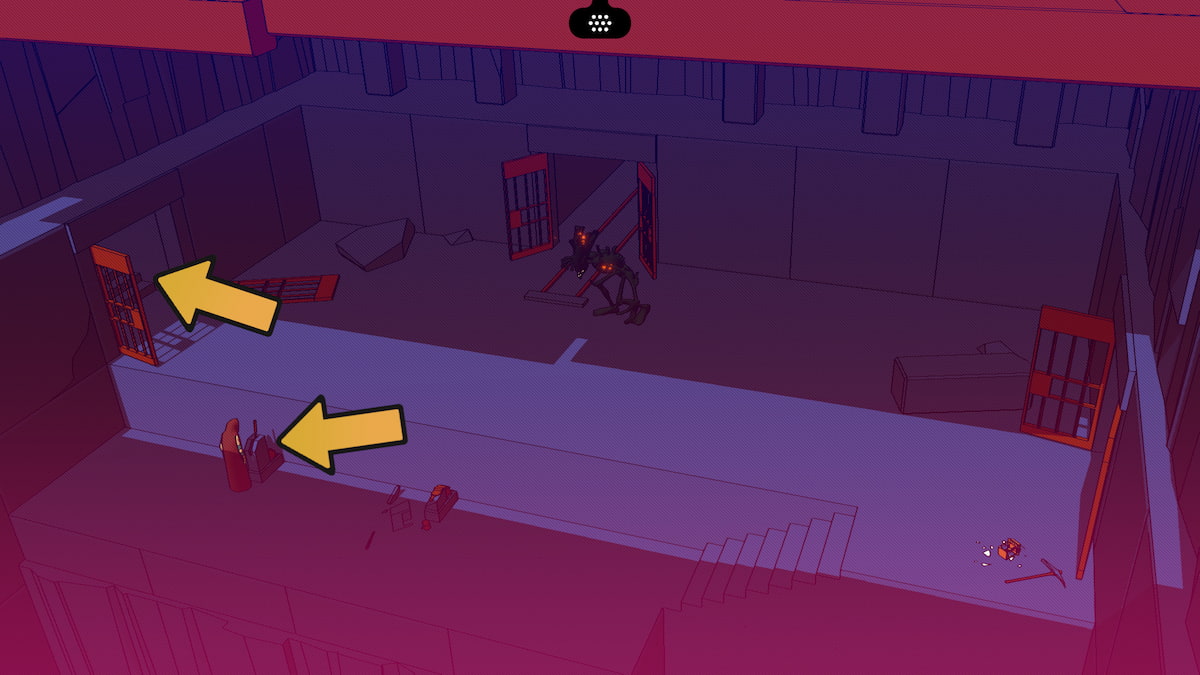
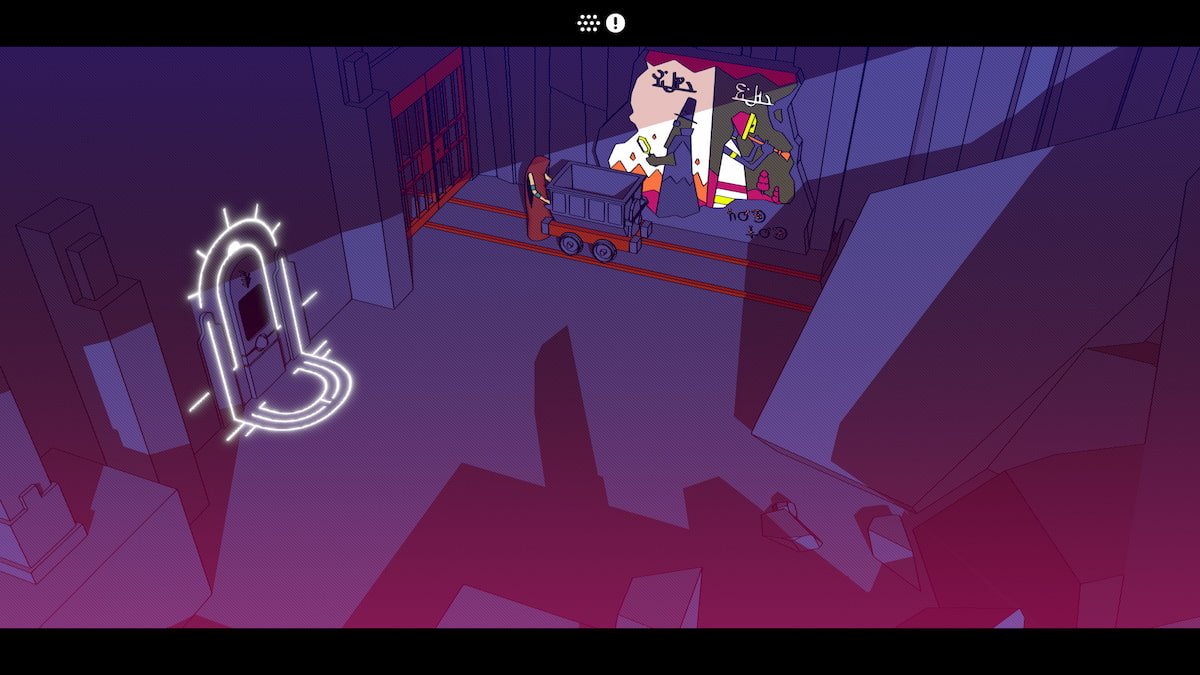
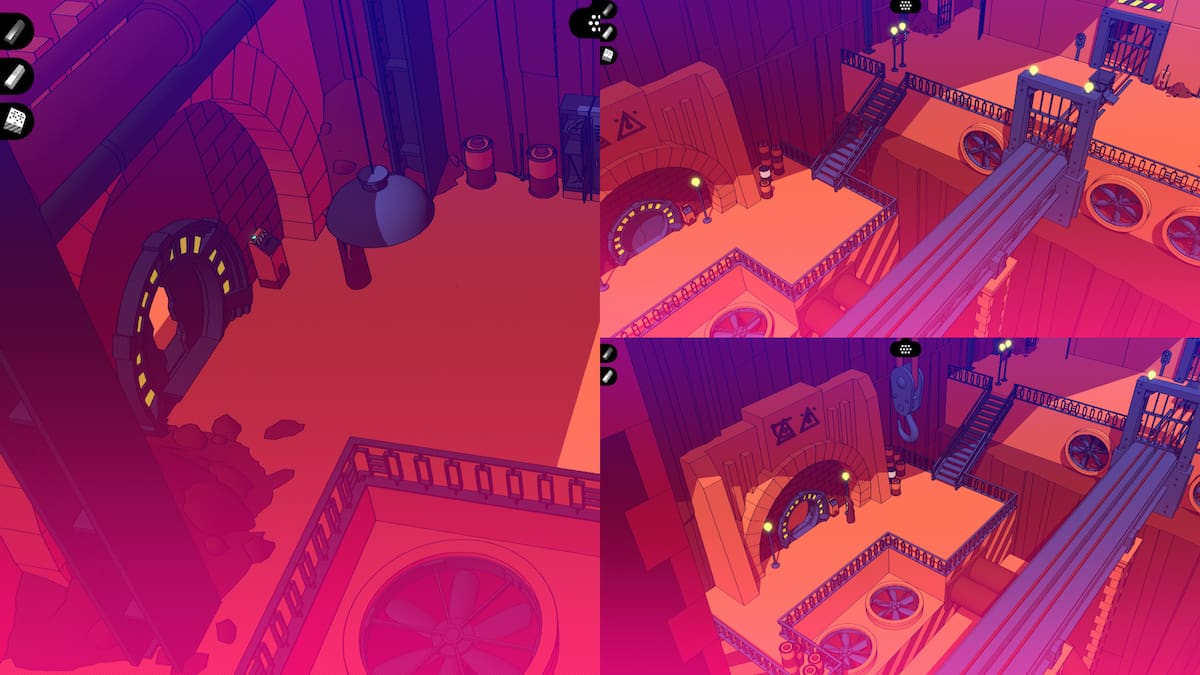
Area between the Abbey and Fortress
Taking the stairs down from the Cemetery, you will find a little pile of sticks on the ground. Use the Lens on it to light the stick so you can use it as a torch. From the torch, go down the stairs and head up into the maze. First, you'll want to find the Preacher. Go Right, Up, Right, Up, Up. Then look down at the Preacher's body.
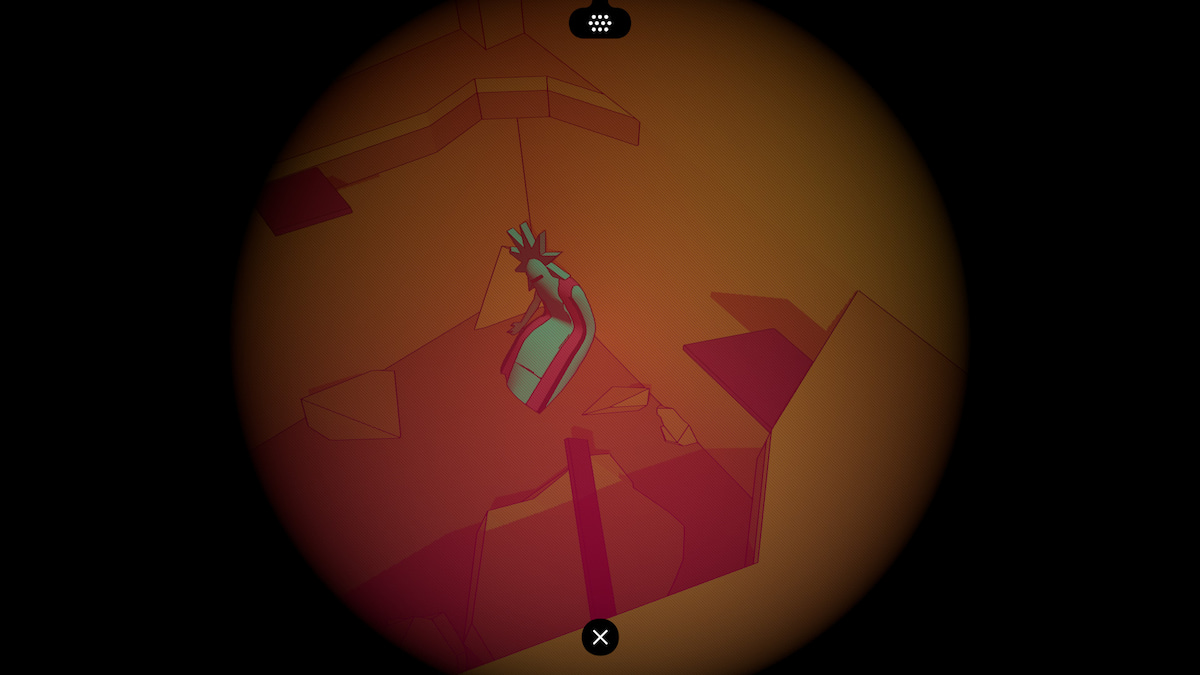
Achievement: The Preacher's Fate
Find the Preacher's Body in the maze.
From the Preacher's Body, go Down, Down, Left, Up, Left, Up, Right, Right to find the lever to empty the hallway you came from. After flicking down the lever, go Left, Down, Right, Down, Down, Left, Down to return to the original hallway. The water should be out of the way now, allowing you to move on to the Fortress.
Video walkthrough of Chapter 1: The Abbey
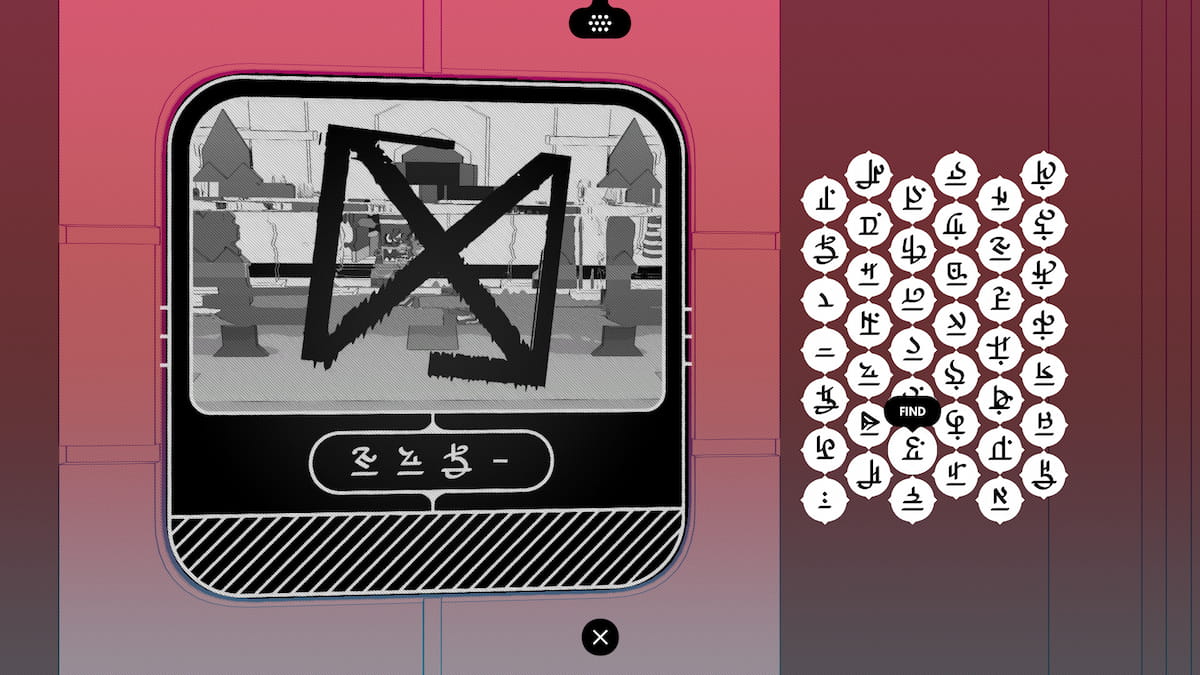
All Glyphs in the Devotee Language
Chapter 2: The Fortress and the Warriors
It's time to enter the Fortress, now that you have gotten around the locked door that the Warriors are blocking. There isn't anything to see in the spaces in between the front gate and the fortress, so you can just keep walking until you find the front door.
Achievement: The Great Escape
Reach the Frontier outside of the Fortress.
Getting into the Fortress
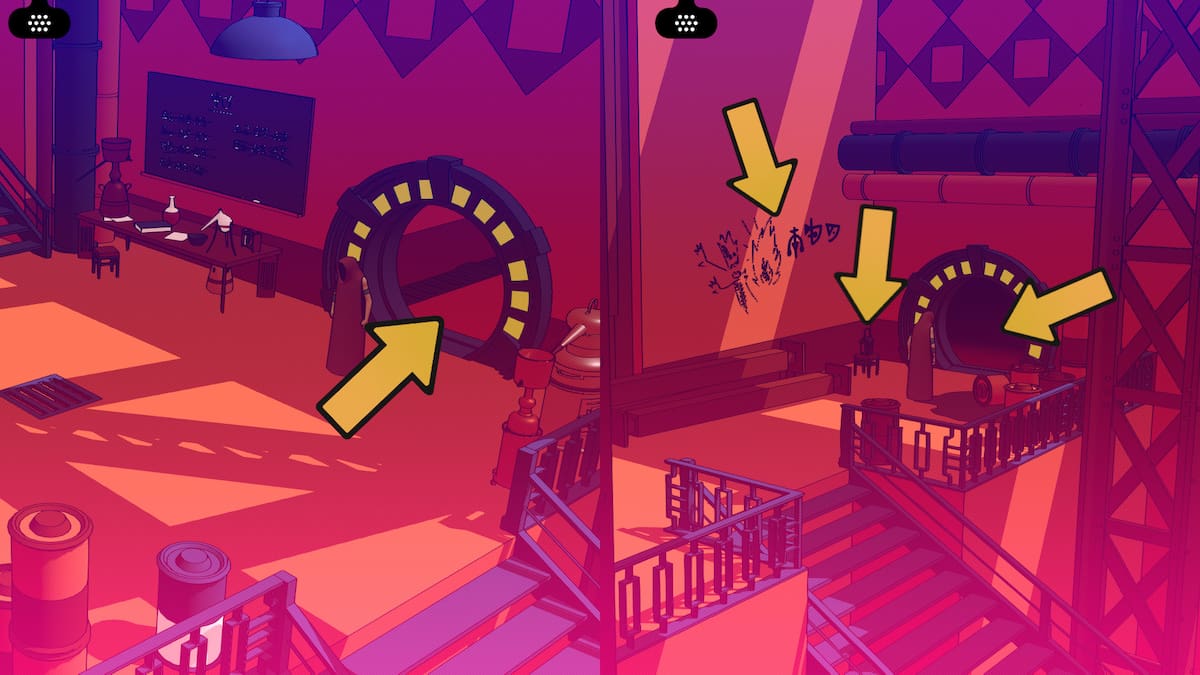
Listen to the Warriors talk to get some new symbols, then interact with the front of the building for two more symbols. We'll identify these later. Go to the right until you find a gap in the wall, then walk into it. You'll be in a new room with another Fast Travel point and a shield you can interact with. This will give you the first page towards unlocking the Warrior Language, and you pick the spear up off of the ground.
Third Fast Travel Point: Fortress Entrance
In the screenshot above, you can see a fast travel point next to the shield. You will need to interact with this before moving on to ensure you have this point for later.
Glyphs: Warrior, Death, Not, Like
Interacting with the shield will give you a new page for the Glyphs for Warrior, Death, Not, and Like. You need to fill in the page as seen below in order to get these all correct.
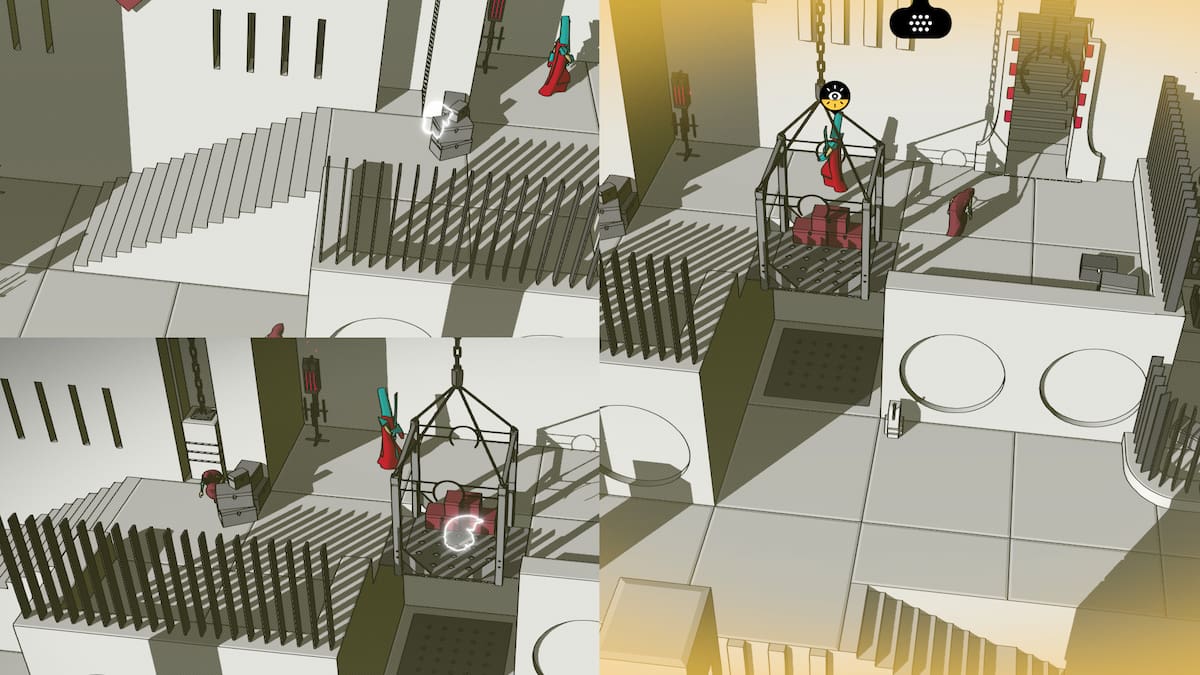
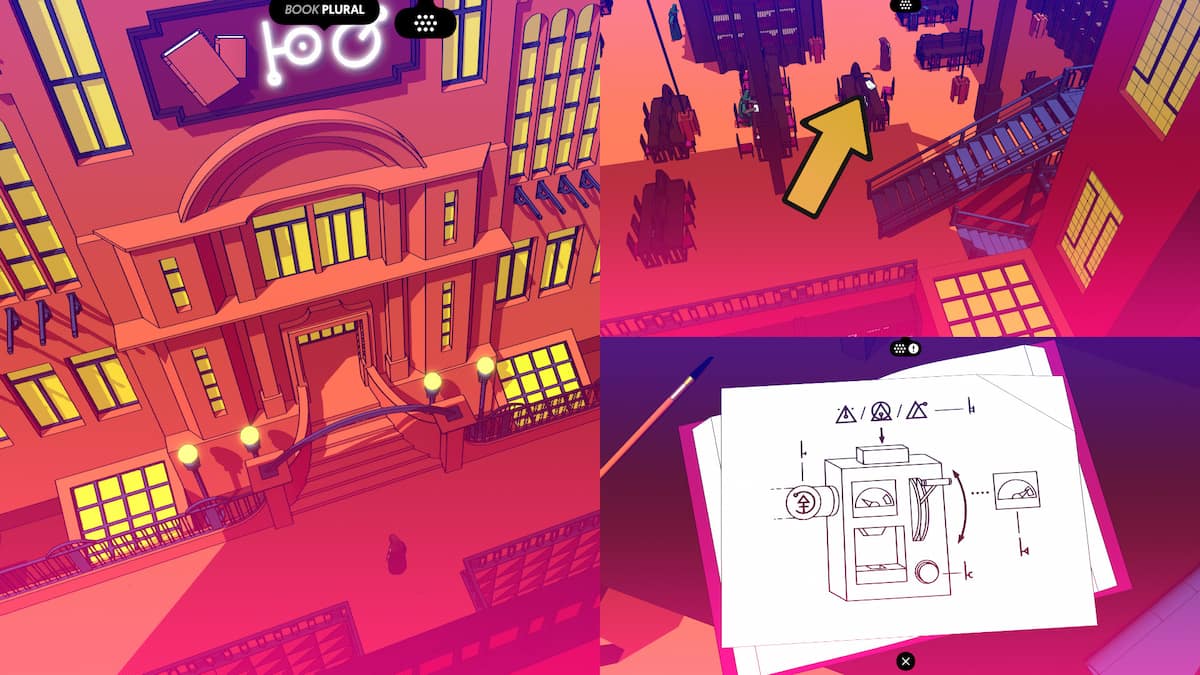
Using the spear you collected in the previous room, interact with the column to knock it over and make a bridge for yourself to cross over and go into the fortress proper. Once you are in the next room, you will get a cutscene with the Warriors, who give you a new page.
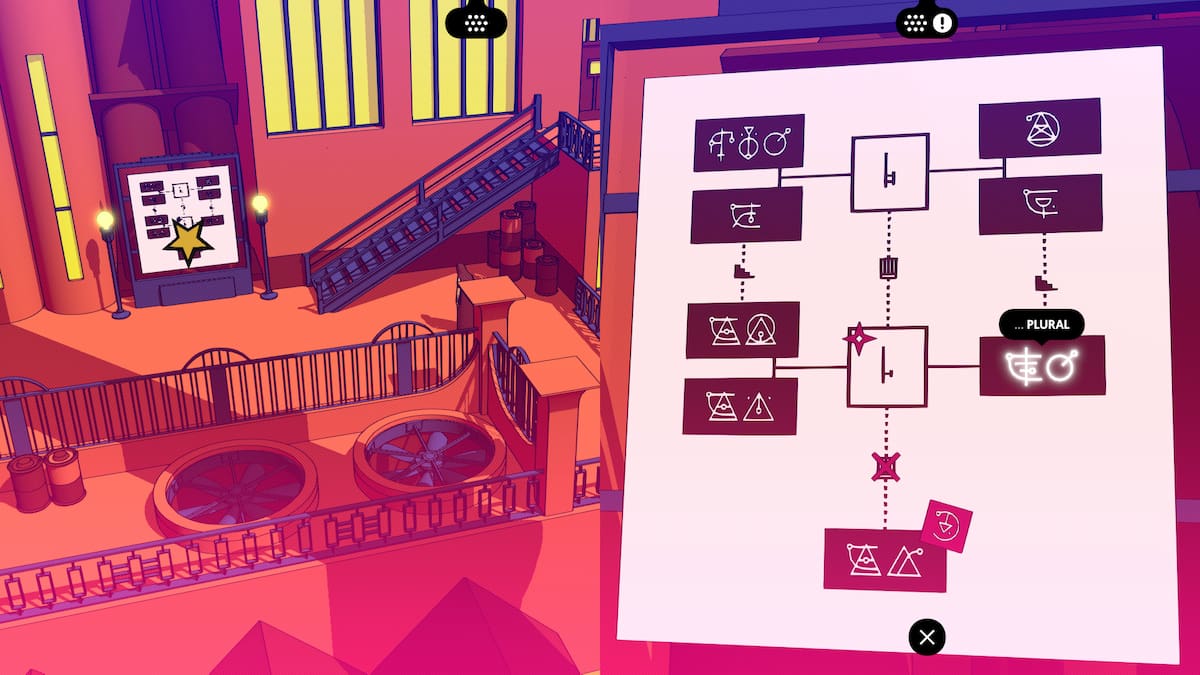
Glyphs: Go, Stop, Plural
The third page will be available after watching the above cutscene with the Warriors stopping and starting again. It will have the glyphs for Stop, Go, and the symbol to make some pluralized.
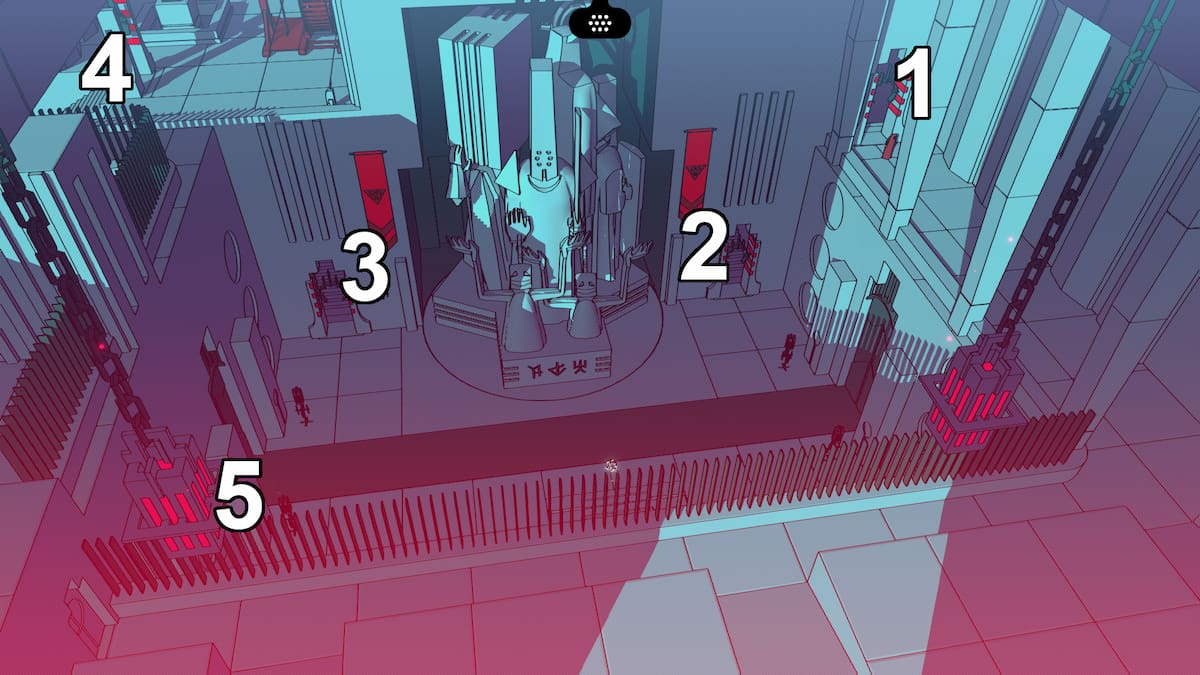
Main hall in the Fortress
The main hall of the Fortress contains several doors. Head into the one you can reach (door 1), and you'll come out door 2. Walk around to door 3, and you will end up on the platform above this door (4). This will allow you to move the giant statue in the center of the room. Use the wheel, then pull the lever, read the words on the statue. Then repeat those steps until you have read all three side of the statue. This will unlock a new glyph page.
Glyph: Protect, Chosen, Impure
After you have seen all three sides of the statue in the central room in the Fortress, you'll get the glyph page for the Warriors language symbols for Protect, Chosen, and Impure.
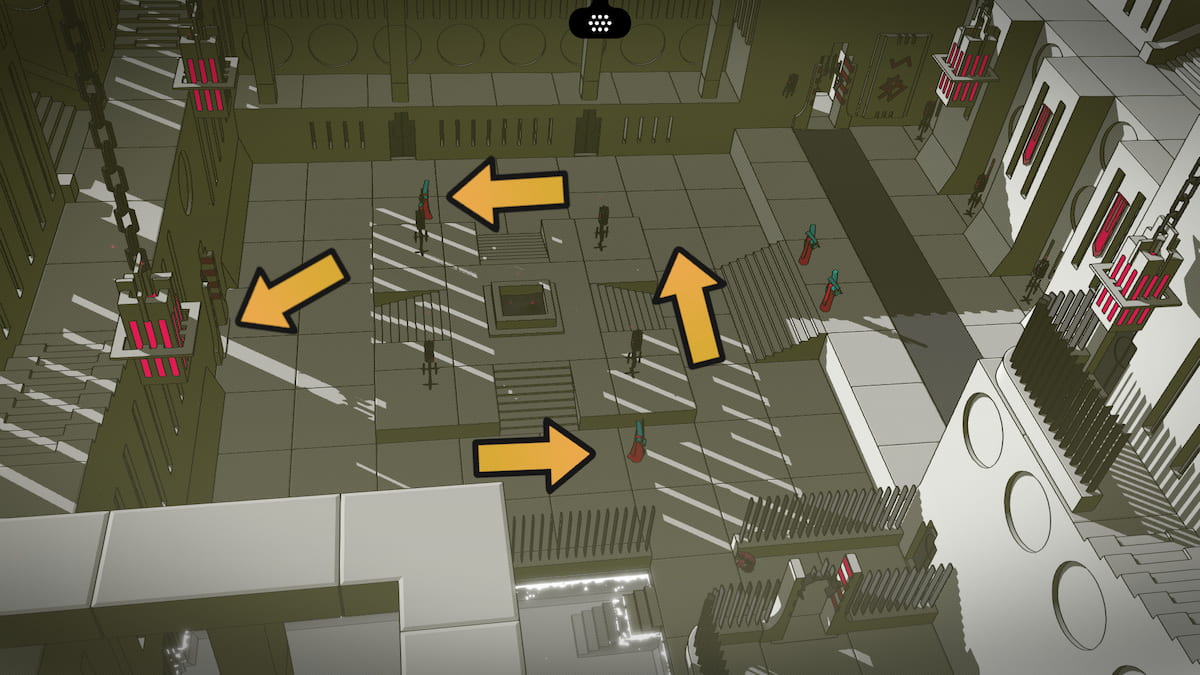
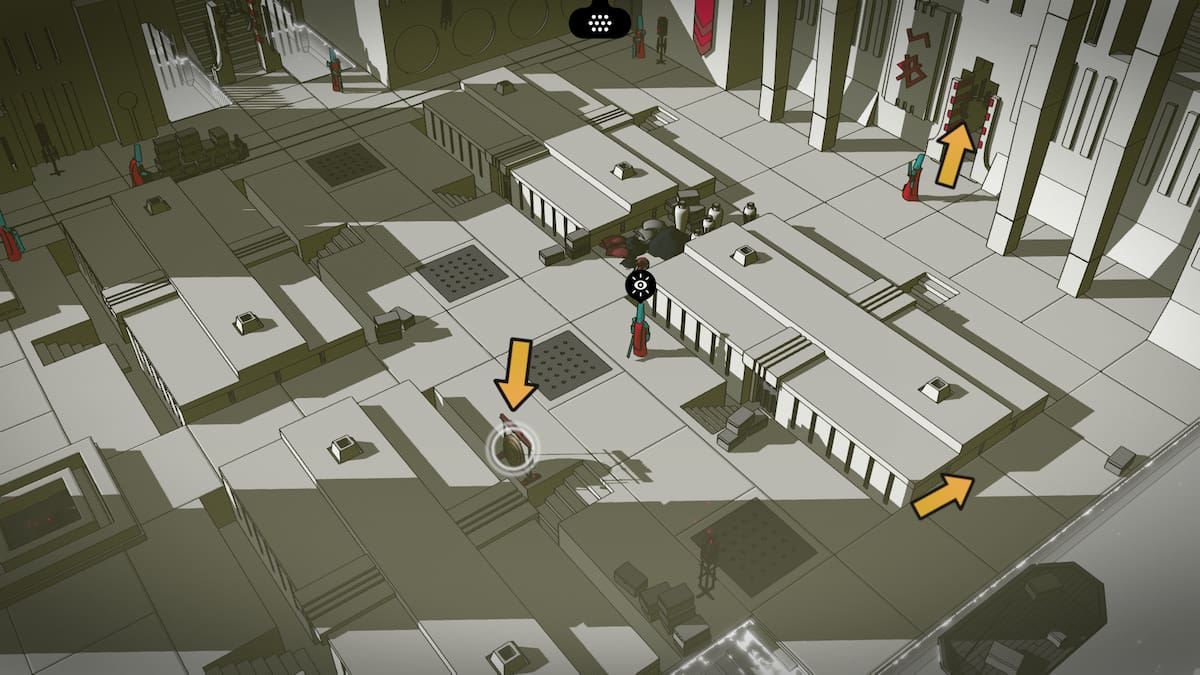
Sneaking around the Fortress: Room 1
In order to sneak around the fortress, you'll have to pay attention to the directions that the Warriors are looking, and find ways to get by them without being seen. In the first room, you will need to follow the Warrior who is walking around the square pretty closely to ensure that they don't see you, and the other circling Warrior doesn't either.
Sneaking around the Fortress: Room 2
In the next room, you will need to cross some more dangerous territory. The first second, you can just walk by since the Warrior is facing away from you. The second, you will need to wait until the Warriors are walking by to move without being seen.
The next section requires that you hit the gong. Once the two Warriors are distracted by the gong, you can head back to the right and then walk across the the hallway to the other side. Make sure there are no Warriors walking toward you before you go. Walk to the left a little more where the main doorway the Warriors are walking through. When the Warriors halt in front of the door, you can walk across the hallway again and down the stairs.
Sneaking around the Fortress: Room 3
In the next section, listen to the Warriors talk until they begin to repeat. After that, walk to the left across the balcony and ride the elevator down. Head into the door.
Glyphs: Pick Up, Put Down, Push
When you listen to the Warrior who is calling out orders in the third sneaking room, you can fill out a new page. It will have the symbols for Push, Pick Up, and Put Down. Fill them in as follows to get all these words.
Sneaking around the Fortress: Room 4

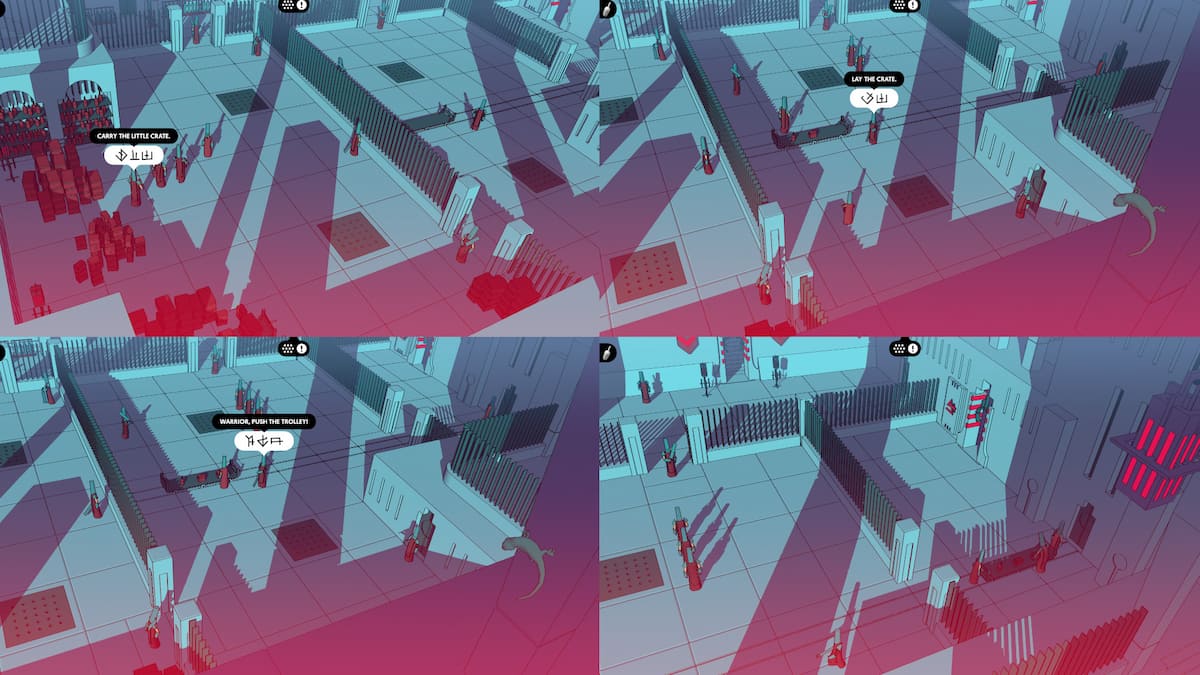
This room is pretty easy to get across, but you'll need to pick up an item to help you. First, head up the stairs, then go all the way to the right while avoiding the Warrior who is placing crates (make sure to look at the signs above the crates and bottles to get a new page). When no one is looking, pick up the red crate that is off to one side. Bring it back all the way to the left, and put the red crate on the elevator.
Pull the lever by the elevator to lift it up. Next, go left and up the stairs on the left of the elevator. Hide behind the crates, then hide behind the crates on the elevator. Sneak through the door when the Warrior is not looking.
Glyphs: Bottle, Crate, Big, Small
When in the fourth sneaking room, you will need to look at the signs above both the crates and the bottles in the right part of this screen. Once you look at the bottle and crate glyphs on the wall, you'll get the page for Bottle, Crate, Big and Small. Here are the glyphs to put in each one.
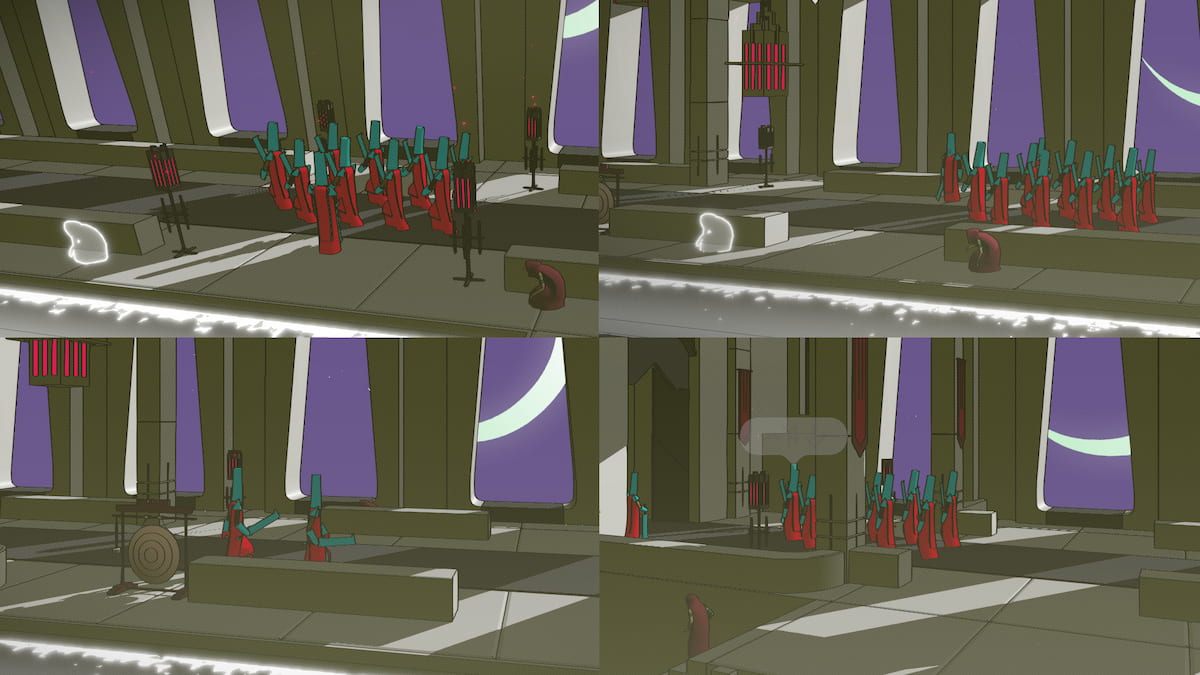
Sneaking around the Fortress: Room 5
This one is the hardest room to sneak through. You will need to walk across the main halls of the floor when the Warrior pushing the cart is hiding you from view, then you will need to use the pile of red bags to get a stone and throw it at the gong. This will allow you to get by the man in the screenshot below, but make sure that the Warrior with the cart is in the way of the other Warrior at the top of the screen.
All Fortress sneaking rooms video guide
If you are stuck sneaking through the Fortress, it can be difficult to figure it out from just the words above. For those who are move visual, here's a link to a video of the sneaking section I compiled to help you.
The Weapons room
The weapons room has a bunch of different styles of helmets and things to choose from, but if you choose the wrong ones, you'll get caught immediately. In order to make sure you blend in, you will need the tall helmet, the arm guards, and the sword. I have highlighted each of the items you'll want to wear in the screen capture above. Now you are safe to walk through the northern-most door in the last room you had to sneak through (listed as sneak room 5 above). On the other side, listen to the Warrior's talking to get more glyphs.
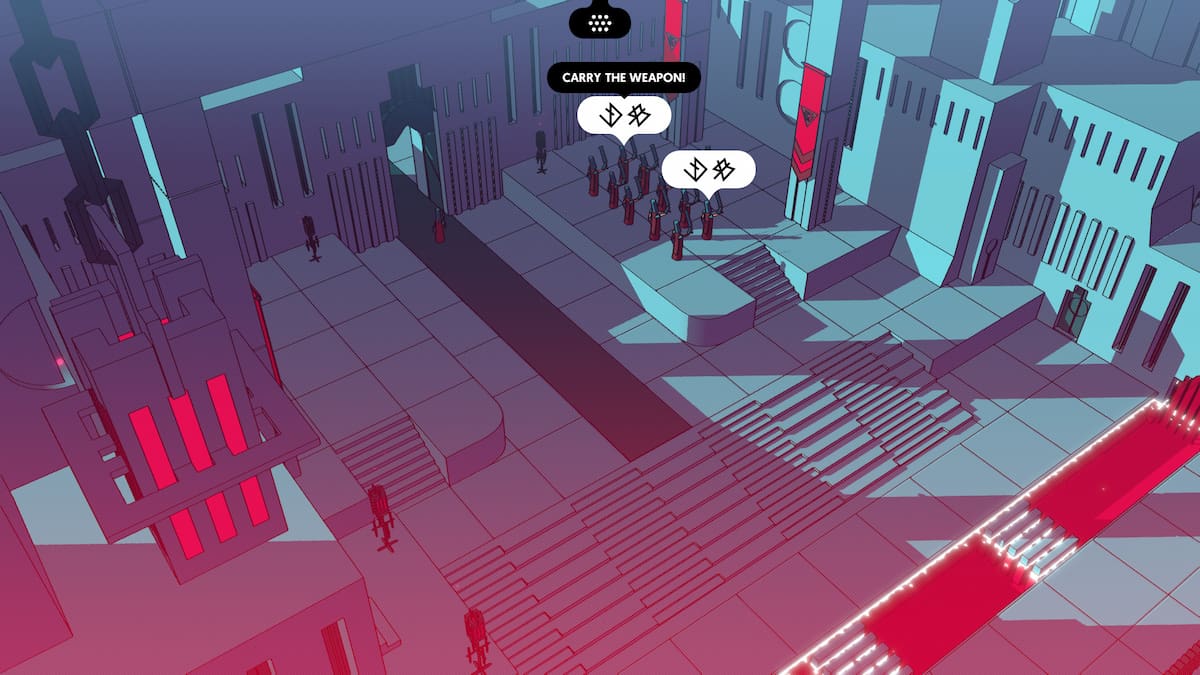
Glyphs: Duty, Trolley, Weapon
In the room shown in the screenshot above, you can get the page for Duty, Weapon, and Trolley. Fill these three in as seen below to get access to these words.
The Giant Sword room
In the next room, you will find a giant sword with glyphs on it. Look at all the glyphs on the sword to find a new glyph, then go down the elevator that is marked Bottles. South of this location, you will find another new glyph marking the southern-most door; make note of it before taking the Bottles elevator down.
Pick up a bottle now that you are disguised. You will need this bottle later, and it's fastest to pick it up now. Then, use the same elevator to head back into the room with the giant sword.
The Observatory
You'll need to make a quick pit stop over at the Observatory before heading down to the Treasure Vault. Once you head through the Treasure Room door at the south of the giant sword room, you'll want to go left on the screen past the two Warriors. You can talk to them, and they will give you a new glyph. Then head up the stairs to the Observatory. Look at the paper on the table to see where to find the missing lens: the Treasure Vault. Look at the poster on the back wall to get two new glyphs.
The treasure vault
Leave the Observatory, down the stairs, through the door, then head south out of the door at the bottom of the screen. Head south again out of the door that is also marked treasure. You will need to play along with the people inside this new place in order to get by the guards here. So, first, walk to the left and put your sword in the rack of swords. Then, follow the walking Warriors into section that is blocked off by a guard.
Now that you are disarmed, you can sneak in behind the walking Warriors. After the two people in front of you pick up their objects, the person in front with the clipboard will order you to pick up one of three objects: a bottle, a small crate, or a large crate. Make sure you have all the glyphs up the this point unlocked so you know what they are asking you to pick up.
Follow the others into the next area, then watch as the first two Warriors place down their objects. You will then need to place down your object, and the Warrior will then order you to push the trolley. Push it to the right, then go into the door on the right side of the room that is marked Treasure. Look at the murals for more glyphs, then head down the stairs to the next puzzle.
The Constellation puzzle in the Treasure Room
The Constellation puzzle will look like the screenshot above. You will need to pick up the torch in the left part of the screen, then walk to the right until you see a stairway down. You will need to have the torch with you, or else you won't be able to see this next part. Place the torch at the bottom of the stairs, then turn the wheel you find down there four times.
Fourth Fast Travel Point: Treasure Room
Once you are down the stairs you will need to drop off the torch into one of the floor's holes. Head through the door north, and there will be a new fast travel point to unlock.

Now that you have unlock the Treasure Room fast travel point and you have turned the wheel in this lower room four times, you will need to pick the torch back up, and head back upstairs. Place the torch inside the little cubby, and the constellations will light up the four pictures carved into the walls. This will Open the Treasure Room door. Look at one of the Constellations on the wall to get a new Glyph page. You won't be able to fill out this Glyph page yet.
The Treasure Room
Now you are finally in the Treasure Room itself. The item you need is the square lens on the second-from the top shelf on the second column from the left. So you will need to move the cart underneath that second to last item, then use the wheel in the right part of the screen four times. Ride the cart up and grab the square lens off of the treasure wall. If you have not been to the Observatory, you will not be able to pick up the square lens.
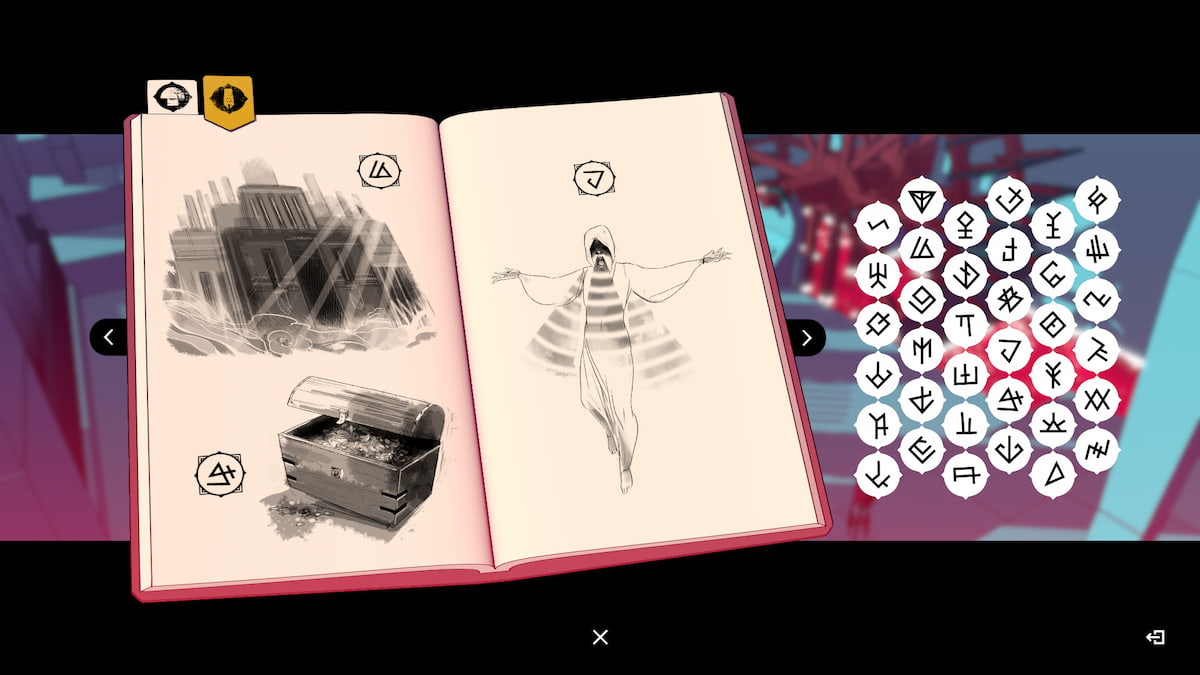
Glyphs: Help, Seek, Scientist, Call, Treasure, Fortress
A new glyph sheet can be unlocked in the Treasure Room; interact with the broken bit of wall in the upper lefthand part, just north of the boat. You will get a new Glyph page for Help, Seek, and Scientist. You'll also get the page for Call, Treasure, and Fortress.
Back to the Observatory
Square lens in hand, you need to go back to the Observatory. Put the square lens inside the telescope, then look into the telescope to get another page for your journal. The constellations will match up with the pictures you got during the Constellation puzzle. You'll be able to fill these in during the next section.
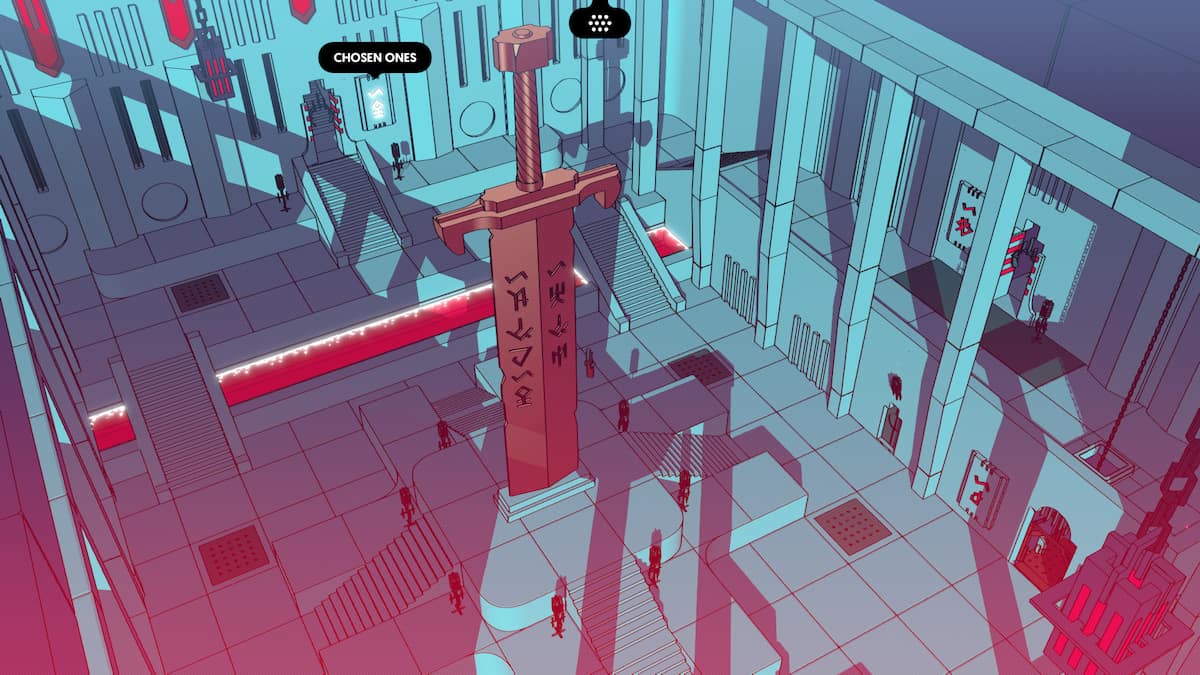
The Chosen
After the Observatory is complete, you'll need to go back to the room with the giant sword, then go into the door that is labelled "The Chosen." Go up the stairs and into the next room. There are two directions you can head in the next room; you can choose to go left and up, or you can choose to continue left. Go into the room that is to the left and up.
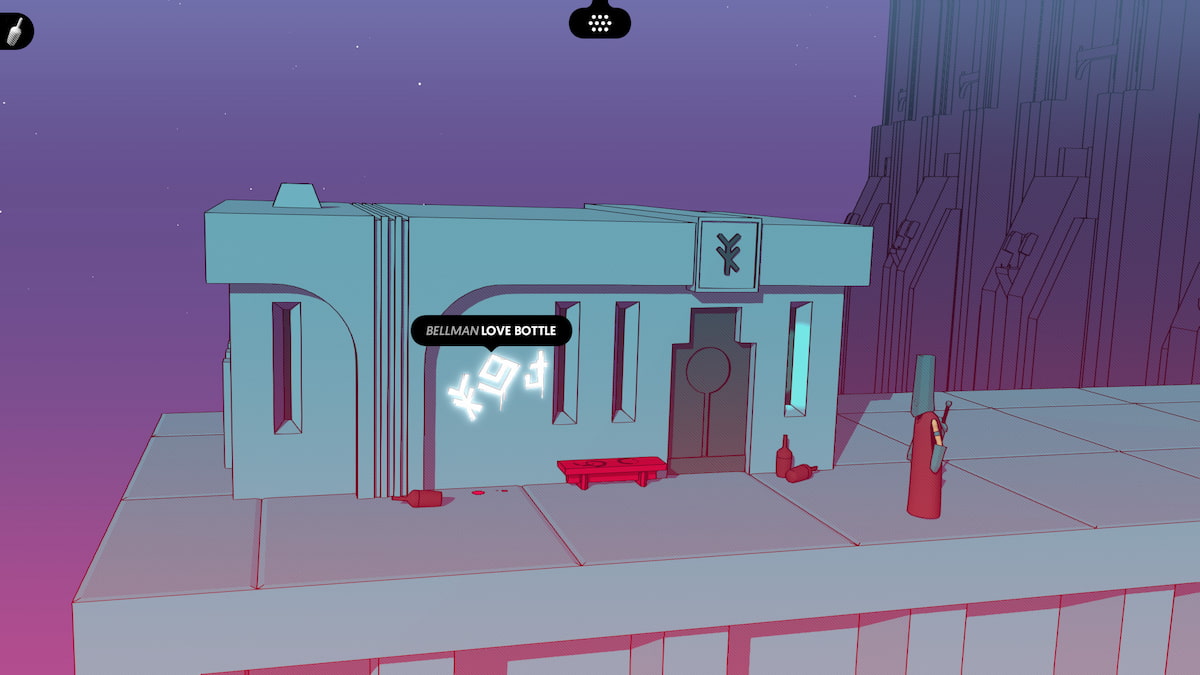
Next, go to the other room you walked by previously. This will lead you up to the Bellman's Home. You can read most of the glyphs by now, so you'll see that the painted symbols on the wall says "Bellman loves the bottle." Good thing you already picked up a bottle from the Bottles room. Look inside the Bellman's Home through the window to see a book, and the shadow of the Bellman himself. You will need to set the bottle down on the bench where there are wet rings from previous bottles set.
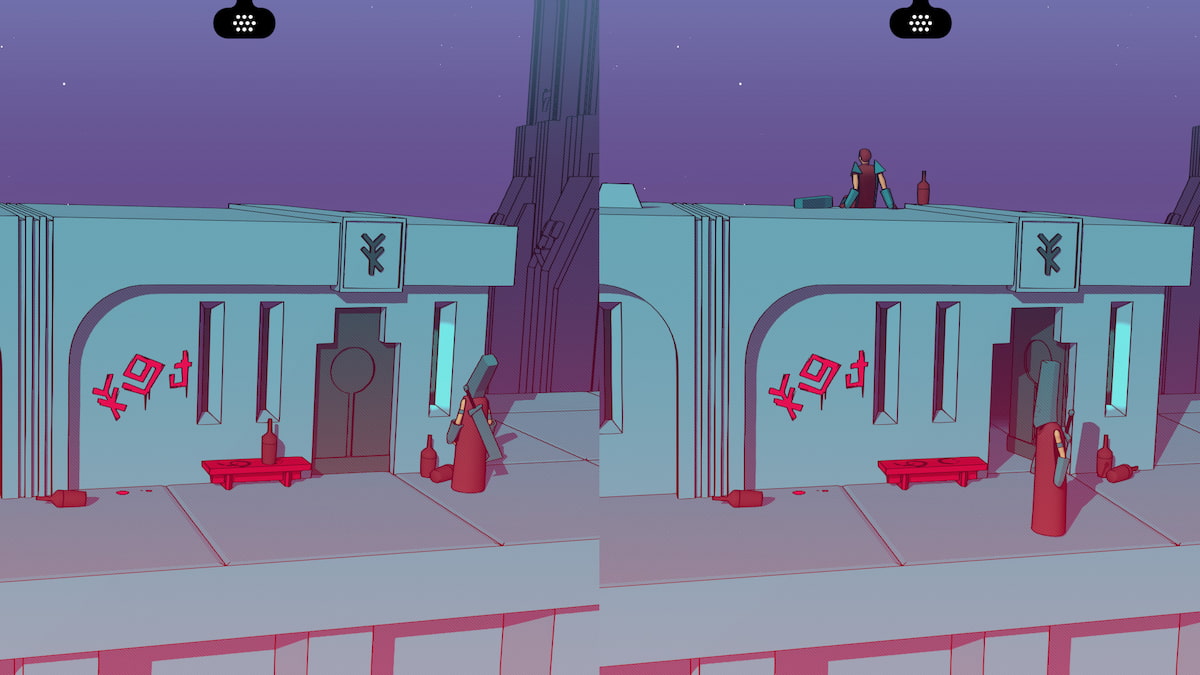
After setting the bottle down on the bench, leave this area and come back. The Bellman will now be on the roof with the bottle, and you will be able to enter his home, and read the book on his shelf. If you read the book, you will get some new glyphs and a new page. This will give you all the glyphs you need to complete the bell puzzle. You will want to do the Call of the Chosen Ones. Head out of the Bellman's home and to the right over to the bells and input all the glyphs in order.

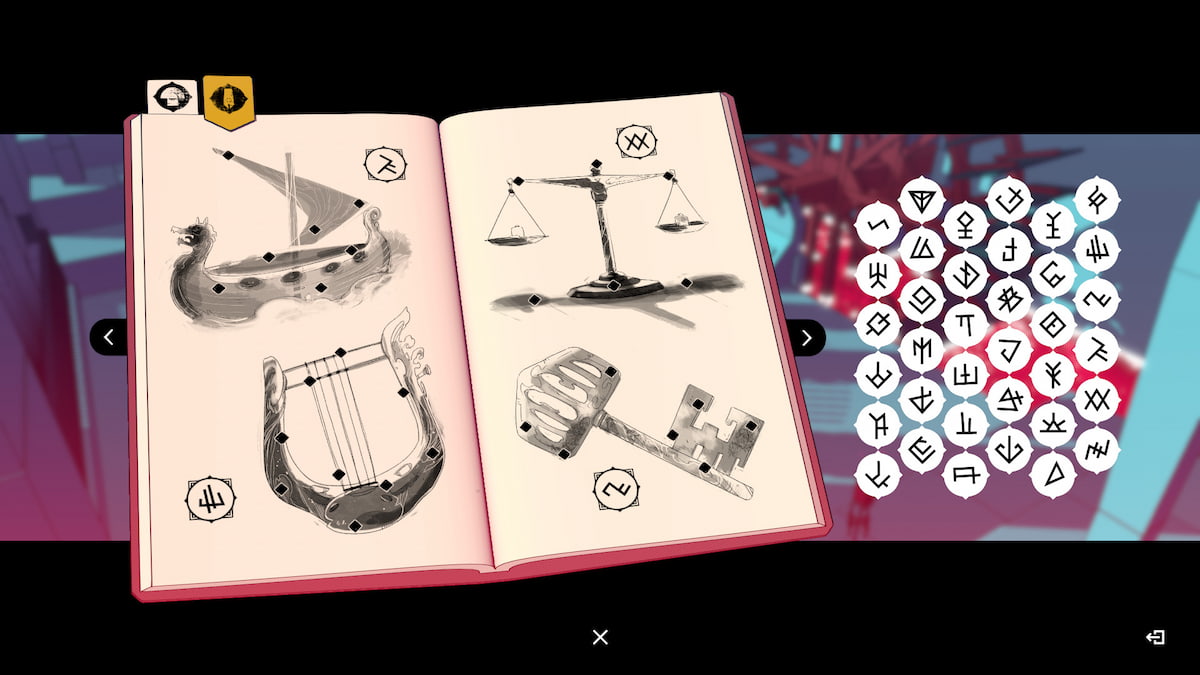
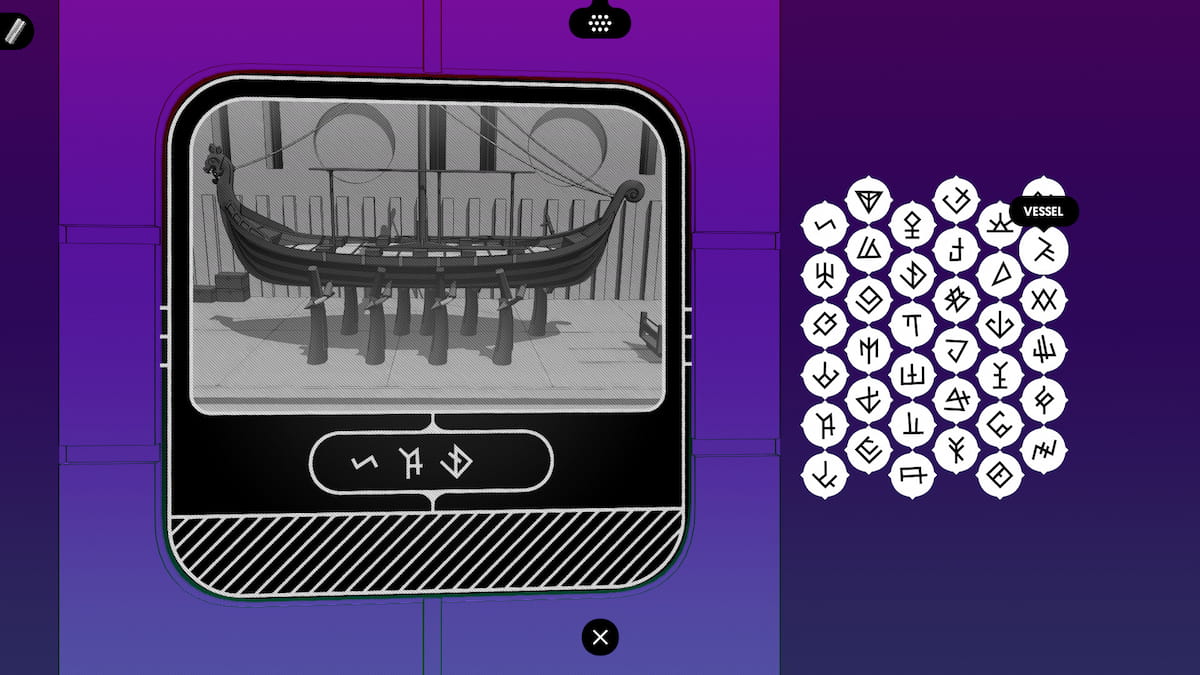
Glyphs: Vessel, Instrument, Balance, Key, Sun, Moon, Bellman
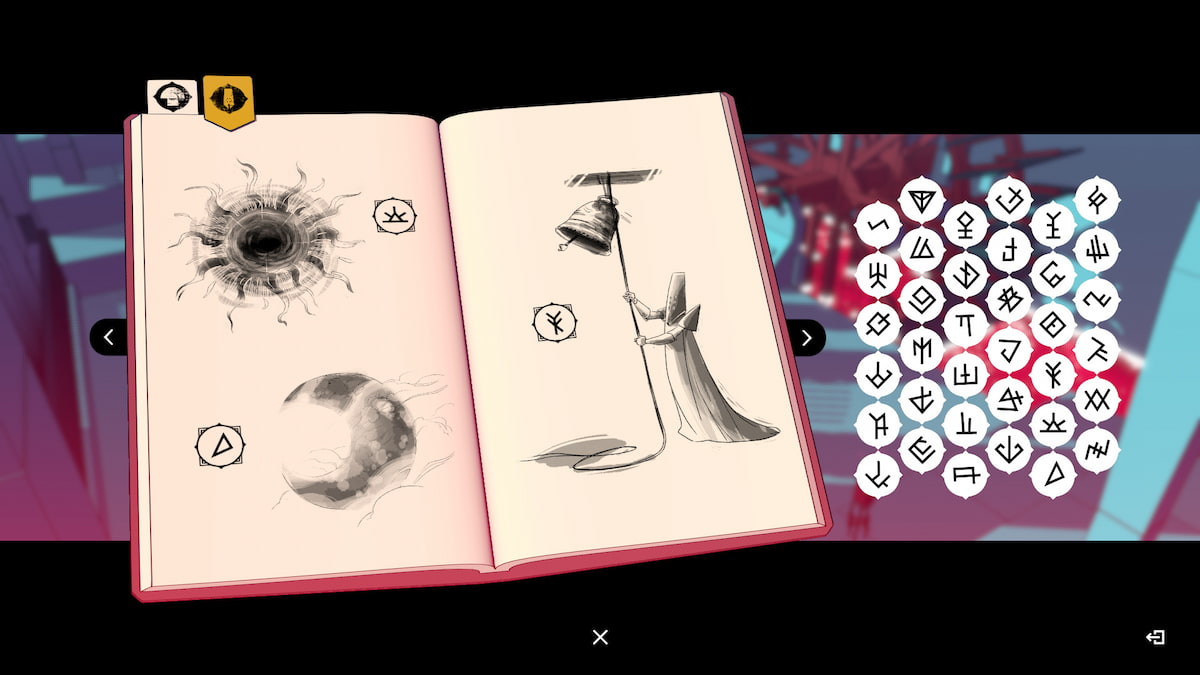
Once you read the book inside the Bellman's Home, you'll finally have the four glyphs to put into this page in your journal. Here are the symbols for Vessel, Key, Balance, and Harp. You'll also have Sun, Moon, and Bellman to fill in the above page too.
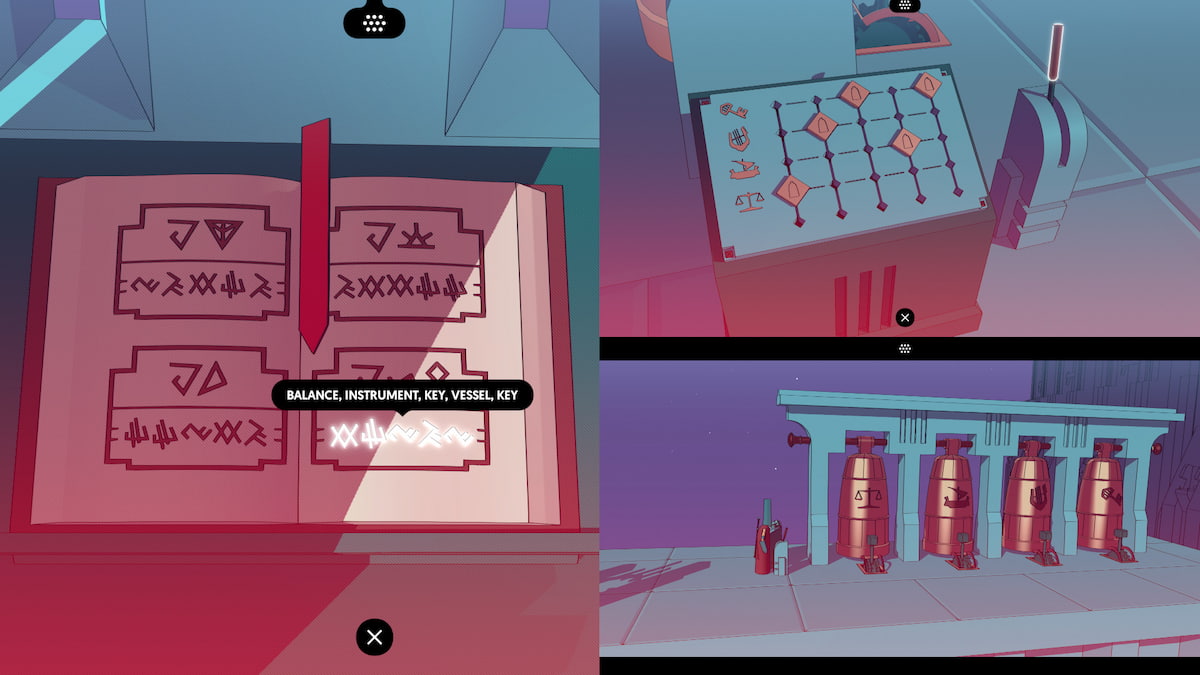
The solution for Call of the Chosen Ones is Balance, Instrument, Key, Vessel, then Key. Plug these into the bell's panel, then pull the lever to complete the call. After you have pulled the lever, then leave the Bellman's area. Head down and to the left on the next screen.
Achievement: Fashion Victim
At this point, you can get this achievement by going back into the Weapons room and leave wearing the wrong outfit. It won't get you killed!
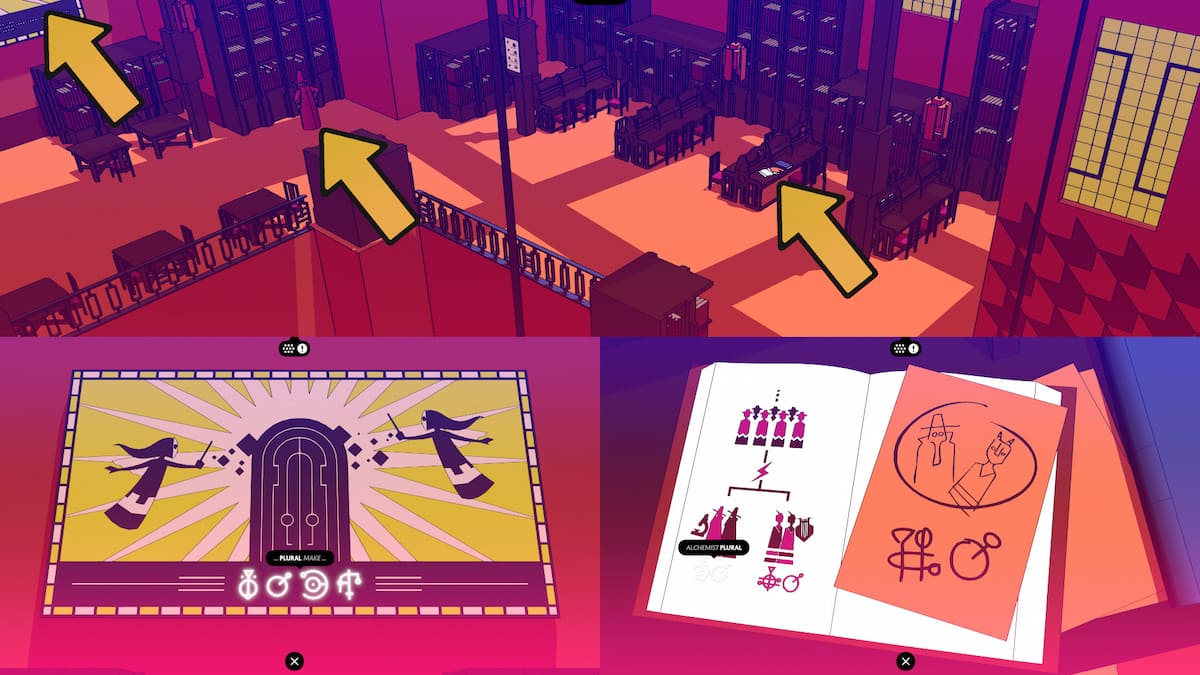
All the Warriors will be running by, but you will need to head against the tide up to the door on the left labelled "The Chosen." Head inside. There will be three statues, and you'll want to interact with the glyphs underneath each of them to get all but one of the glyphs you need to complete the Warrior's language. In the next room, interact with the glyphs on the floor of the elevator to get the final glyph. Ride the elevator up to the Gardens.
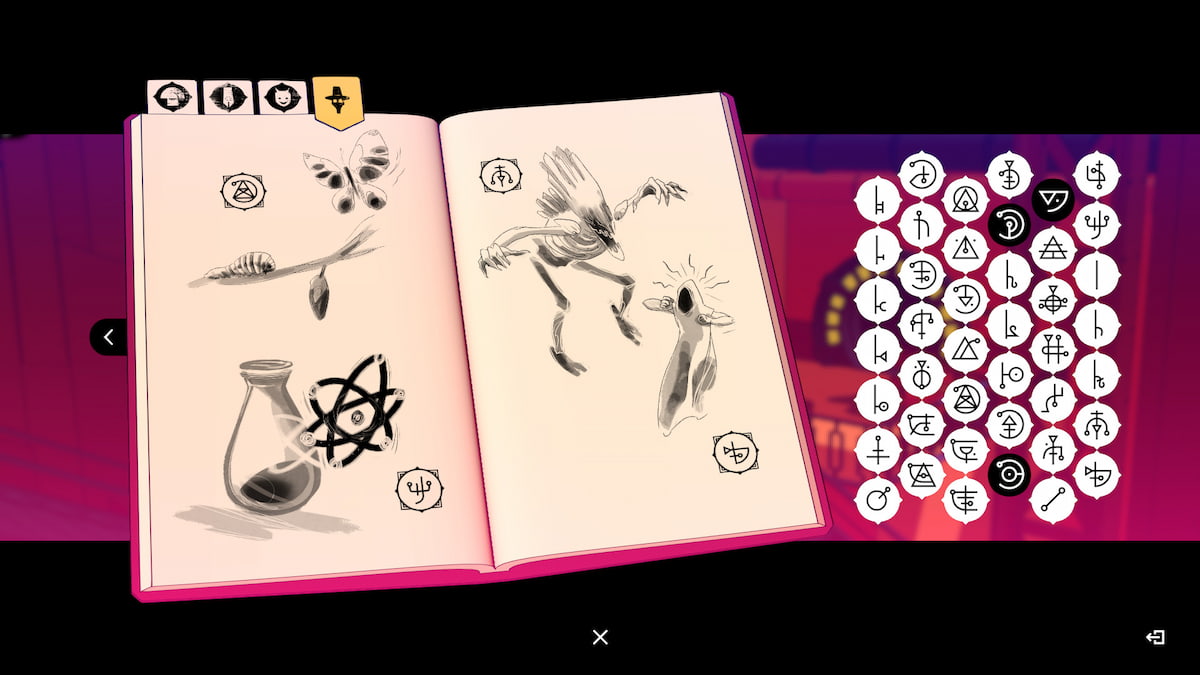
Glyphs: Make, Music, Fear
The glyphs on the floor of the Chosen's room contains the final glyph for the Warrior's Language, and you will unlock the page automatically after interacting with it. Fill in Fear, Make, and Music to complete the glyphs.
Video walkthrough of Chapter 2: The Fortress
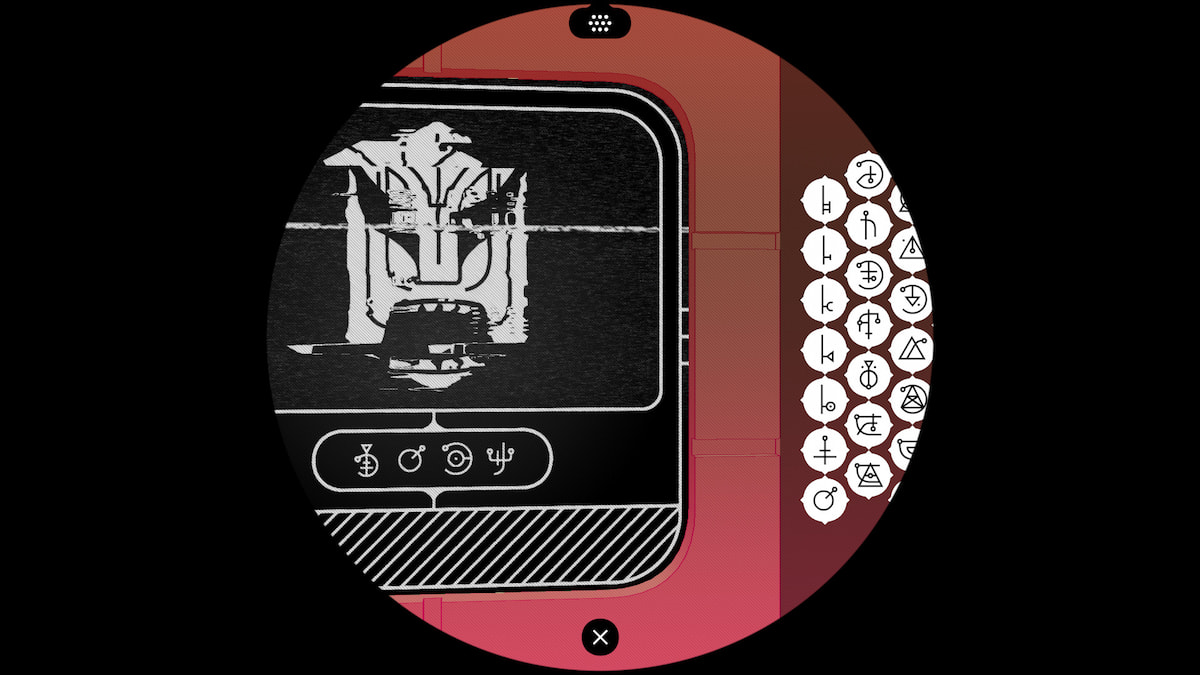
All Glyphs in the Warrior Language
Achievement: A New Dawn
Reach the Garden.
Chapter 3: The Gardens and the Bards
You have finally reached the third location, called the Gardens. This is where you can find the Chosen Ones and their language. Thankfully, there will be a lot less sneaking around in this chapter, so you can relaxing and enjoy the beauty of the Gardens.
The Gardens' first glyphs

The first new glyphs will be on the sign in the first screen of the Gardens. Interact with it in order to get the glyphs page shown below.
Glyphs: Plural, Not, Warrior, Pass
With the sign above, you have access to four glyphs for the Bard's Garden language. Fill in the glyphs like they are below to get all these words for your newest language.
Use the boat to get into the Gardens proper, and chat with the two Bards on the other side of the water to get new glyphs. Cross over the bridge, then chat with the person holding a mirror.
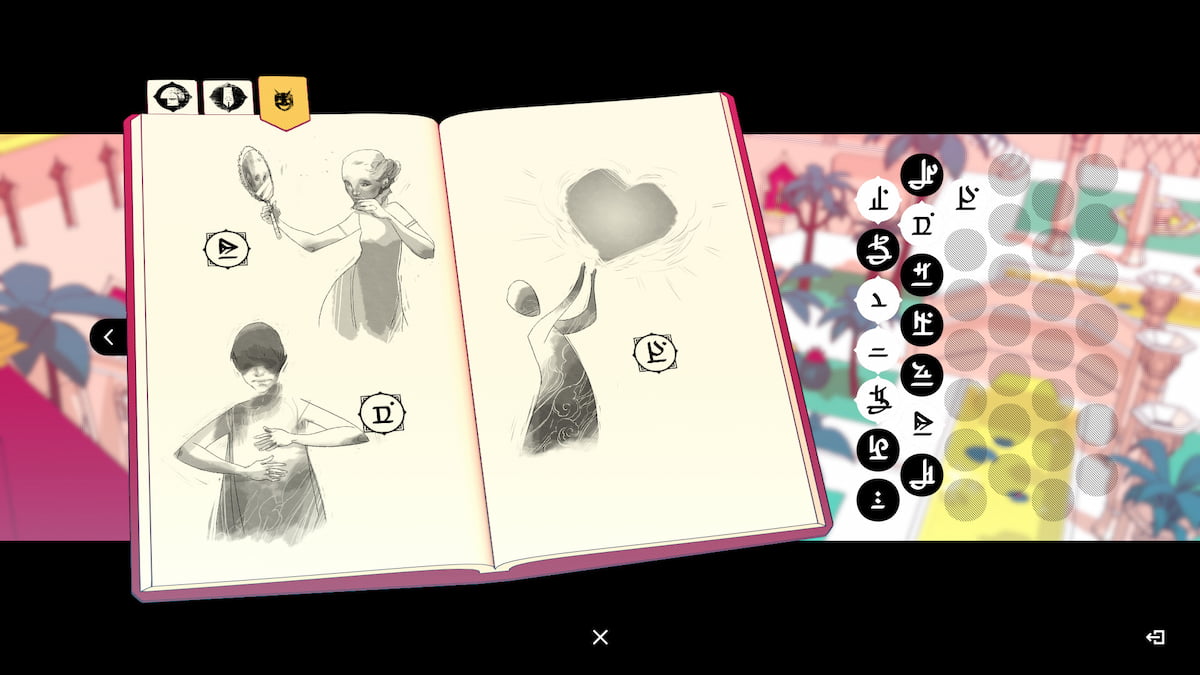
Glyphs: Beauty, Be, Love
When you speak to the Bard holding a hand mirror and admiring themselves, you'll get the page with the glyphs for Beauty, Be, and Love. Fill them out as they are in the page below to get these three words.
To the top of the screen, there is an artist painting; you can speak with them to gain some new glyphs. After that, head through the door on the left side of this area. You will find yourself in a square courtyard; to the north, east, and west, there are monkeys with boxes. Head north and chat with the harp-playing Bard for a new page.
Glyphs: Greetings, Question, Bard
When you are in the screen with the harp-playing Bard, you can speak to them to gain another page. This one is for Greetings or Hello, the sign for Question that goes on either side of the sentence, and Bard, which is what these Chosen Ones call themselves.
The Monkey Courtyard and fruit locations
There is a courtyard that is one of the first screens you will come across in the Gardens. There will be three monkeys that are standing around the courtyard; you will need to feed each of them a fruit to see the little plays that their boxes act out. There is one fruit on this screen, in the center of the courtyard, hanging off of a tree.
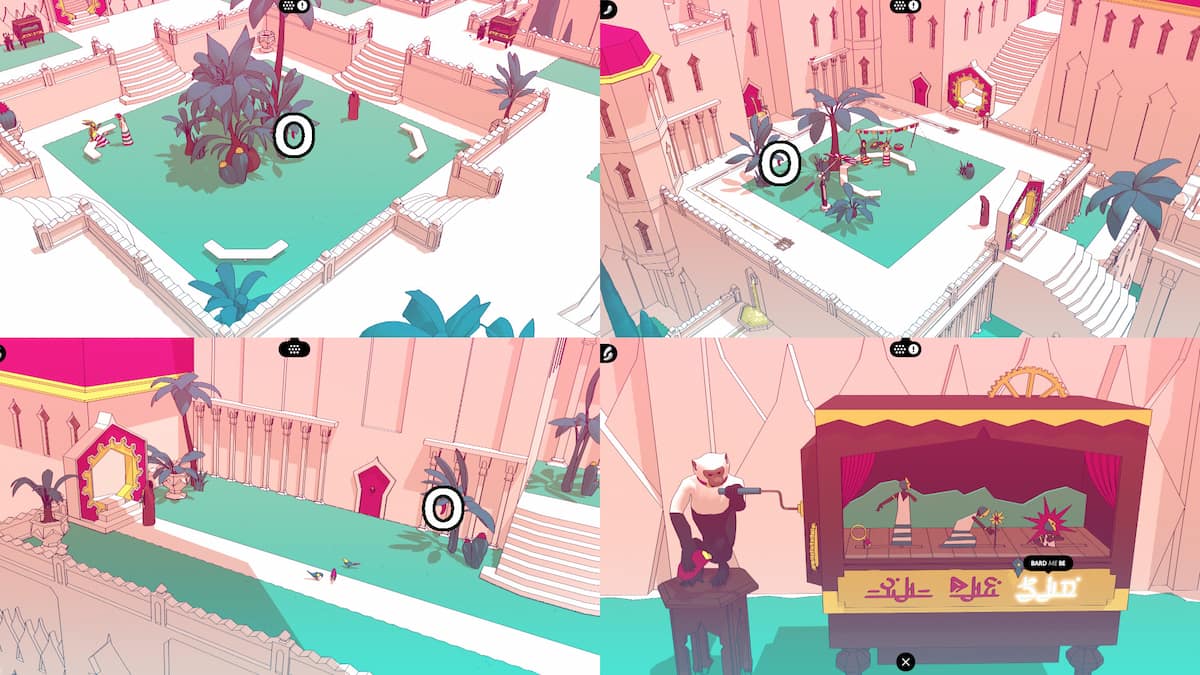
Head north from the monkey courtyard to find the second fruit. It will be on a tree to the left of the bard playing a harp. Move to the next screen from the Bard playing the harp, and you can find the third fruit on a tree to the left of the dais with the three statues on it (make sure to interact with the glyphs on the statues in order to get these glyphs for later). Head back to the Monkey Courtyard, and feed the three fruit to the three monkeys. This will unlock a new page.
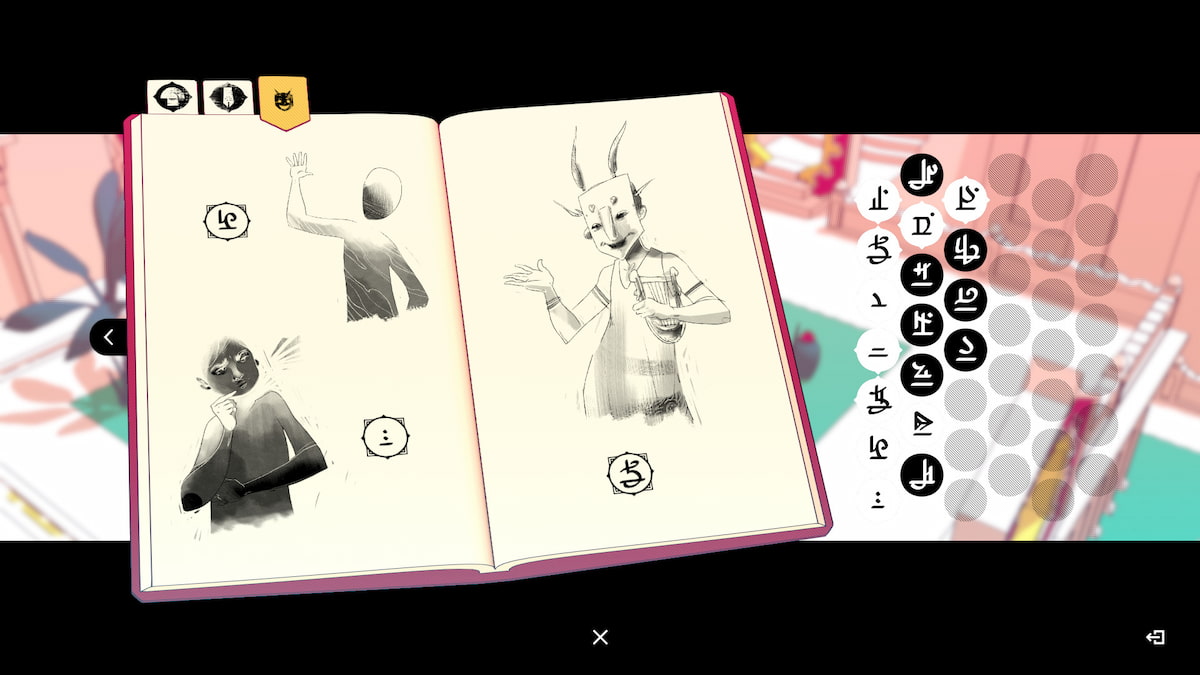
Glyphs: Weapon, Possess, Idiot
Once you have finished listening to the monkey's little box plays, you will get a new page. It will have the glyphs for Weapon, Hold or Possess, and Idiot. Fill the page in like so to complete it:
The servant's passages in the Gardens
After you have completed all the page above, it's time to move on. In order to do that, you will have to follow the servant into the servant's passage, which is located in the southern part of the monkey courtyard. The door will be locked, so you will need to follow the servant into the passage when they open the door to get in.
Fifth Fast Travel: Servant's Passage
Once you are in the servant's passage, you will need to head down the stairs and to the left. Take the top door, and it will lead you to another Fast Travel Point.
The Fast Travel room puzzle
In the same room with the Fast Travel point above, you can find a broken carved mural. If you put the pieces together, you'll get some Devotee language translated directly to the Bard's language, earning you a bunch more glyphs. Put the pieces back as the guide states above.
Glyphs: Me, You, Seek, Find
If you complete the Fast Travel room puzzle as stated above, you'll get yet another page for your notebook. This means you'll know the words for Me, You, Seek, and Find if you fill it out correctly.

Leave the Fast Travel room, and then head to the left. If you exit out of that door, you will find a servant's quarters location with several servants working. One is making instruments; you can see them through a little window, and there is a sign with a glyph on it near the window. Interact with the window to earn a new page.
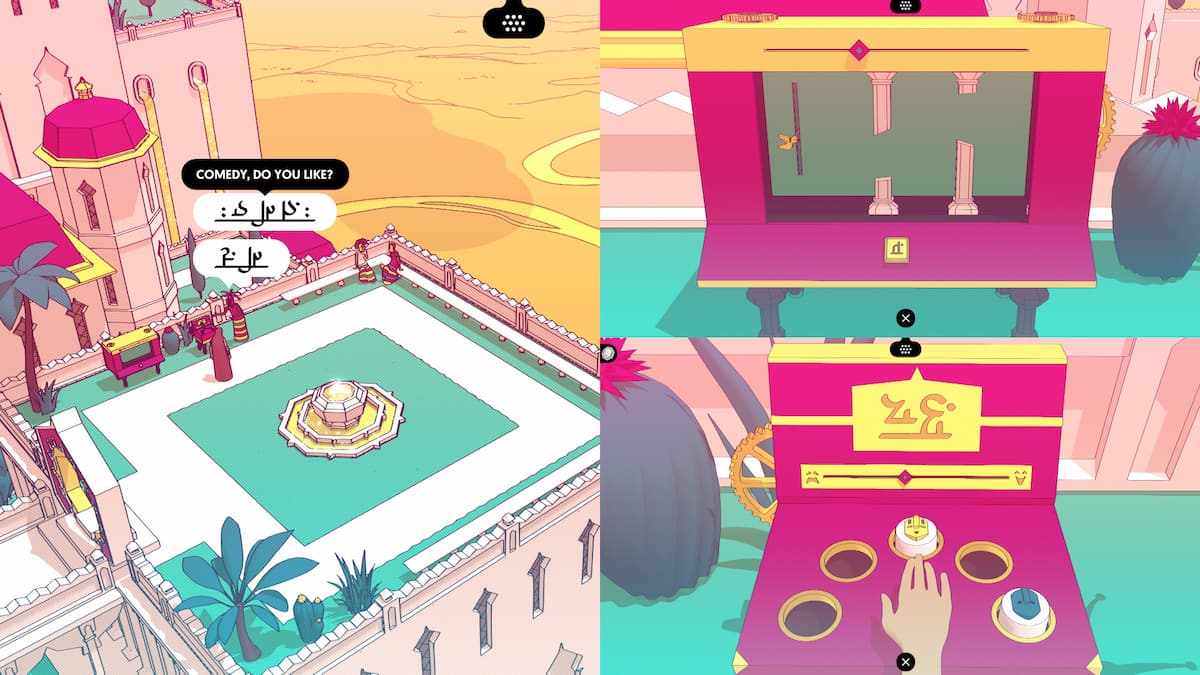
Glyphs: Music, Instrument, Comedy
If you have interacted with the servant's instruments window and the statues near the starting screen of the Gardens, you will earn a new page. It will have the glyphs for Instrument, Music, and Comedy.
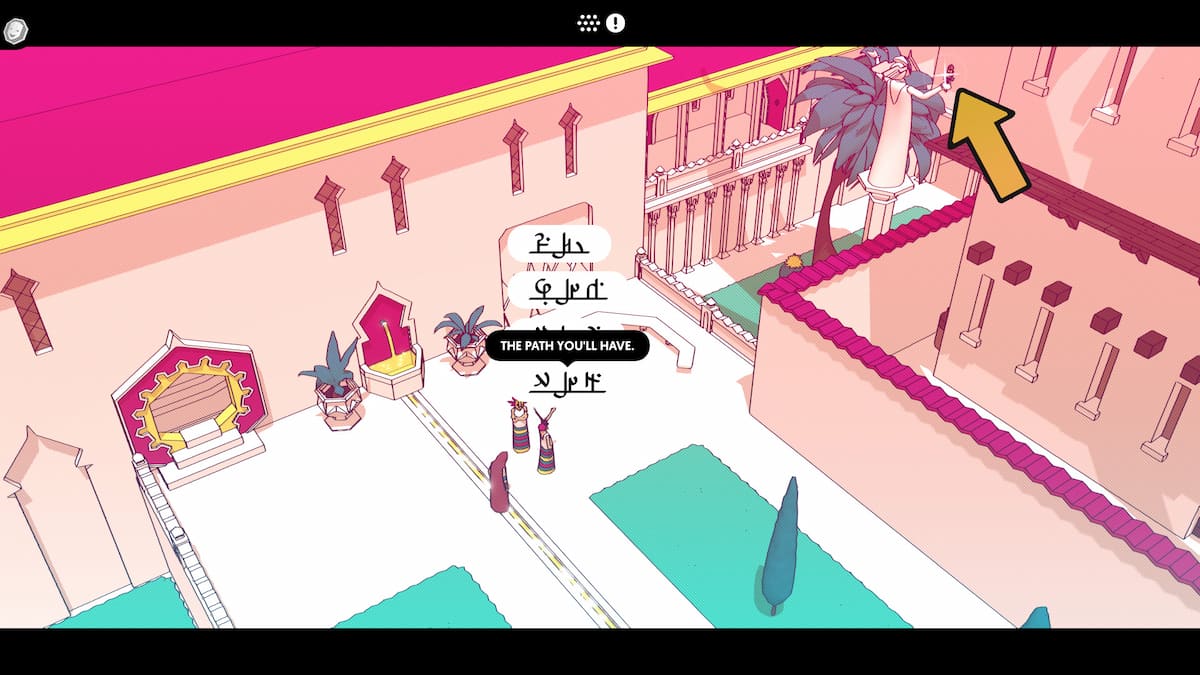
Walk past the instruments window after filling out the glyphs page, and head into the first door to the left of it. This will lead you up to the Agora. Make sure to look at the glyph on the gazebo-looking structure. You'll need this one later. Next, head over to the people standing around the grate on the left side of the screen. If you interact with them, you'll see that one of them dropped an item down the drain. You will be able to retrieve this later on. From the gazebo thing, head out the northwest part of the screen.
Fixing the boat with the hammer
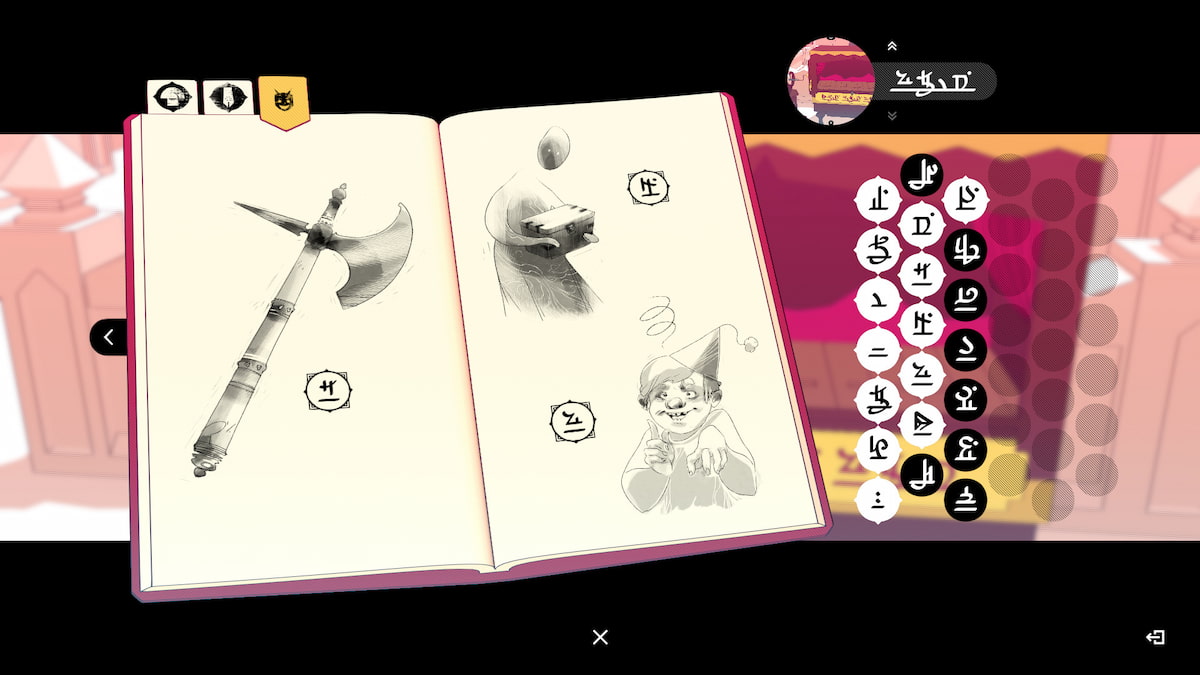
Next up, you will have to help a servant grab a tool to fix the boat. The servant will ask you for something, but you won't know the word for hammer yet. Head into the workshop to the left of the screen, and pick up the hammer on the back table. Then, interact with the sign on the wall to learn the words for hammer and pliers. Bring the hammer back out to the servant fixing the boat, and they will complete the repairs.
Glyphs: Hammer, Saw, Pliers
Once you have interact with everything in the toolshed, you will be able to fill in this new page. You will get the glyphs for Hammer, Saw, and Pliers, and you can put them in the page just like this:
Achievement: Scholar
If you have picked up and filled in all the glyph pages up to this point, you have half the glyphs for the whole game.
After riding the now-fixed boat across the water, you will be in a new part of the Gardens. Head up the stairs and up through the door. Interact with the signpost, then head north two more screens. You will find yourself in the Windmill location, and you will instantly fill out another glyph page.
Glyphs: Path, Windmill, Theater, Agora
Once you have entered the screen with the Windmill, you will unlock a new page with the words for Path, Windmill, Theater, and Agora, which is the name of the gazebo-looking thing. If you don't have this page, make sure you interact with the signposts in the area to help unlock it.
Playing the games in the Garden
Next, head south from the Windmill, then east from the hub. This will bring you to a balcony overlooking a beautiful vista. On the top wall, there is a person offering you an item if you play their games. There are two games; you only need to beat one of them to get a theater coin. But you should beat both of them in order to get the achievement. The first game is a Flappy Birds-copycat, and the second is a whack-a-mole game called Find the Idiot. In the first game, you need to fly in between the gaps of the columns using the Ascend button in the bottom center. Find the Idiot has you bopping the green-faced masks that are an obvious elusion to the Warriors that Bards think are big dummies.
Achievement: True G4M3R
Beat both the Flappy Bird-like game and the Find the Idiot whack-a-mole game.
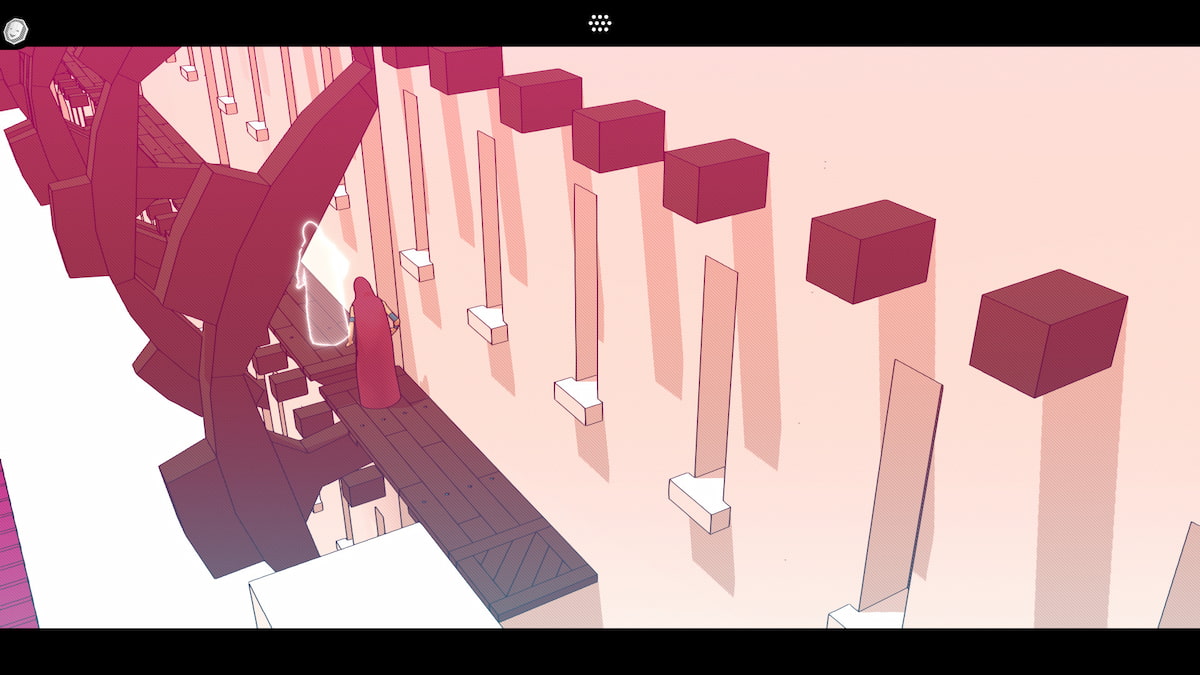
The Windmill jumping puzzle
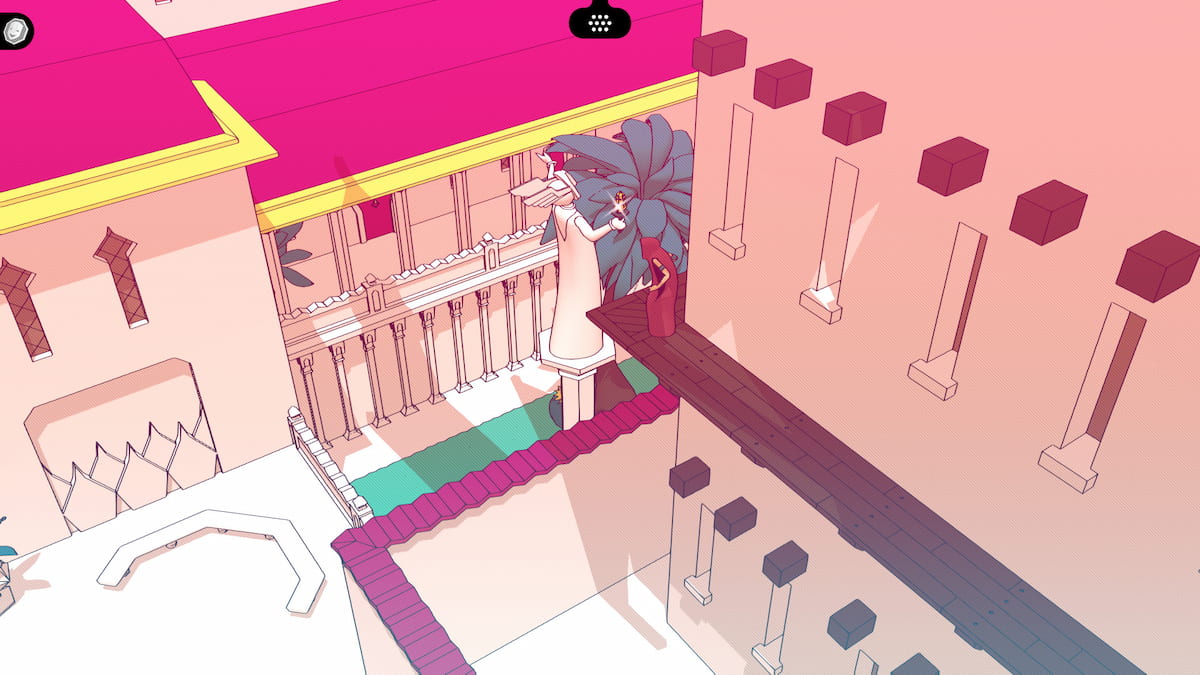
Next up, it's time to head to the Windmill. Speak to the triad of people gathered by the Windmill, and they will point you to the "flame" that is on a statue. The one proclaims that if you take the flame, you will be able to find the path to ascension; they are alluding to the flame that the statue is holding by the Windmill. Walk into the Windmill proper, then head up the stairs to complete the jumping puzzle. You basically just have to wait for the way to be clear before hopping across.
Once you have cleared the jumping puzzle, you can walk around the outside of the building, walk up to the statue, and take the flame it is holding. Continue in the same direction past the statue, and you will come out at the bottom, opening the doors to the Windmill. The Bards will ask you if you found the flame, which will unlock a new glyph page. The Bards will ask if you found the flame; show them the flame, and they will insist you are an idiot for trying to ascend.
Glyphs: Play, Fire, Ascend
After completing the Windmill jumping puzzle and getting the flame, you will be confronted by the Bards. They will speak to you and unlock a new page of glyphs with the words Play, Ascend, and Fire or Flame.
The Comedy club
Next up, head over to the Comedy club. Make sure to speak to everyone you see along the way, just in case you missed a glyph or two. This includes the two, seemingly drunk men hanging out in front of the Theater. Walk to the person in front of the Theater and give them your entrance token. Head up the stairs into the Theater, and interact with the curtain to watch the play.
When it is done, head to the left and out the servant's entrance. Inside this room will be a book you can interact with and a set of stairs to walk down. Interact with the book to unlock a glyph page.
Glyphs: Monster, Brother, Book
After interacting with the book in the theater backroom, you'll unlock another page. It will have the glyphs for Book, Monster, and Brother, and they can be completed as shone below.
Sixth Fast Travel Point: The Comedy Theater Backroom
If you head down the stairs in the Theater's backroom, you will come across a fast travel point. Interact with it before moving on so you can unlock the conversations later on.

From the fast travel point, you can unlock the door to the outside of the theater with the lever to the southwest of the fast travel point. You can also head through the door north of the point and unlock a bypass from the Theater to the Servants Passage.
Follow signs for the Theater, and you will find a purple door with a plaque nearby. In order to get there from the page depicted in the screenshot above, you will need to head Up then Left. This screen will be on the other side of a sign carved with the Theater sign. Interact with the plaque in order to get some more glyphs and another glyph page.
Glyphs: Abbey, Fortress, Man, Free
After interacting with the plaque underneath the Theater in the Servants Passage, you will finally have the glyphs for Fortress and Abbey, as well as Man and Free. Fill them out like they are below to complete this page.
Head through the Servant's Passage, always heading toward the signs marked Agora. From the purple door, you will need to go: Right, Right, then the Right door marked Path to Agora, Right, Right, Down, Left, then Down. Once you have reached the location underneath the Agora, you will be able to open another lever to unlock the door to open a shortcut, and you will be able to pick up the Compass that the Bard dropped down the grate. The compass will be in the little puddle underneath the carved symbol for Agora.
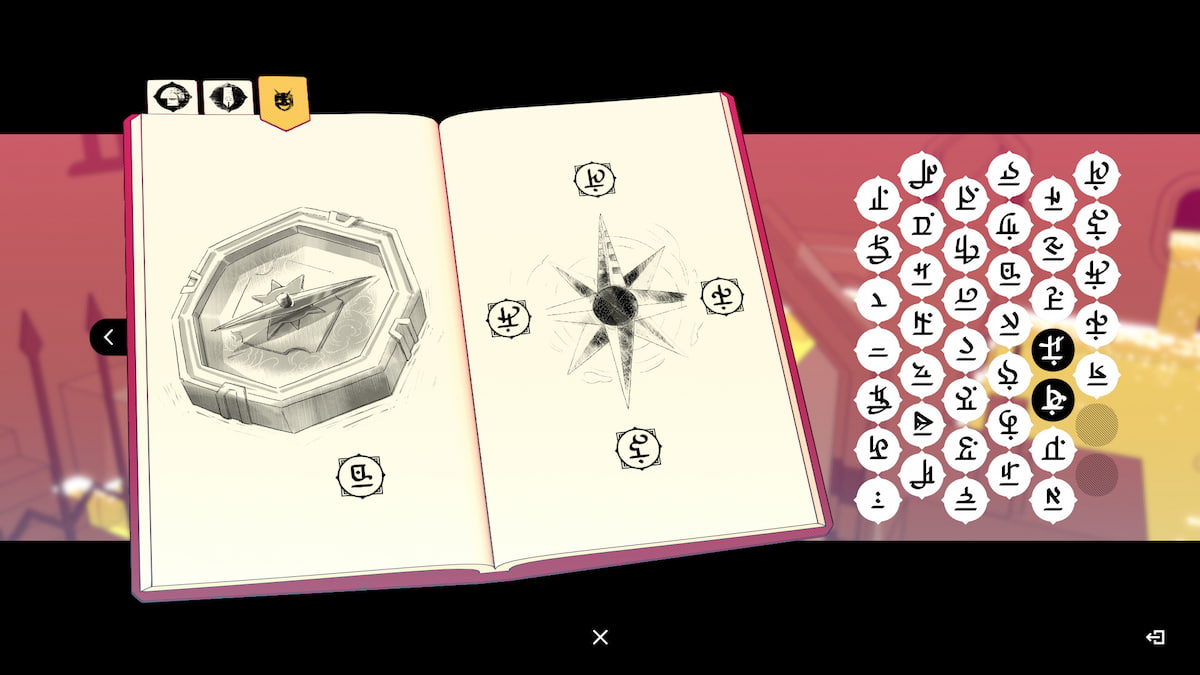
Glyphs: Compass, North, South, East, West
Looking at the compass you have picked up will unlock the page for Compass and the cardinal directions. You will need all of these to get through the next section, so make sure to fill these out. Now the Bard's language will be complete.
The Way Up
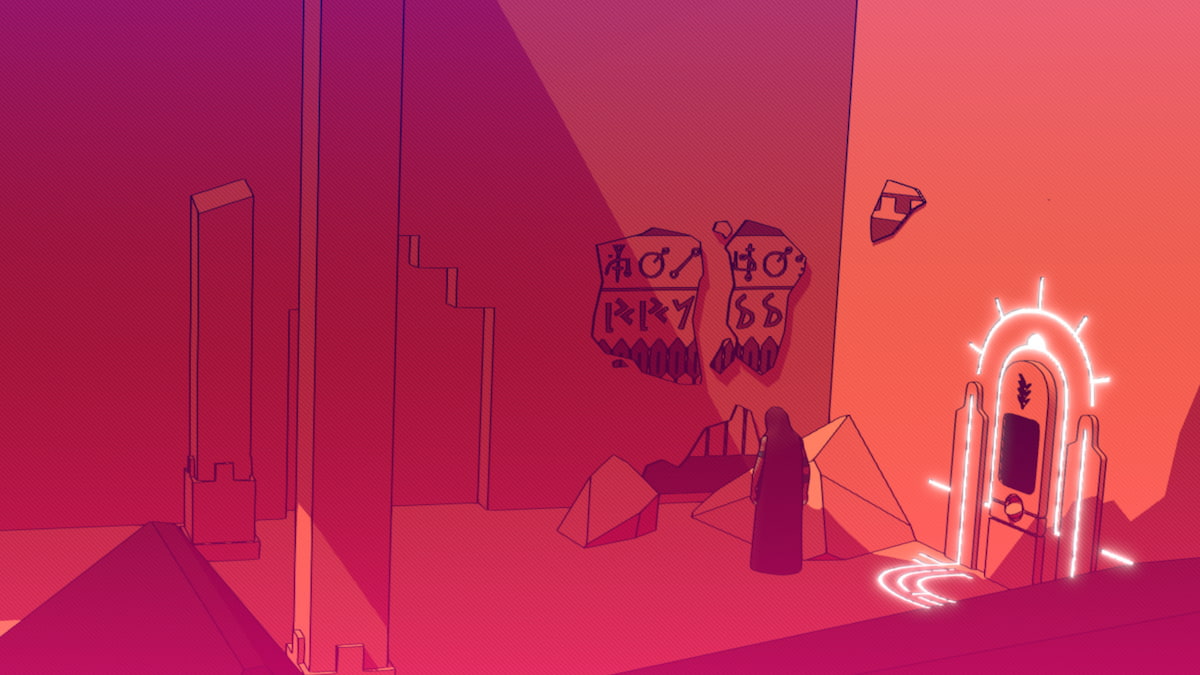
Finally, it's time to head to the Way Up. In spite of the fact that every Bard you have asked so far says only idiots want to try to Ascend, you will need to do it anyway. The Way Up can be access through the Servant's Passage, or you can head to the upper ground and look for it between the Windmill and the Theater. Either way, there should be plenty of signposts pointing you in the right direction. Head inside and put the flame from the Windmill statue inside the door to get it to open.
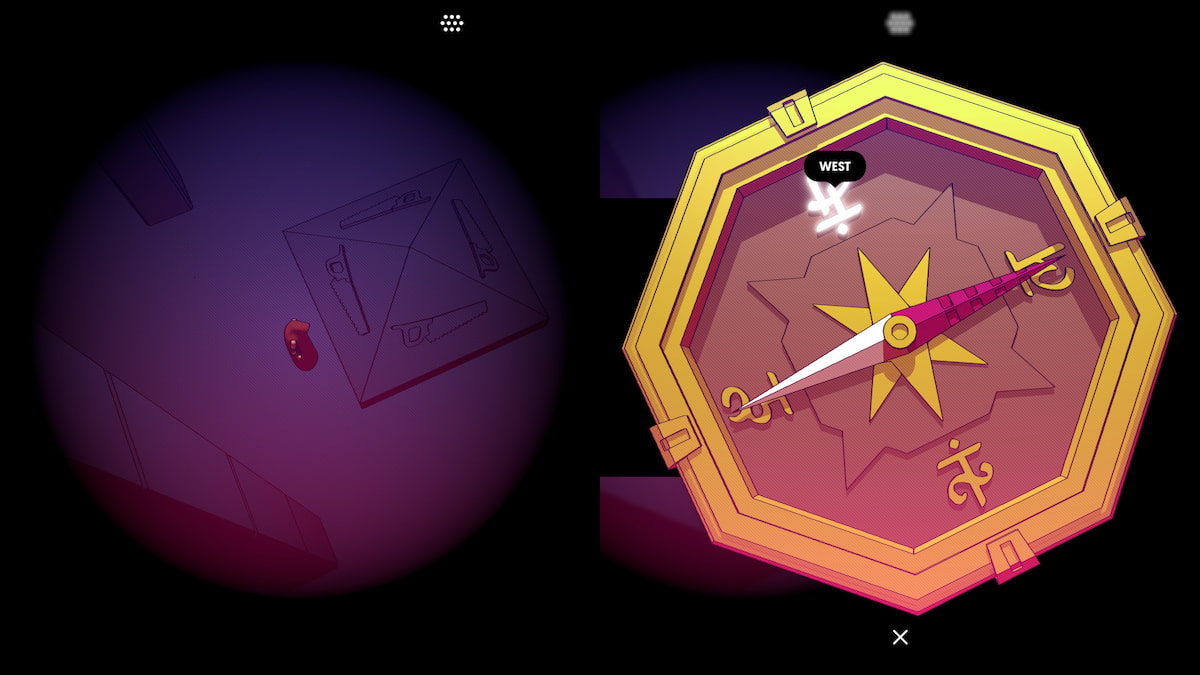
During the play in the Theater, you got the directions you need to go in the Way Up to get out. When you looked at the Book in the Theater backroom, you copied the text into your notebook. This is what you need to use to get through the Way Out. They state that if you see a saw, you should go west; if an instrument, you should head north; fire will go east, compass south, and weapon west.
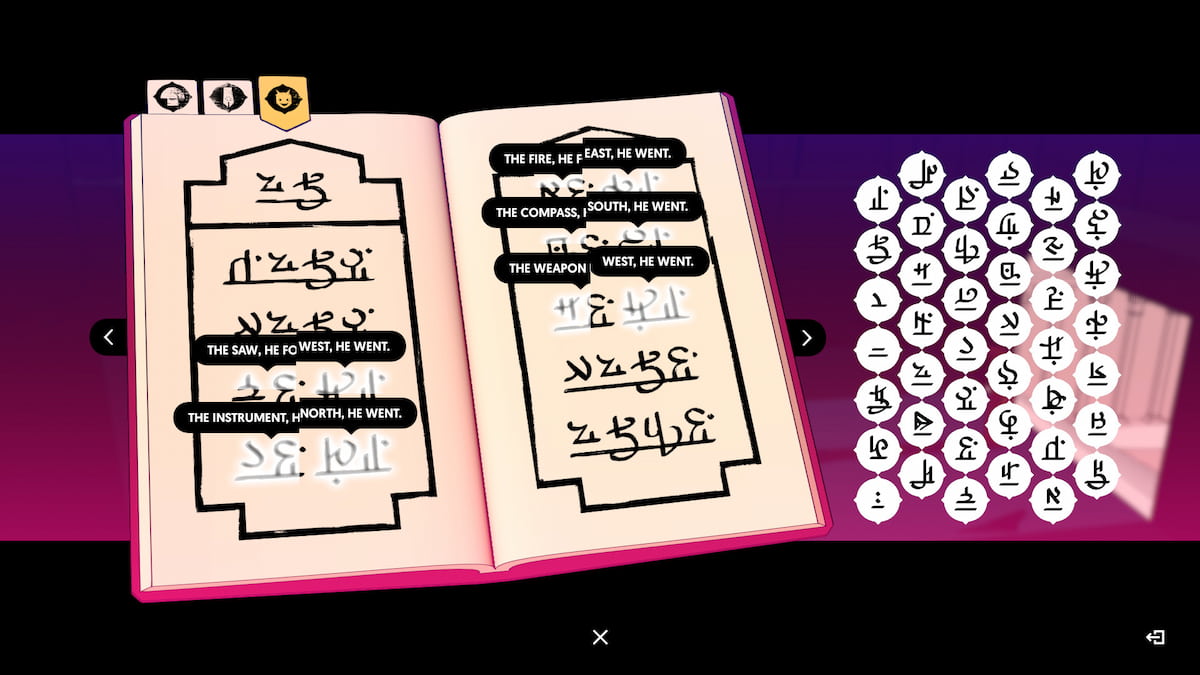
The first item you will come across in the dark is a saw, so you will need to go west. Pull out your compass and orient it to north, so you can see which direction is west. Walk to the west and look for the next picture. You will have to reorient your compass each time. The directions you have to go on the screen are Up, Up, Right, Right, Left.
Achievement: The Darkness
Reach the Galleries where the monster lives.
The Galleries and the Monster
Welcome to the Galleries. This location will get you to the next chapter, but it will also contain a monster that wants to murder you. Thankfully, the monster is allergic to light, so you can avoid it that way. Head to the left, and in the next room, the monster will be waiting. Walk down the stairs and hit the lever, then go through the doorway once it is lit up.
In the next room, you will need to sneak all the way around the blocks while the monster isn't looking, then you will need to pick up a rock, throw it at the minecart, then push the lever marked with a star in the screenshot below. Then you will need to run as fast as you can into the light before the monster can catch you. Here is a video of this section if you are stuck.
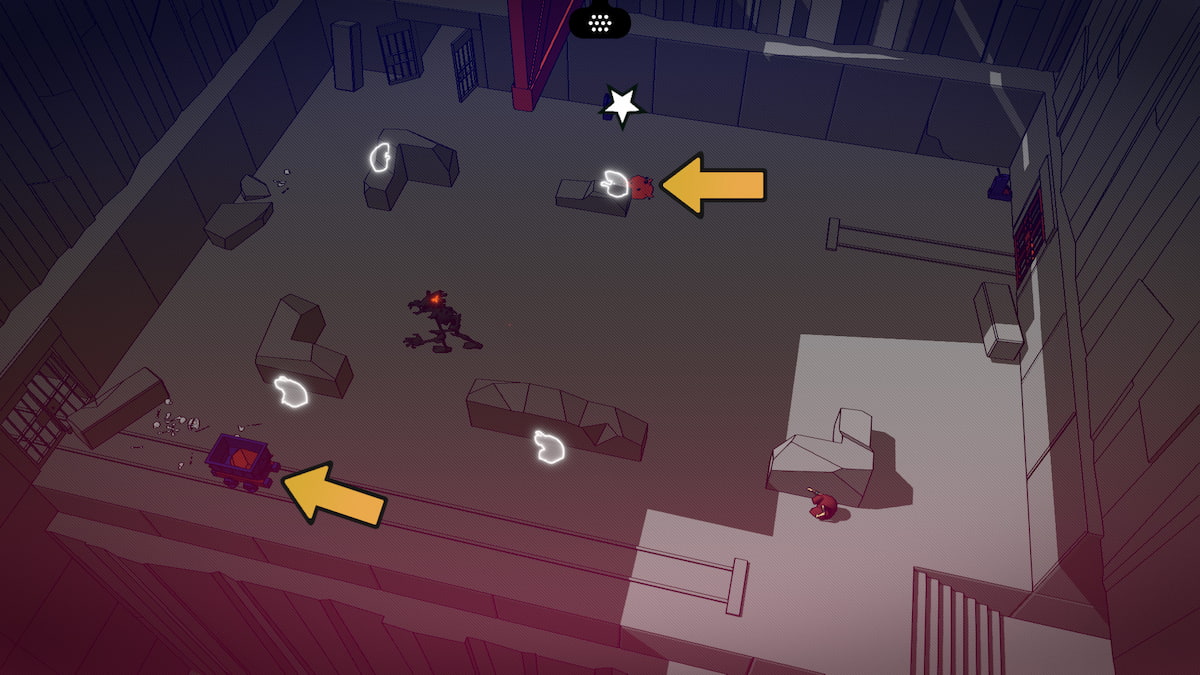
The last room with the monster has you trying to beat the clock. Move to the right as quickly as possible, move the cart out of the way, then pull the lever before the monster can catch up to you. It will be running down the hallway for you, and you will have just enough time to close the door before it reaches you.
All Glyphs in the Bards Language
Video Walkthrough of Chapter 3: The Gardens
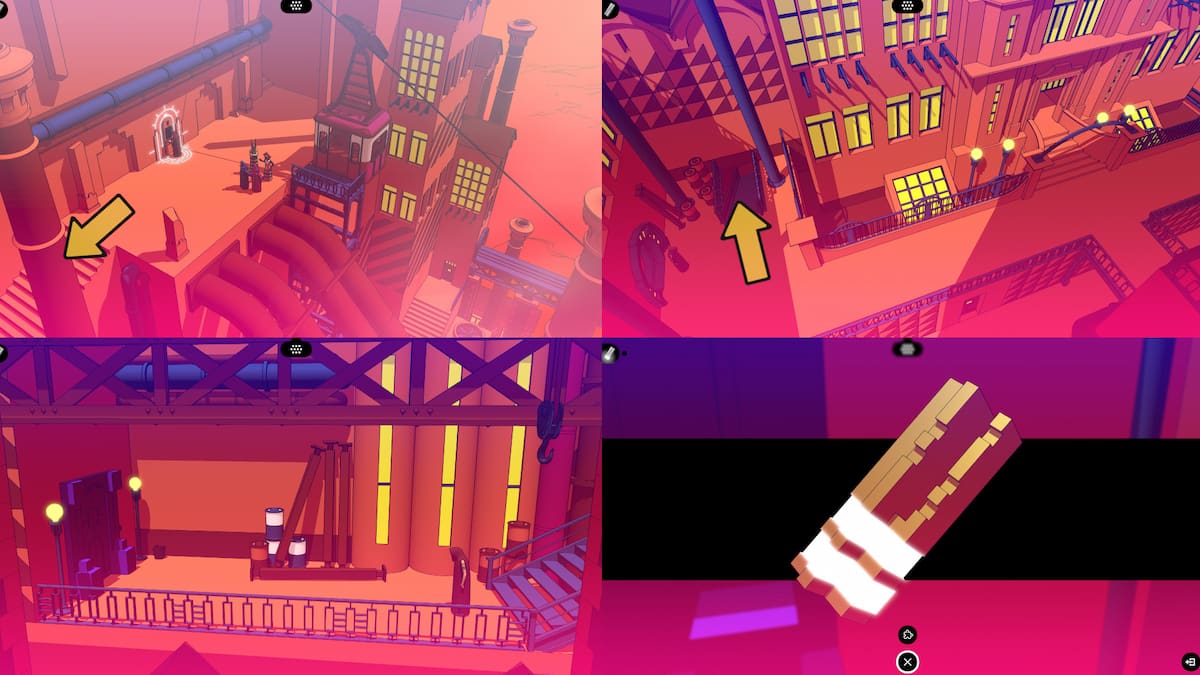
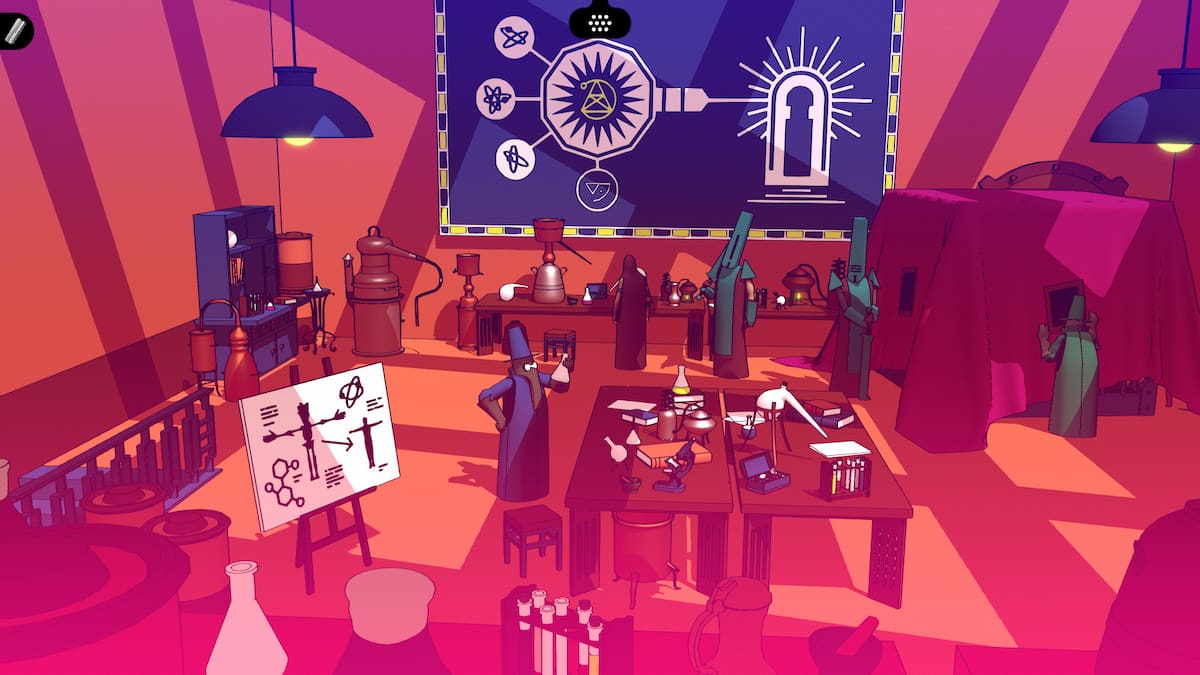
Chapter 4: The Laboratories of the Alchemists
We have made it to the land of the Alchemists. You have yet another language to figure out as well as a collection of items to get. Here is a complete walkthrough of this challenging area.
The elevator puzzle in the Galleries
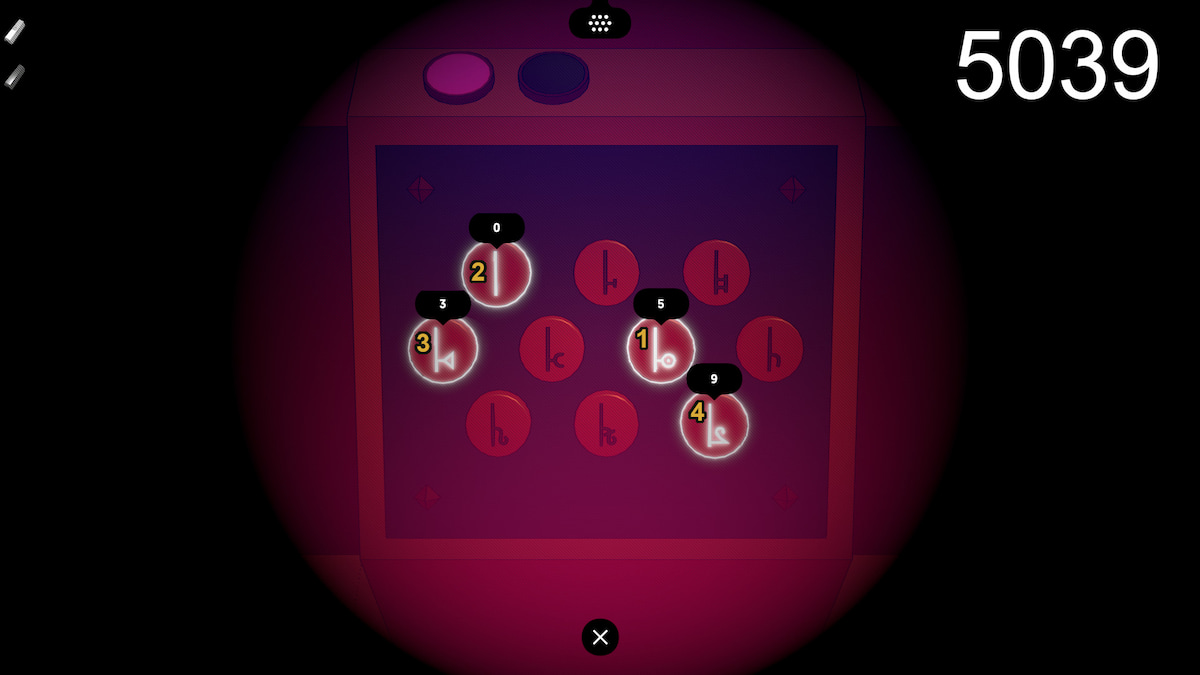
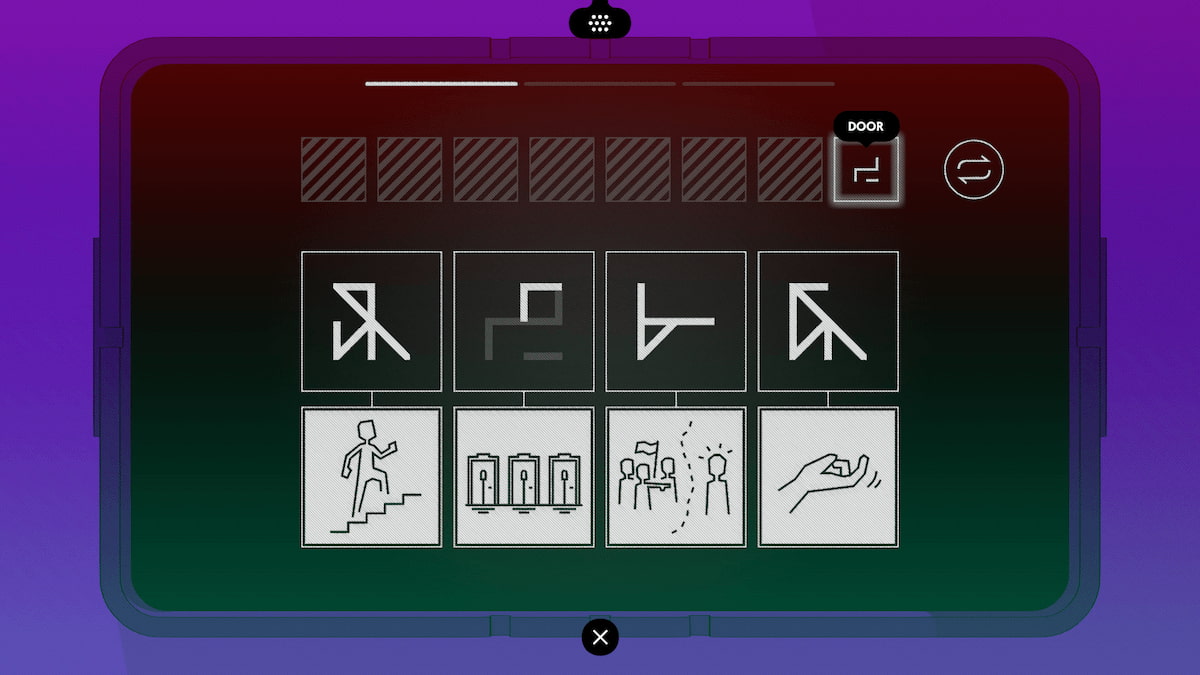
Now that you are free of the monster, head to the right through the now-open door. You will see an elevator with no power and a puzzle beside it. If you fiddle around with it long enough, you will realize that each of the symbols are numbers, and each one needs to be pressed, moved, or pulled in the right order to get the elevator working again. The number are listed below in the proper order so you can pull the right the first time. Once this puzzle is complete, the elevator will turn on and you can ride it to the next chapter.
Glyphs: 1, 2, 3, 4, 5
After you finish the elevator puzzle, you'll get a new page for all the numbers you just learned. This will be the first page in a whole new language for the Alchemists.
Seventh Fast Travel Point: The Galleries
Before going up the elevator, make sure to head through the northern door to get a few new symbols for your new language and a fast travel point.
Glyphs: You, Me, Seek, Find, Plural
If you interact with the mural above by moving the cart out of the way, you will need a Bard passage that has been translated into the Alchemist language. You will get a new page from this, and you can fill in You, Me, Plural, Find, and Seek.
Ride the elevator up into the Alchemists' city. The first thing you will want to do is interact with the map. Head up the stairs and look at the big white sign on the left side of the screen. While these glyphs won't mean much to you now, they will be important.
Next, go up the stairs to the right, chat with the two people standing by the elevator, and get a couple of new glyphs. After that head up the elevator. At the top, you'll find another person; chat with them to get some more glyphs. There is also another map; it will look the same as the one in the screenshot above, but it will be clear that you are on the second level and not the first. Head left, and you will find the library, which is where you want to go first.
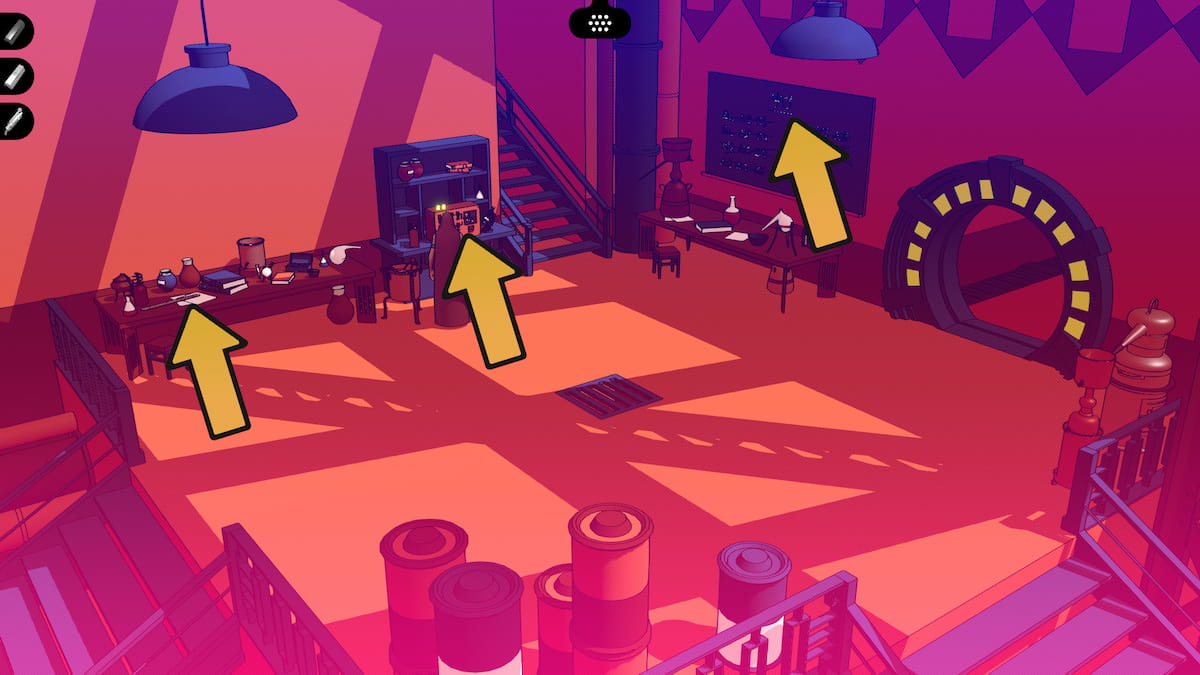
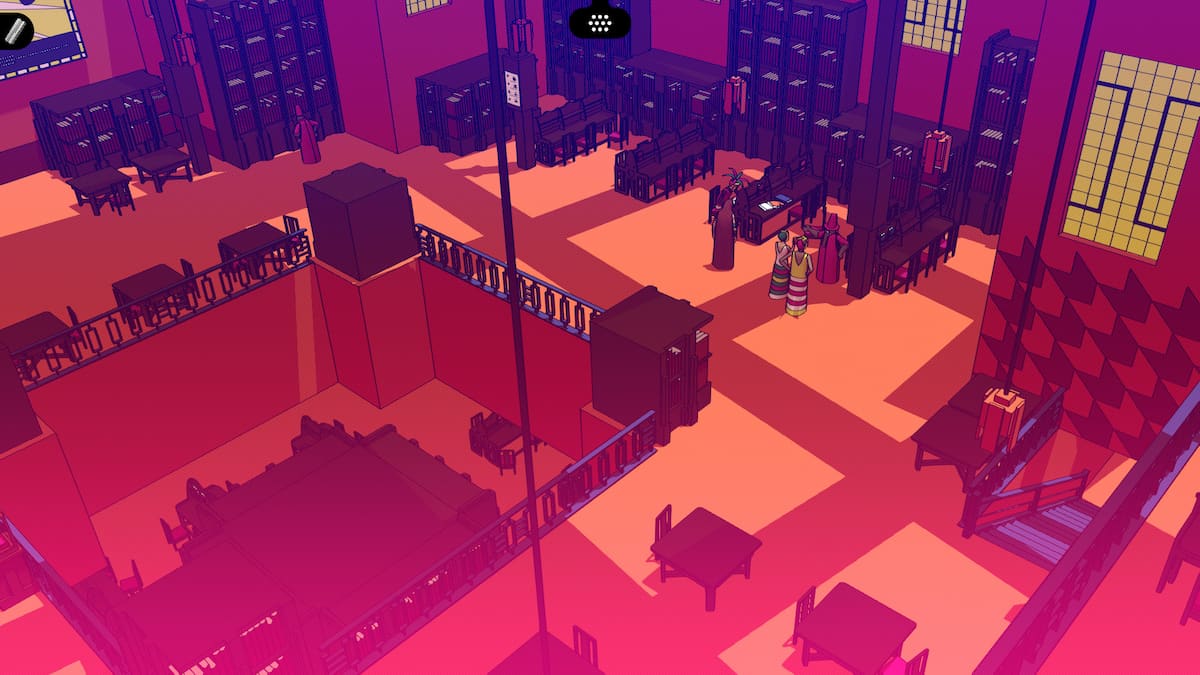
In the Alchemist library
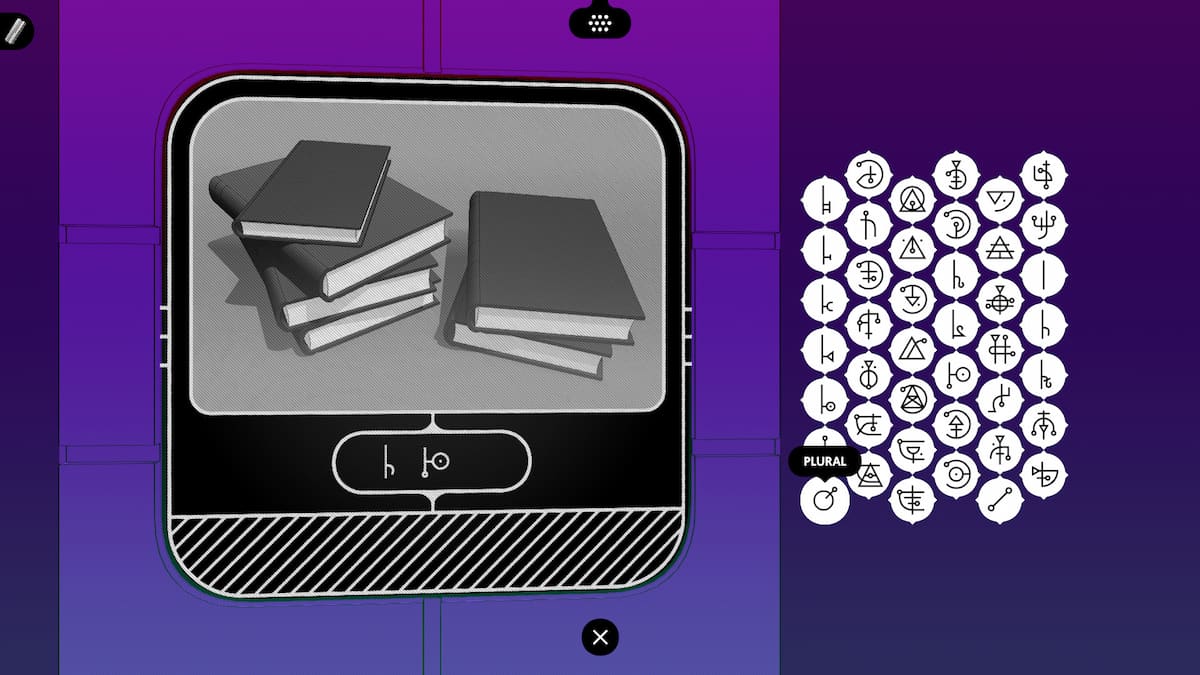
Just inside the door of the library is a book you can look at with a diagram some glyphs on it. Interact with it, then head to the left of the screen. You will find another book you can interact with as well as a person you can talk to. All these will give you more glyphs for your language book.

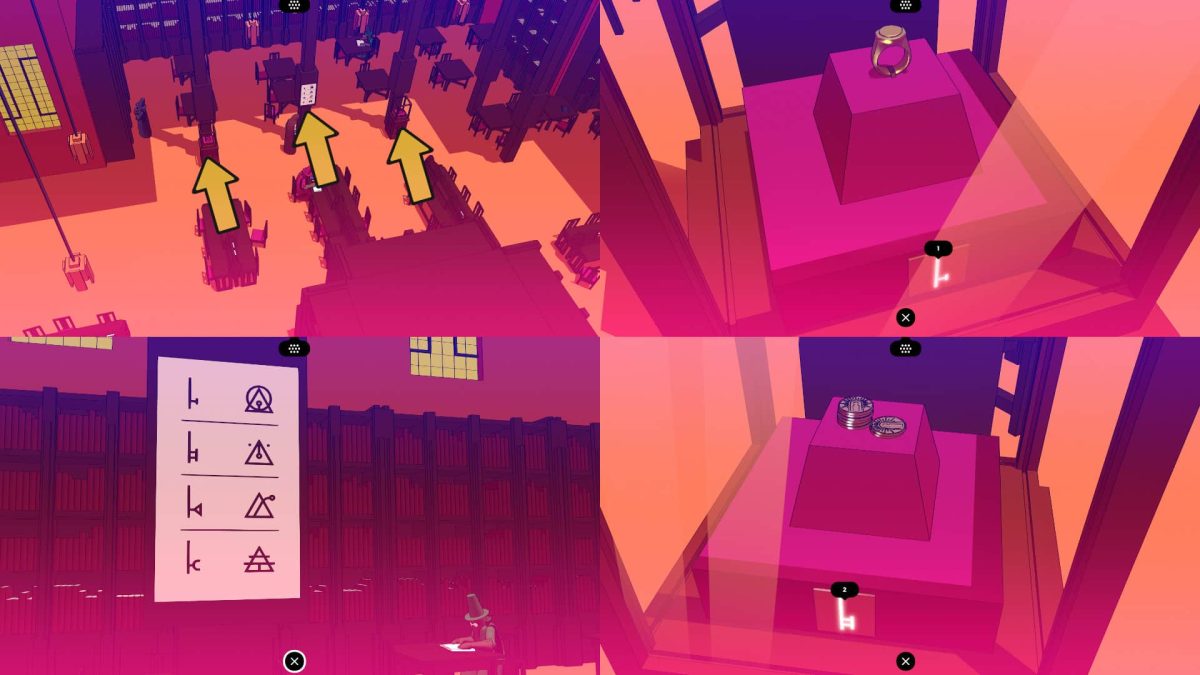
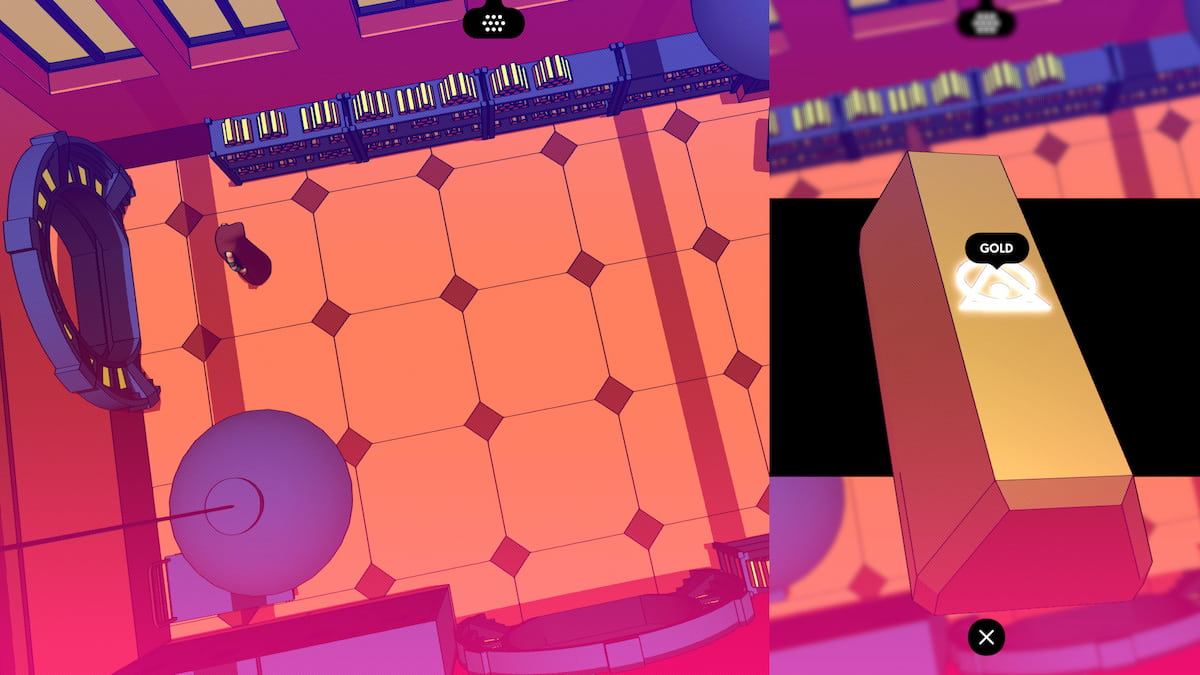
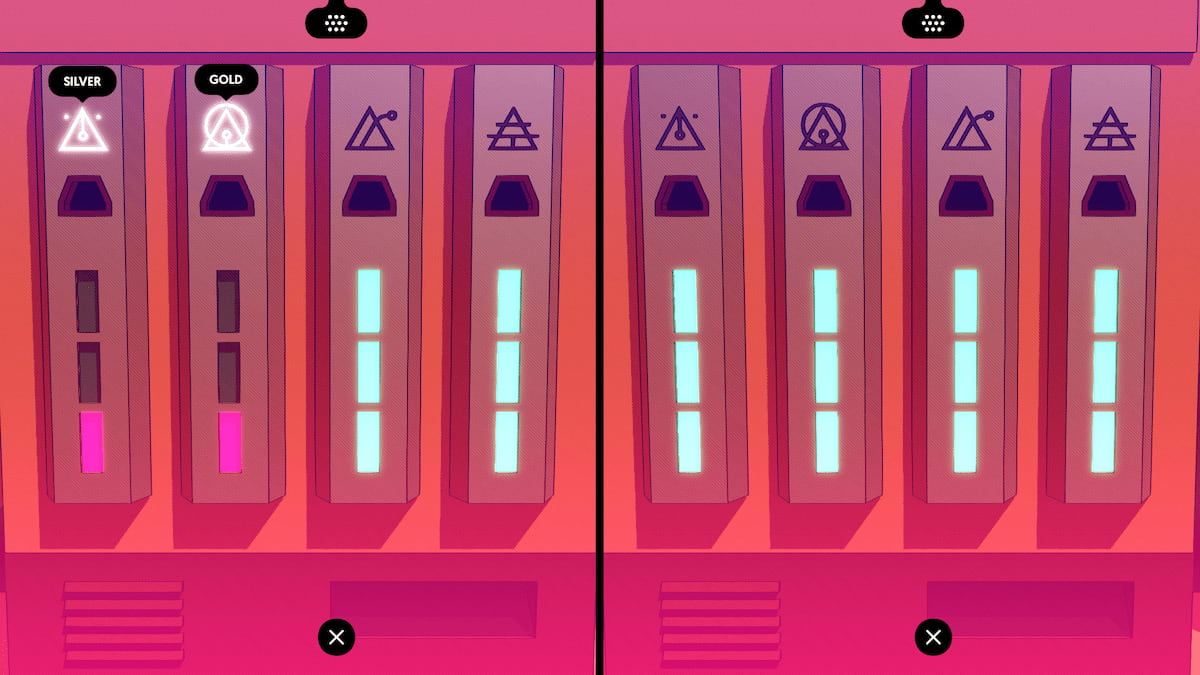
After that, you will need to head to the top of this screen, where you will find two glass cases. Once contains silver coins while the other contains a gold ring. Make sure to look at the numbers below each of these as well. Interact with the sign on the wall, and you'll notice it has the number one with a symbol. This correlates to the numbers underneath the object, making one equal gold and two equal silver, meaning there are two more items to find in the library.
Go back down towards the entrance of the library and climb the stairs to the second floor. Up here, you will come across several new things you can interact with. First, look at the book that is slightly up from the top of the stairs. Next check out the mural on the back wall, and then talk to the person standing near the mural. This will unlock a glyph page.
Glyphs: Alchemist, Brother, Bard, Book, Fairy, Door
Once you have interacted with the book on the second floor, the mural on the wall, and one of the two instances of the book symbol, you will get this page. It has the symbols for Fairy, Door, Book, Brothers, Alchemists, and Bards.
After completing the page, you can interact with the third glass case, which is on the left side of the upper part of the library. It is labelled with a three and contains a copper mug. So now you have one equals gold, two equals silver, three is copper, and a last mystery metal for four. Head down the stairs in the back corner in the upper left to get to the next location.
Down the stairs, you'll find a study nook or an office. Inside it, you can find three things to interact with: another glass case, a paper on the desk, and a hat laying on the floor by the desk. The papers on the desk won't be much good, but the hat has some helpful information inside that you will copy down into your journal. When you interact with the glass case, which has the number four and some carbon inside, you'll get another glyph page.
Glyphs: Gold, Silver, Copper, Carbon
Now that you have interacted with the four glass cases in the library, you'll get another page. This will have Gold, Silver, Copper, and Carbon. Fill it out like this to complete it.

Eighth Fast Travel Point: The Library
From the office with the fallen hat, walk down the stairs at the bottom of the screen. This will lead you out to a platform with a fast travel point. Activate it so you can come back here later.
Next up, it's time to eat! Head over to the cafeteria, which is this building on the right side of the second level. It has a knife and fork on the front of it. As you can see, the clock nearby has three times where the doors will open to feed the population. You'll need to wait until the small, hour hand is pointed at one of these three times: 12, 4, and 8. Then a bell will ring, sounding a lot like a school bell (you can also wait for the bell to ring, then book it to the entrance). The doors will open, and the people standing outside will pour in. Once you are inside, there is a person to speak with, and you can pick up a knife and fork from the silverware in the back.
The Gold Mine and Silver Mine
Now that you have possession of the fork and knife from the cafeteria, it's time to go to the Gold Mine. You'll need to head to level 1 via the elevator or stairs, then go left to get to this screen. Once you see the skull with the X sign, you are in the right place. Pull the lever, then hop into the cart to ride into the mine.
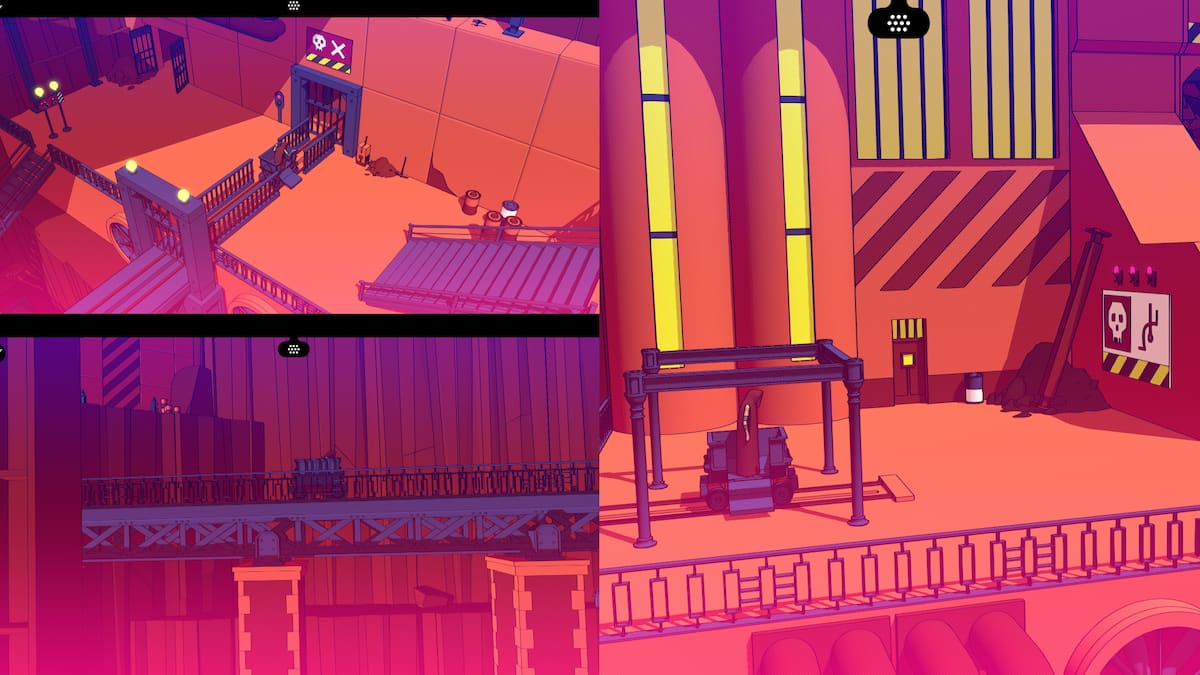
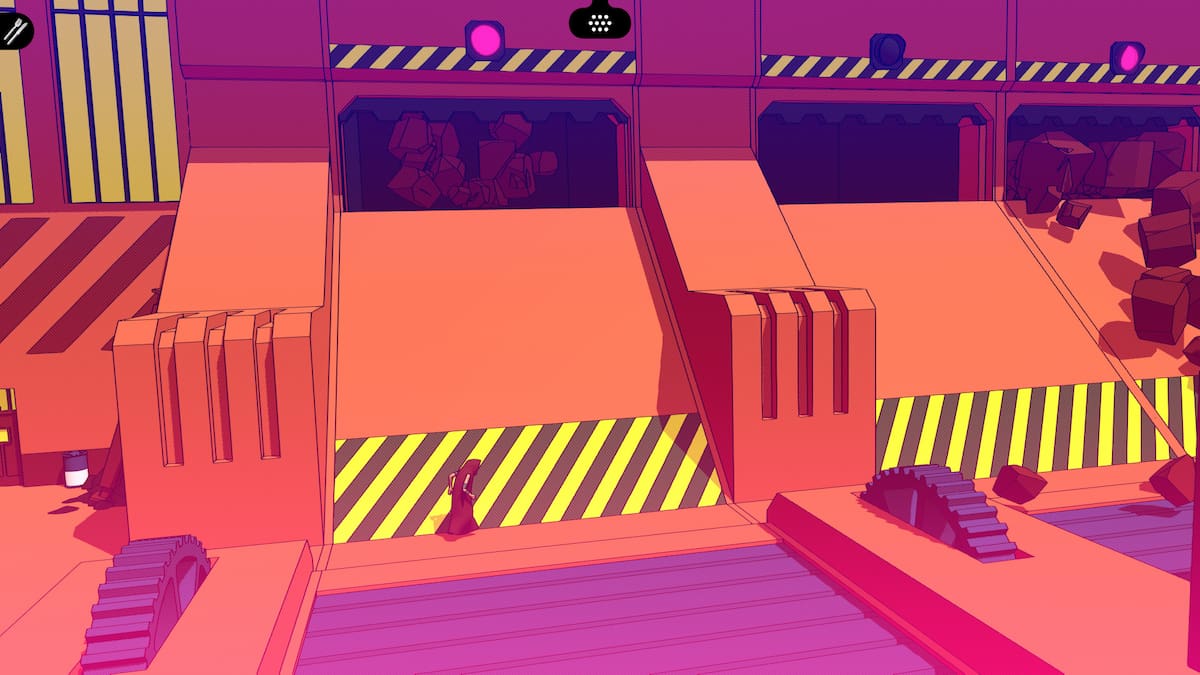
As you step off the cart, check out the sign with a new glyph for Danger on the wall, then walk through the puzzle with the falling rocks. You'll just need to time it right to make it through the puzzle.
On the far right side of this room is a staircase; head up it, then interact with the pink machine in the next room. You will need to turn on the machine, put the knife and fork inside the top of the machine, pull the lever until the reading is in the red, then press the blue button. This will cause the silver to melt and form into a silver bar.
Glyphs: Death/Dead, Open, Closed
After interacting with the pink machine in the gold mine and the danger sign in the gold mine, you'll get this page for Dead, Open, and Closed. Fill it in as it is below to get these three words.
In the next room, pick up a Gold Bar off of the piles of gold bars along the back wall. Now you have both a gold bar and a silver bar, which will be needed for the Transformation Key later on. Head out of this room through the door on the bottom of the screen.
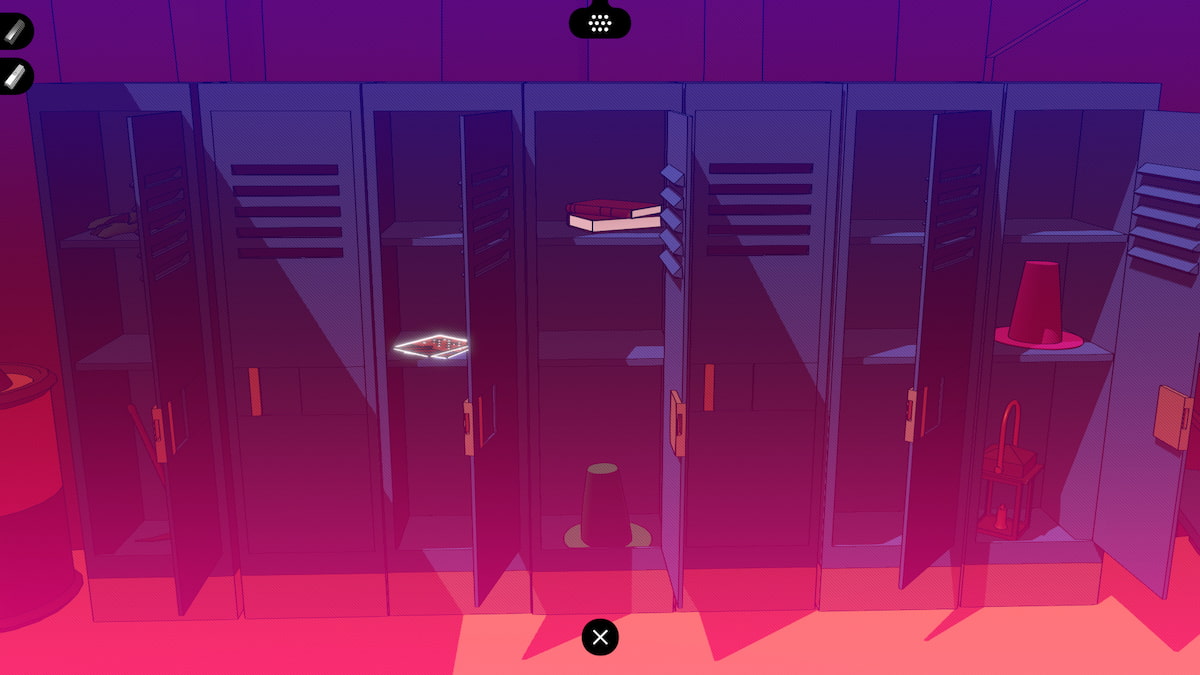
In the next room, you will find several lockers. Inside the third locker from the left, there will be a set of two keycards. Pick these up. There is nothing else in the lockers you need to grab.
Enter the Silver Mines
Use the first keycard to open the door in the left side of this room, and it will lead out into the entrance of the mines again. Head to the top of this screen and to the left, looking for a stairway down. This will lead you to the entrance of the Silver Mine. You will need to use the second keycard to open this door and head inside.
Inside, head to the left to find an Alchemist trapped by a cart. If you move the cart for them, they will drop an object on the ground that you will automatically pick up. It is a lighter, which can be used to light fires. You will also know the glyph for Help now.

Walk back to the right; there will be a staircase hidden at the bottom of the screen under the doorway out of the Silver Mine. Inside will be a mural with more glyphs and a fast travel point.

Ninth Fast Travel Point: Silver Mine
In the Silver Mine, head straight down from the entrance; there will be a well-hidden staircase at the bottom of the screen. Walk down it to find this hidden Fast Travel Point.
Glyphs: Not, Warrior, Plant
You will get this page after interacting with the mural on the wall above the fast travel point in the Silver Mine. You will get the words for Not, Warrior, and the word for Plant.
Laboratory 2
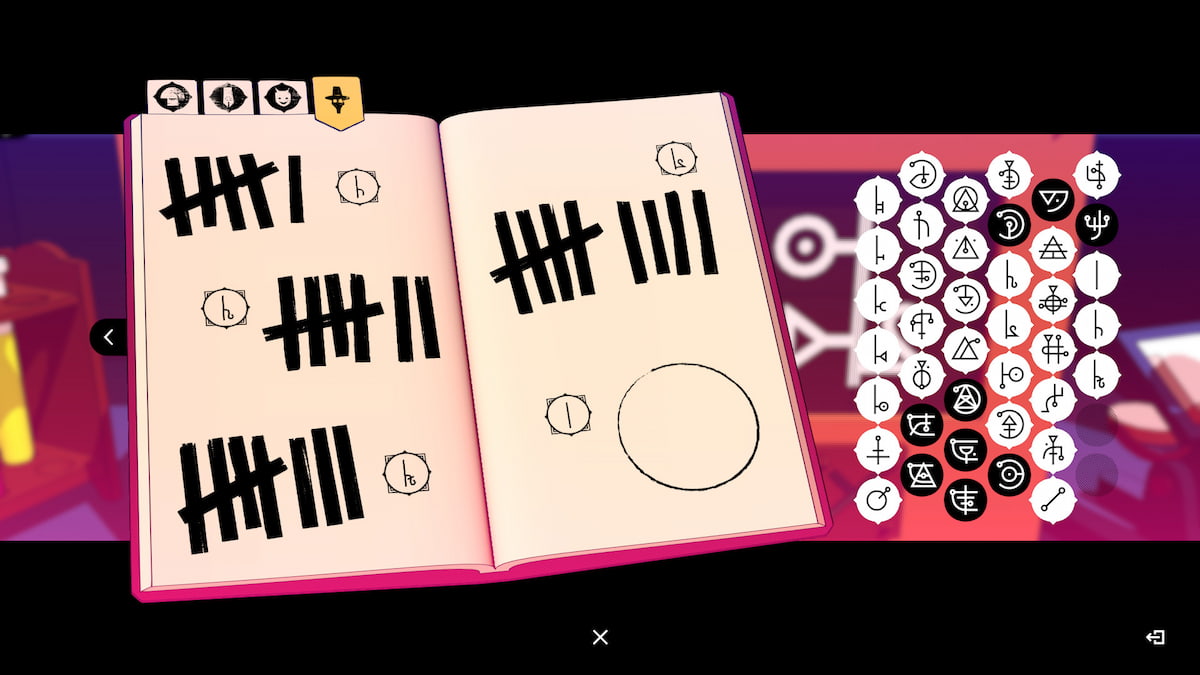
From the Cafeteria, if you head south and down the stairs, you'll come across the Laboratories. In the first lab, you'll find three things you can interact with: a ruler, which has all the numbers in order, a machine with numbers on it, and a chalkboard with more glyphs. If you interact with the number machine and flip through all the numbers, you will unlock a new glyph page.
Glyphs: 6, 7, 8, 9, 0
If you interact with the machine in the Laboratory with all the numbers on it, it will unlock this new page for the other numbers you'll need to beat this part of the game. It will have the symbols for the numbers Six, Seven, Eight, Nine, and Zero.
In order to make the symbol on the right, which is the same symbol from the library in the note inside the hat, you will need to put in the symbols for 5-0-3-9. Take note of this number; you'll need to it get into Lab number 3. After that, go down the stairs to the left to the next lab.
Glyphs: Library, Cafeteria, Laboratory, Mine
Now that you have seen the main four sections of the Factory, you will get a new page for the Library, Cafeteria, Lab, and Mines glyphs. Fill out the page like this to complete it:
Laboratory Number 3
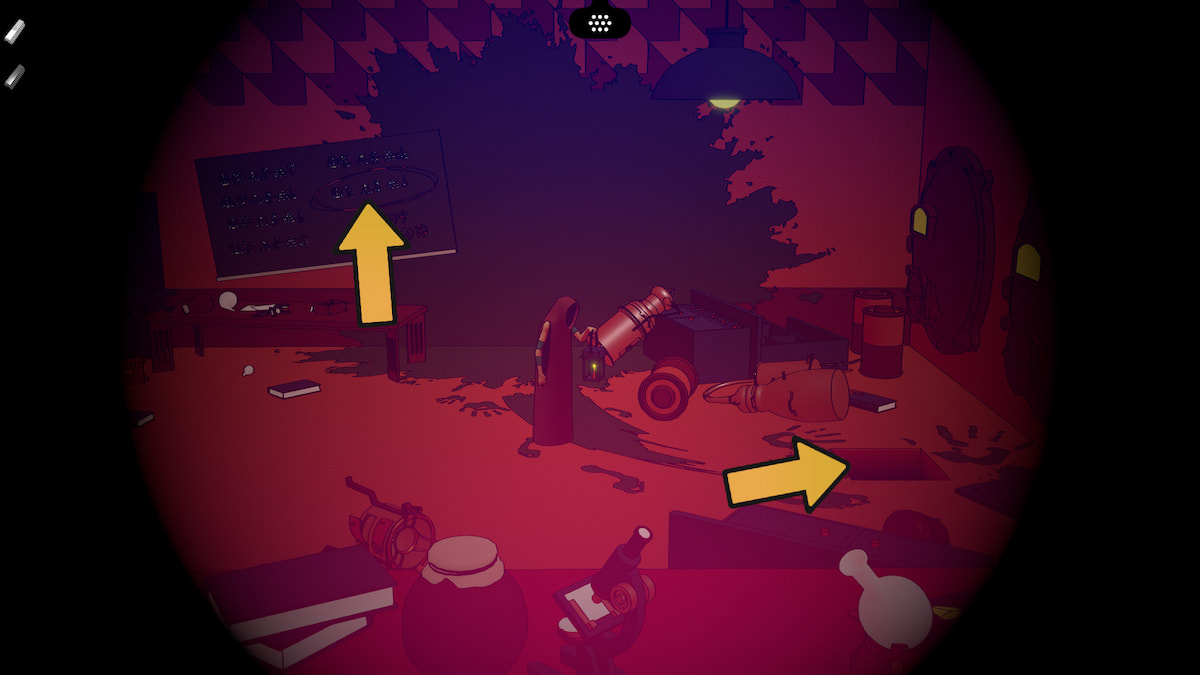
Laboratory number 3 is locked up. In order to get there, you will need to walk out the back door of Laboratory 2; head out into the gate, then interact with the monster painting on the wall to get more glyphs. This will give you a new page.
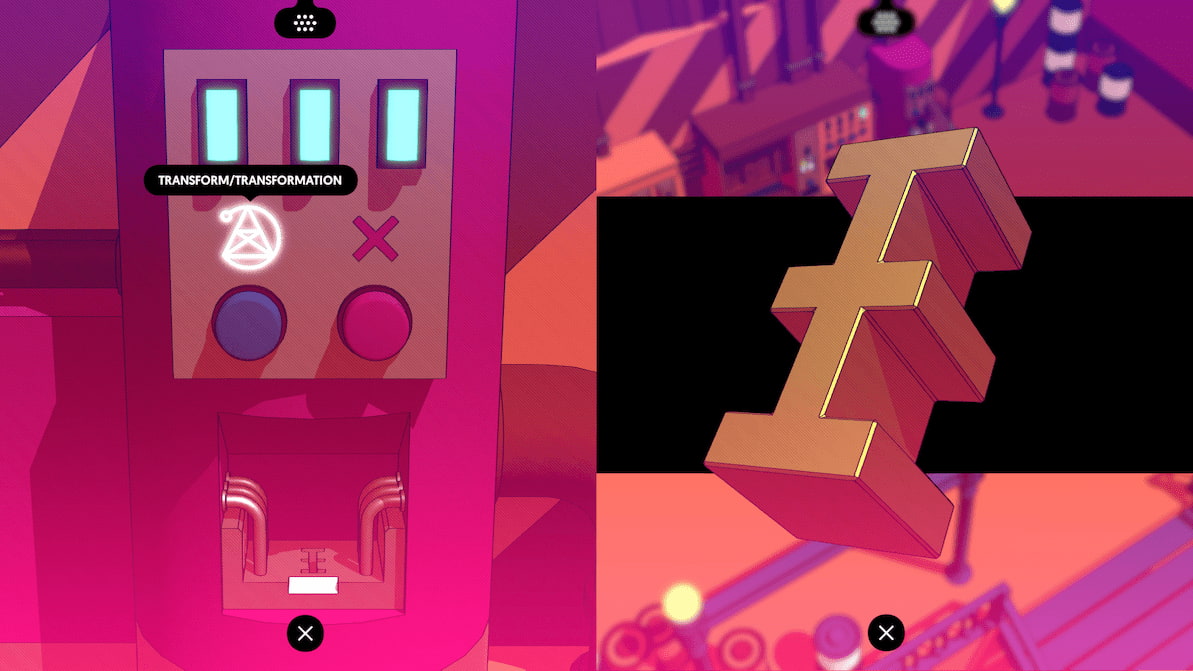
Glyphs: Transform, Formula, Monster, Fear
Transform, Formula, Monster, and Fear are the four new glyphs from this page. If you don't have it, make sure you have interacted with the graffiti on the wall by Lab 3, the glyph on the floor of the Transformation room, and the people in Lab 1.
In order to get into Lab 3, which is dark, you will need to light the unlit lantern by the door with the lighter you got from the Silver Mine. Lighting it will give you the final page of glyphs in the Alchemists language.
Glyphs: Make, Fire, Help
Once you have helped the trapped person in the silver mine, seen the page about the lighter in the library, and lit the lamp by the entrance to Lab 3, you will have the last page for the Alchemists Language. This last page has glyphs for Make, Fire, and Help.
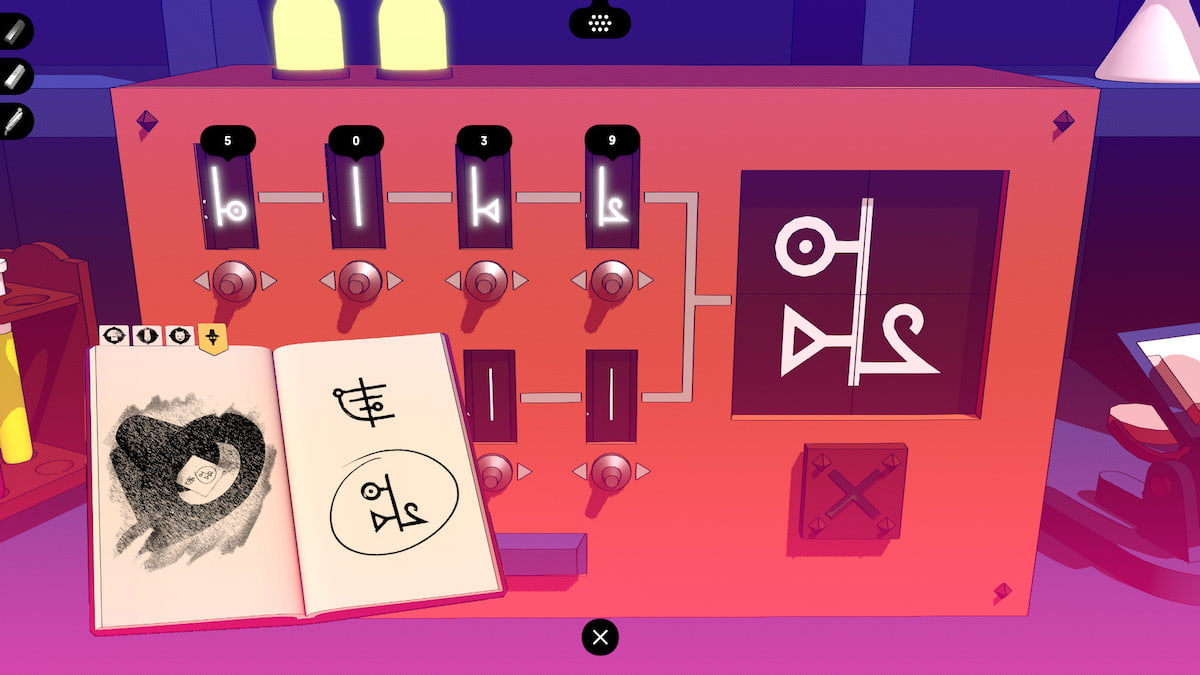
Armed with a light source, you can finally head into Lab 3. The door to get inside it will be locked, and you'll need that four-digit number from the machine in Lab 2, recreating the symbol on the note inside the hat from the library. This number is 5-0-3-9. Type it into the keycode to proceed into the lab itself.
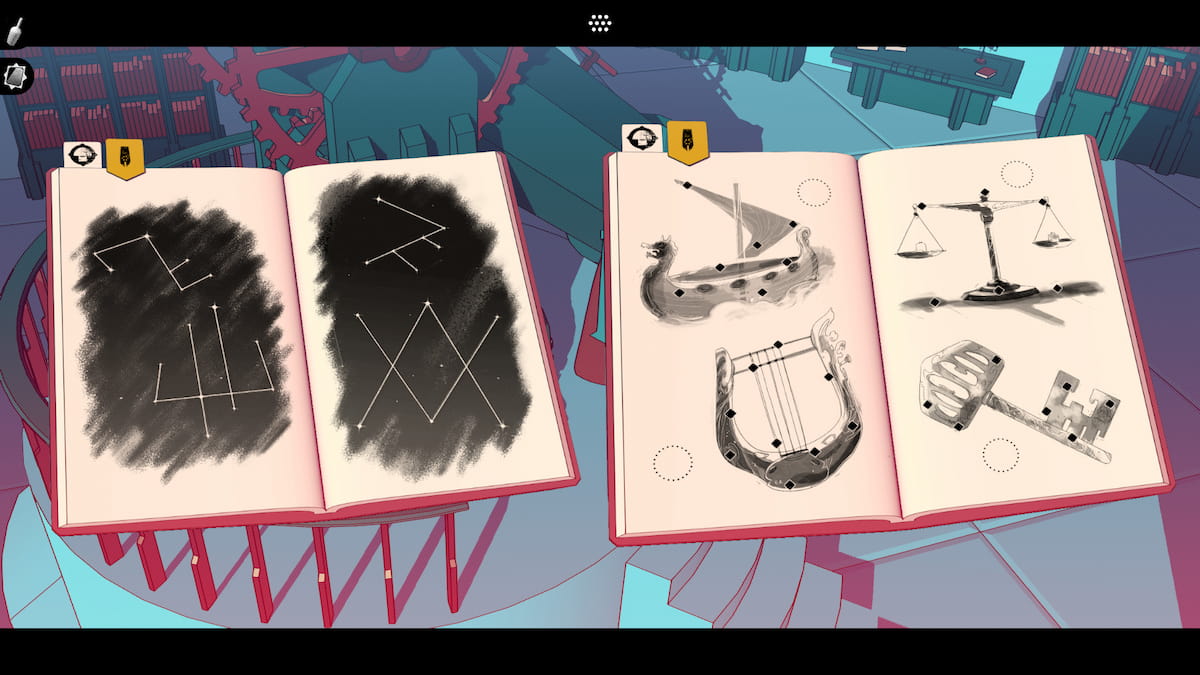
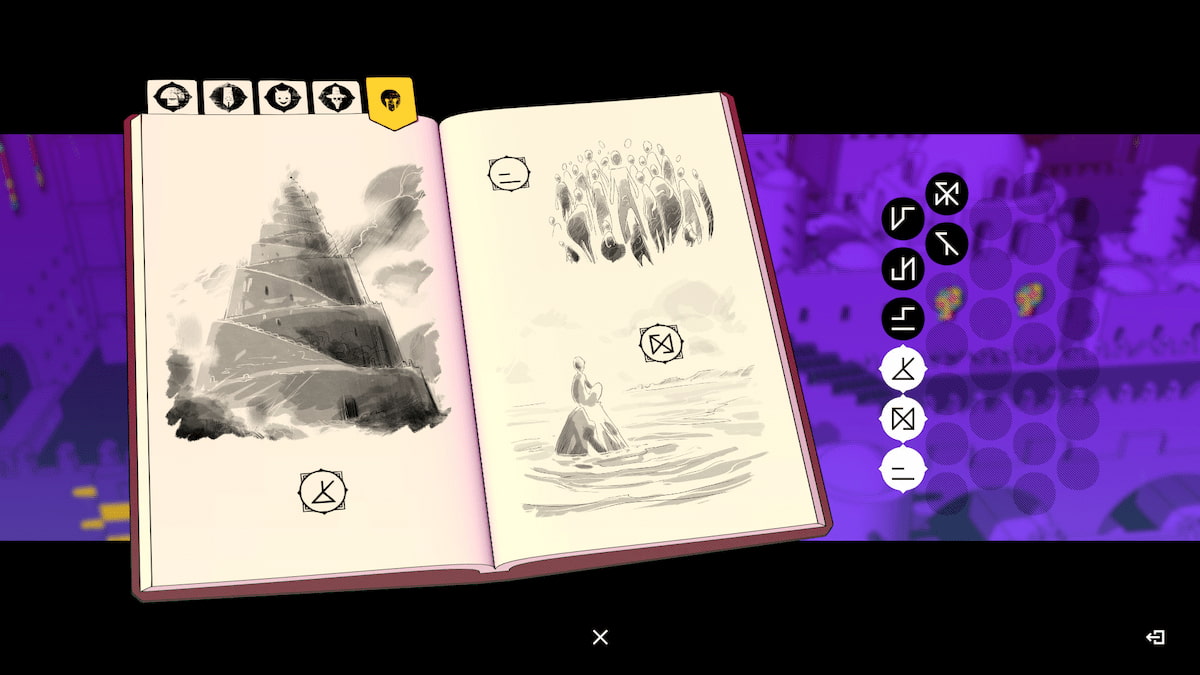
There are two points you can interact with in Lab 3. One is the hole in the floor; the second is the chalkboard. The chalkboard is the important thing here; make sure to look at it to get the formula you need for the Fairy Gate.
As soon as you interact with the chalkboard, you will automatically write down the formula in your notebook after looking at it. The Formula has the symbols for Gold, Silver, and Carbon. Each one has a symbol next to it.
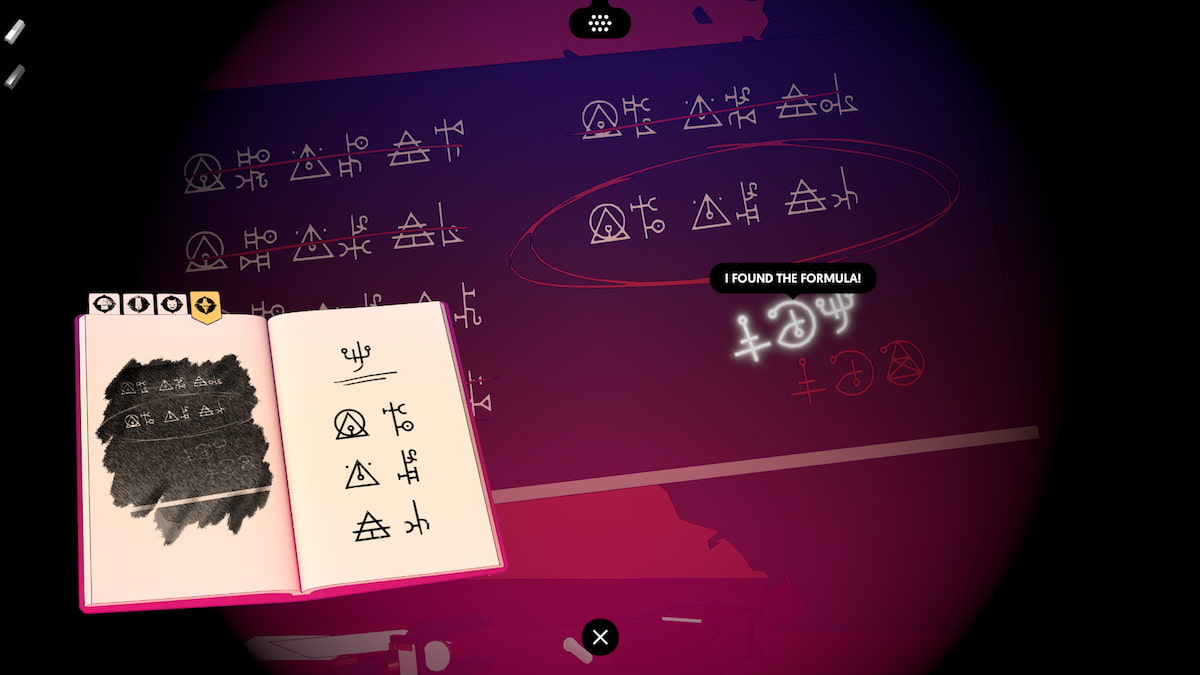
The way these symbols work is fairly simple, so let's break it down. The upper left hand corner of the number (1) is the 1,000s position. (2) is the 100s position, (3) is the 10s, and (4) is the in the ones position. So if you take this number below, the first number is 1, the second is 4, then 0, and 5. So 1,405. If you look at the page with the numbers on the page copied from the chalkboard, you get Gold 1405, Silver 0812, and Carbon 0046.
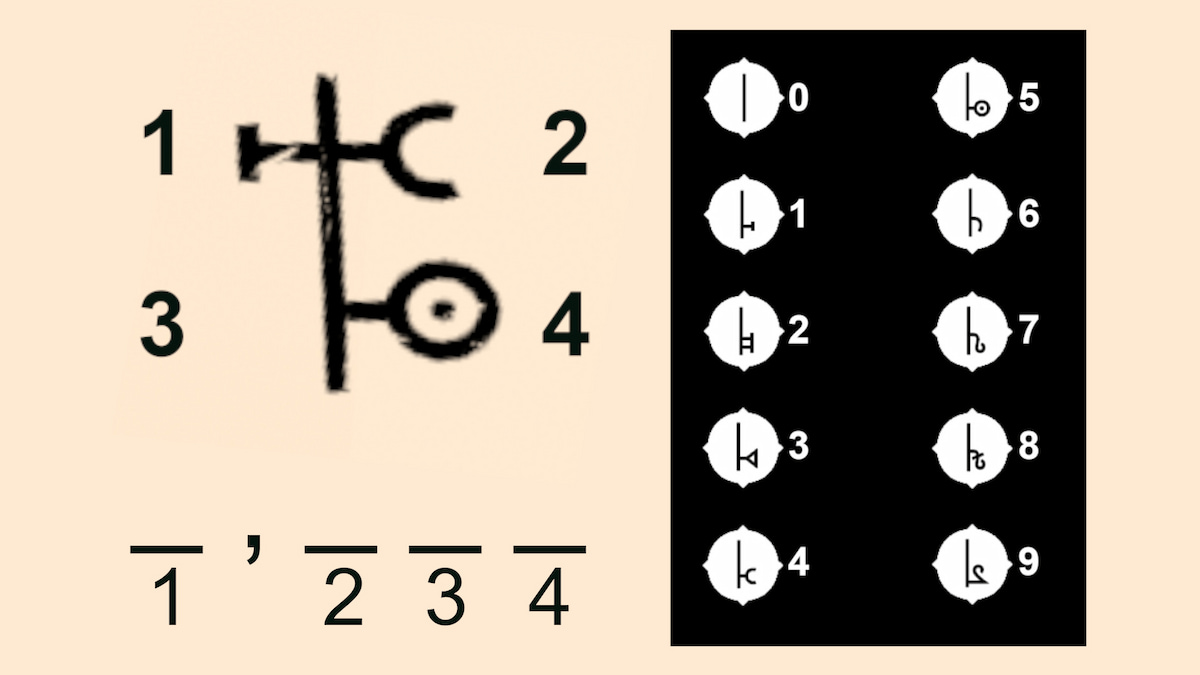
Head over to the transformation room, which is in the upper-right part of the Factory. Take the Silver bar and the Gold bar you got from the Gold Mine, and put them into the right places in the machine. This will fill up all four sections of the transformation machine.
Next up, you will need to calibrate the silver, gold, and carbon sections of the transformation machine to make sure to get the right mix of gold, silver, and carbon in your key to make the Fairy Door work. The first glyph on the machine is for Silver, and you need to get the weights to equal 812. The numbers on the weights correlate with the number system you had to use to get to the numbers above from the formula on the chalkboard; the smallest weights are ones, the second is a five pound weight, then 10 pound weights, then 100, 200, and 500 pound weights. Make them add up to the numbers from the formula.
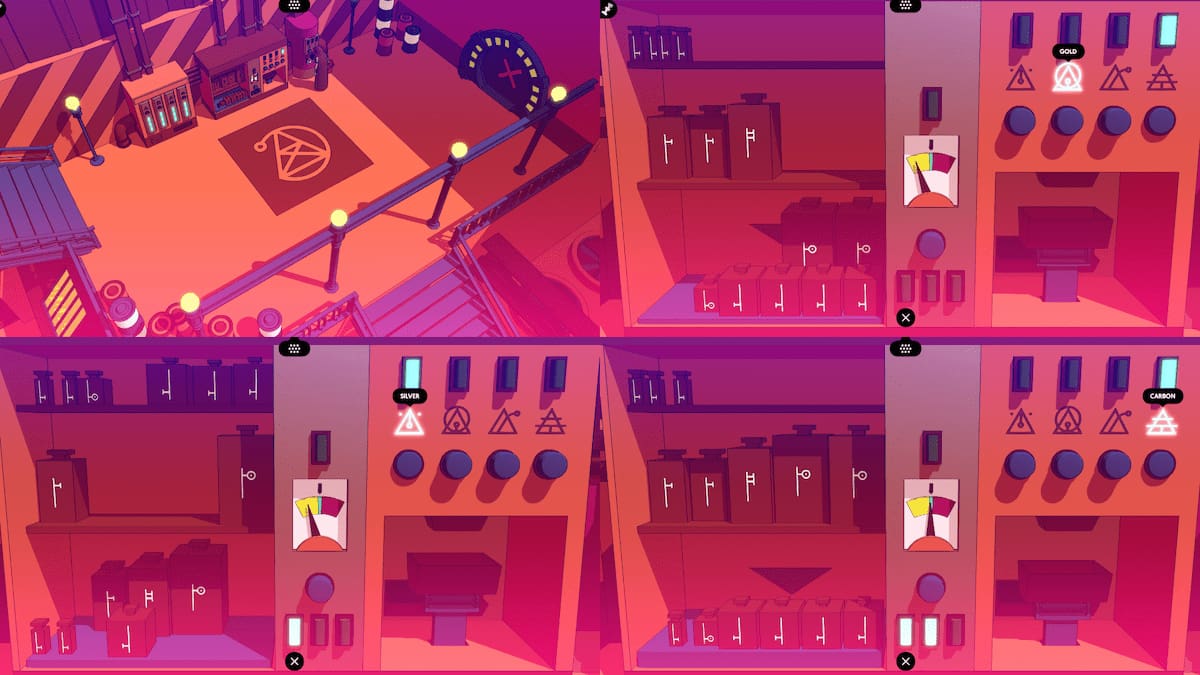
In order to make Silver equal 812, you need the 500, the 200, the 100, a 10, and two one-pound weights. Gold, which is 1405, Requires both 500-pound weights, four of the 100s, and one five-pound weight. For the final one, selection Carbon button, and add four 10s, one five-pound, and one one-pound weight to make 46. Head over to the next machine, and press the transform button. This will form a key that will fit in the Fairy Gate.
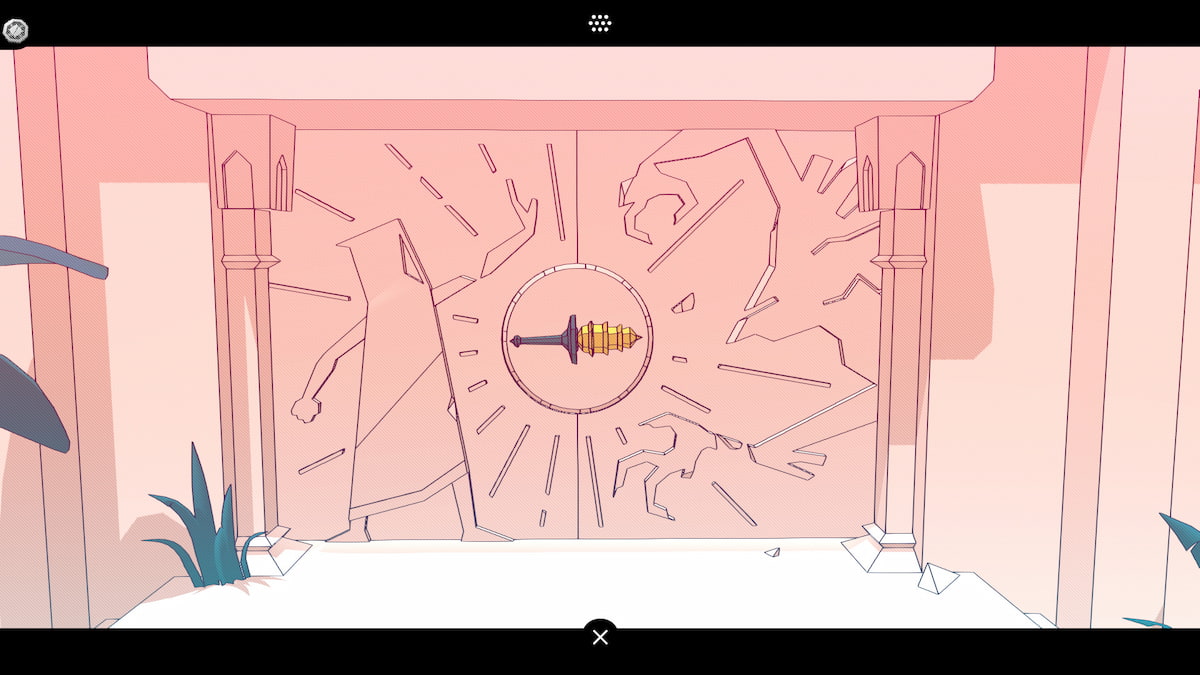
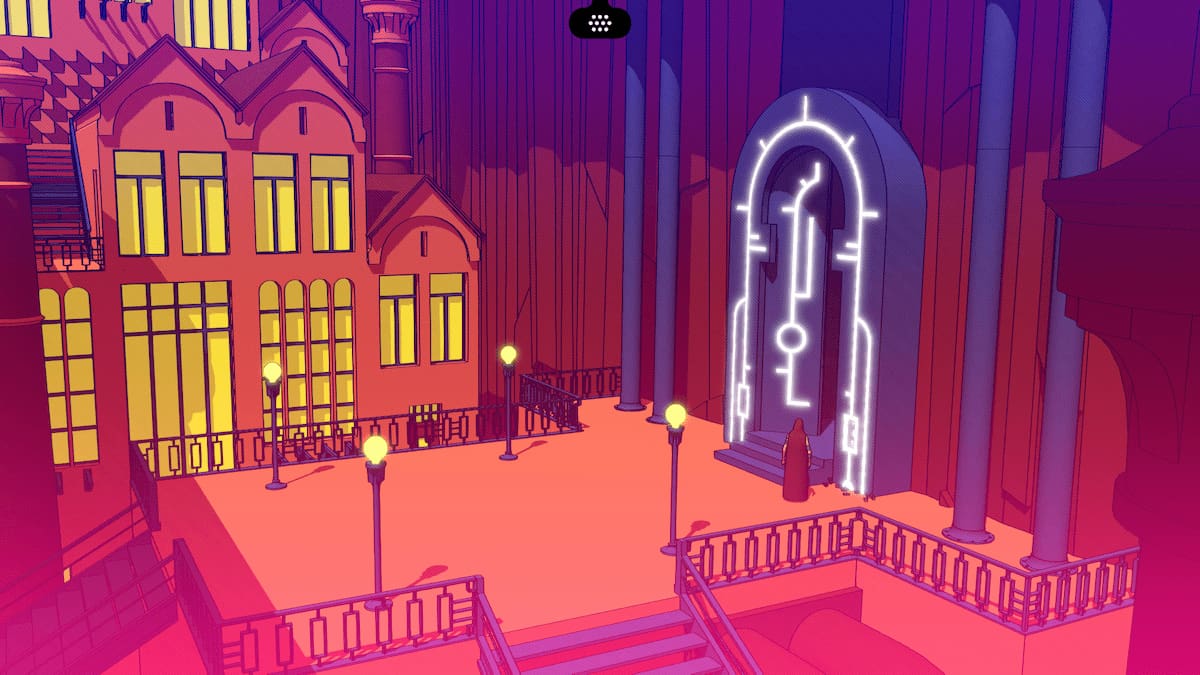
Using the stairs on the left side of the screen, head up to the Fairy Gate, and put the key in the door. If you have mixed the metals properly, the key will open the doors, allowing you to walk into Exile.
Video walkthrough of Chapter 4: The Factory
All Glyphs in the Alchemists language
Achievement: One Last Step
Reach the fifth layer of the Tower called Exile.
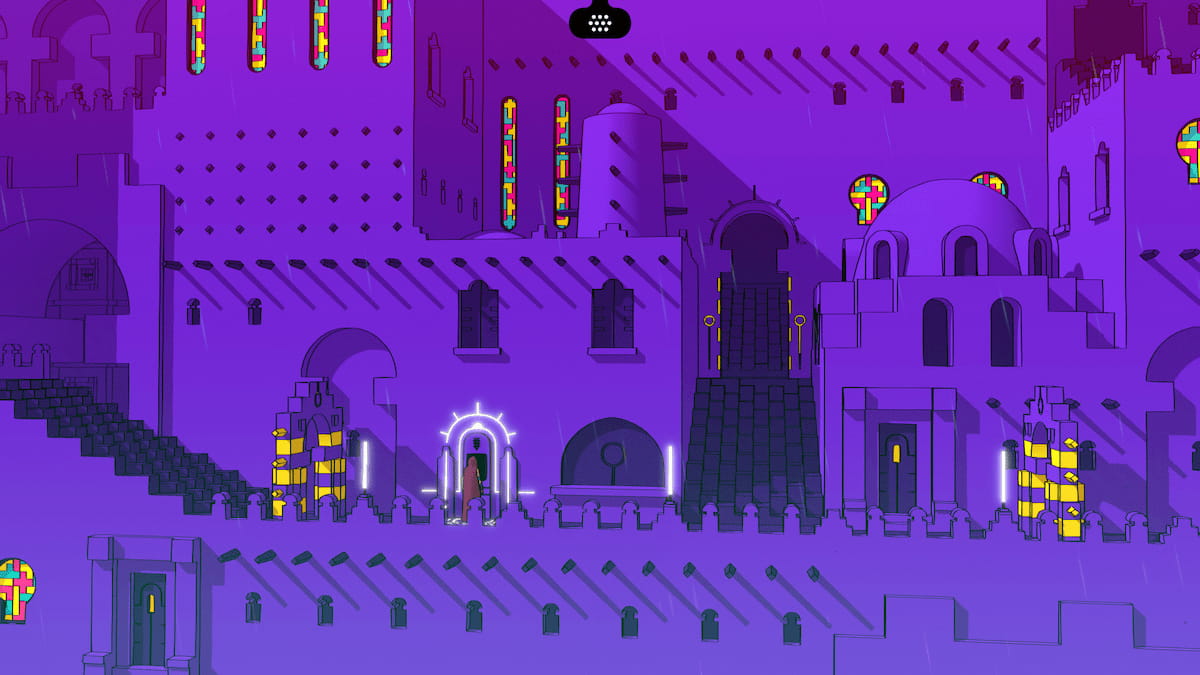
Chapter 5: Exile and the Top of the Tower
In the final chapter of Chants of Sennaar, you will have to collect a whole new language and unlock a door. It's a very quick chapter—much shorter than the ones before it if you want the bad ending. Here is an explanation for how to get both the good and the bad ending in this indie title.
Completing Exile

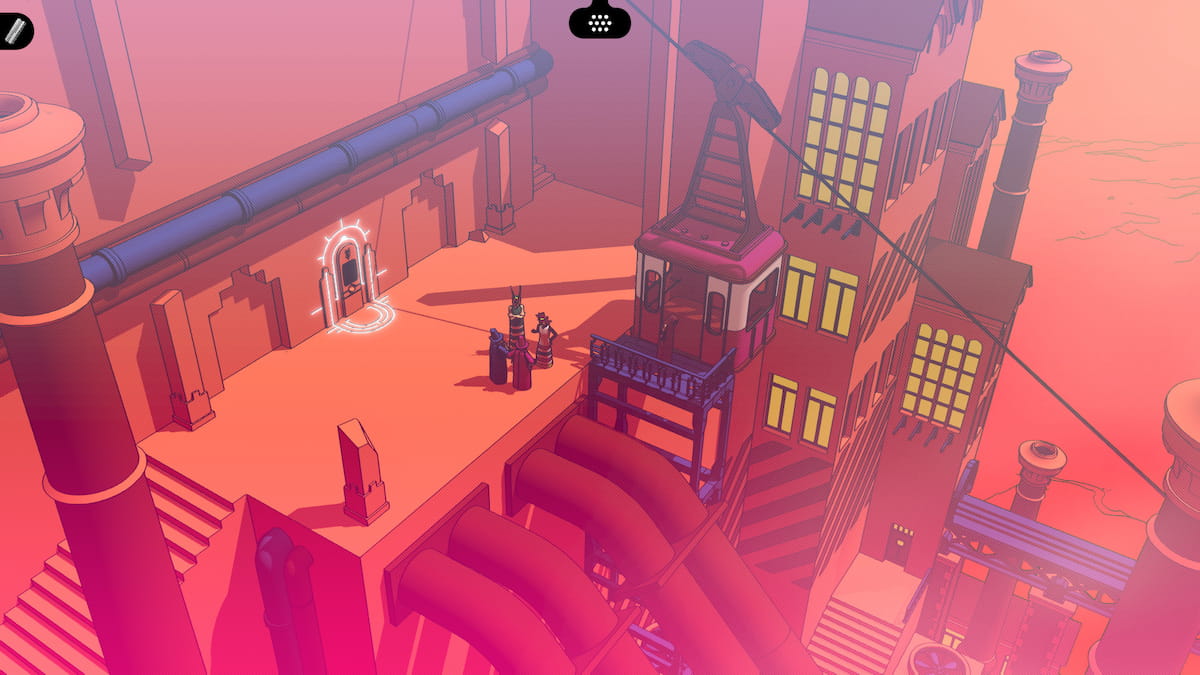
Head into Exile, and interact with the sign on the left side of this screen. It will give you some new glyphs that you will need to learn in this fifth and final language. It will also give you your first Exile glyph page.
Glyphs: Tower, People, Exile
Interacting with the first poster will give you a page in your journal. You have now learned three new words in this newest language: Tower, People, and Exile.
Tenth Fast Travel Point: Exile
The last fast travel point is inside Exile. Once you are inside, take the stairs at the bottom of the screen, then head to the left to the next screen. The fast travel point will be along the main path. If you have gotten the previous portals in this list, you will earn an achievement. If you want to know what to do with these consoles, check out the good ending section of this article.
Achievement: Cable Guy
Activate all 10 fast travel terminals.
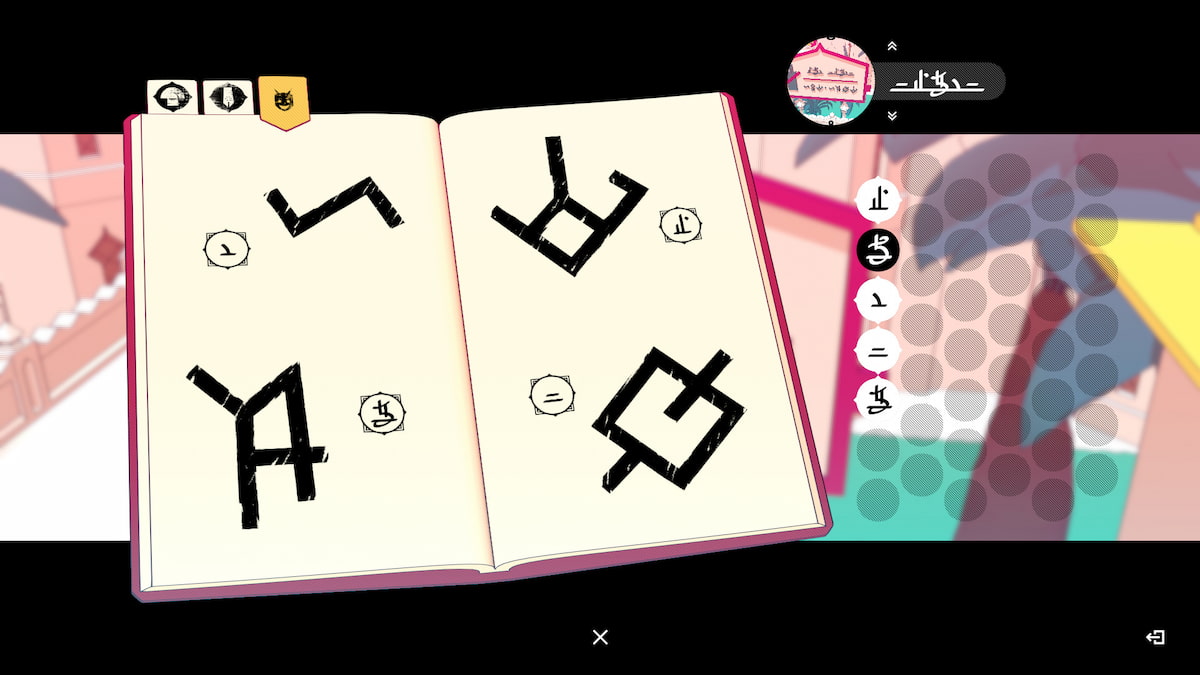
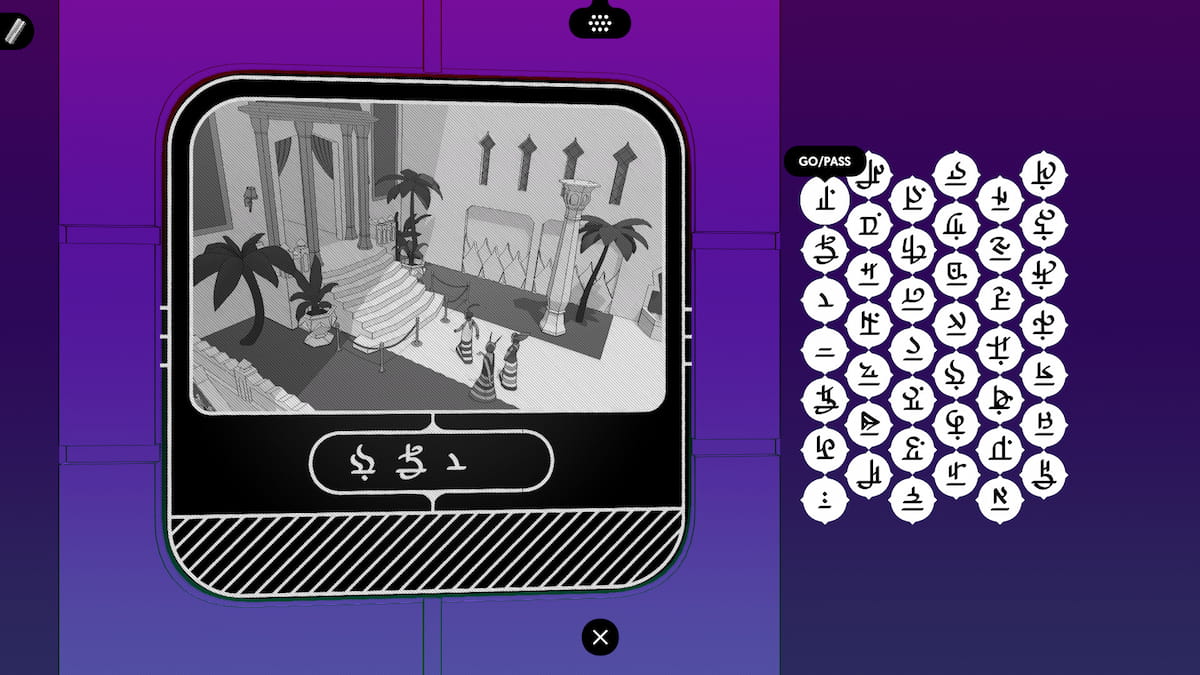
If you head up from the previous screen, you'll find a yellow terminal. On the screen of the terminal, you can find a collection of different glyphs from all the languages you have learned so far. Line up the matching glyphs with one another, and you will unlock a new page in your glyph journal.
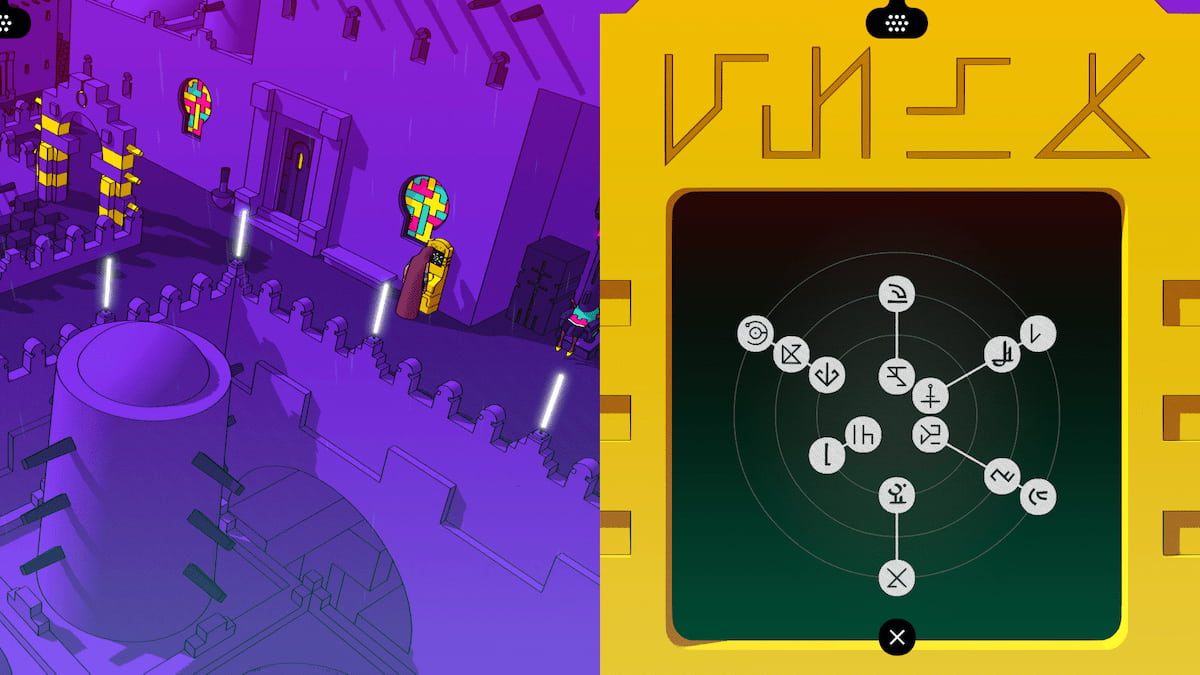
Glyphs: Me, Speak, Key, Make, Man, Create
If you turn the puzzle in the correct way on the yellow terminal, you'll earn a whole bunch of new glyphs for the language of Exile. The page will auto-fill in, you don't have to worry about matching up the glyphs correctly. If you read the glyphs in order, it will begin to tell you the story of why you are here.
The there are two more yellow terminals, each one with a new rotation puzzle. You can find the second one at this intersection shown below. This one will also give you a new, autocompleting glyphs page when you get glyphs in the right order.
Glyphs: You, Go, Help, Door, Up, Dead
The terminal above will give you another page with another sentence about why you have been summoned to Exile. Solve the puzzle in the second yellow terminal to earn this page.
The third yellow terminal will be located by the large door; walk past the giant laser-spitting face, then head to the next screen and look to the left of the golden door. Solve it with this solution to get another glyphs page.
Glyphs: Not, Wait, Plural, Greeting, Open, Fear
The third glyph puzzle will give you this new page with the glyphs for Not, Wait, Plural, Greeting, Open, and Fear. This will be the last piece of the puzzle you need to open the locked door in Exile.
With these glyphs, you will be able to unlock the door at the western-most part of the map. In order to unlock it, use the glyphs you have now learned for Key, Open, and Door in that order, and you will able to enter. Inside, speak to the person, then interact with the terminal at the back of the room. It will give you another set of challenges.
Glyphs: Climb, Doors, Stranger, Come, Death, Stop, Revive, Peoples, Us, Disregard, My People
In order to complete these three screens, you will need to think critically about how the new glyphs can be made by combining the ones you already know. For example, in the the screen capture above, you can see that the glyphs for "go" and "up" combine to make "ascend." Completing these pages will unlock all the remaining glyphs.
- "Plural" and "door" makes Doors.
- "Not" and "me" makes Stranger.
- "No" and "me" combines to make Come.
- "Go" and "Dead" makes Die.
- "Not" and "go" makes Stop.
- "Not," "go," and "die" make Revive.
- "People" and "plural" make Peoples.
- "Not" and "seek" make Disregard.
- "People" and "me" make My People.
Achievement: Champollion
Get all 186 glyphs in the game and validate them all.
The easy but bad ending
Now that you have all the glyphs, and your new friend has given you a weirdly shaped key, you can finish up the game. Head back to the golden door, insert the key, and head up to the top of the Tower. You will get the bad ending.
Achievement: I Did It
Finish the game with the bad ending.
The more time-consuming but good ending
Follow everything in the previous ending up until unlocking the Tower's final door, then complete the following steps before climbing to the summit of this world. You will need to reconnect all the terminals and unlock all the purple doors in the game to get the perfect ending. There will be a lot of backtracking during this section, so make sure to use fast travel when possible.
Reconnecting all the Terminals
The fast travel points or terminals located throughout the world now have to be reconnected in order to keep the Tower alive. You will need to head to the first fast travel point, which will bring you to the area outside of the Abbey. This first terminal requires some translation.
Terminal 1: Outside the Abbey
Fast travel to the first terminal, and interact with it. This terminal requires a translation; you will need to translate the Devotees language to the Alchemists in order for them to understand. The Devotee will ask for help with the plants, and the Alchemist will decide to help.
Achievement: A Good Beginning
Complete the first Terminal connection to get this trophy.
Terminal 2: Inside the Abbey
Fast travel to Terminal 2, which is inside the Abbey near the Cemetery. You will need to use the key for this one. From the second terminal, head out to the other side of the Abbey where the person is playing guitar. There is a hidden nook in the background. Inside there will be a purple door. Inside, you will need to first solve a puzzle of sorts. The answer to this one is Preacher, See/Look, Potion, Potion. Head inside the Exile room and press the button next to Exile to turn it off. This will unlock build the second terminal's connection.
Terminal 3: Outside the Fortress
Terminal 3 is located near the entrance of the Fortress. Unlike the last two terminals, you will need to do both a translation puzzle and a purple door. First and foremost, the translation puzzle. Since the Warrior is saying that the Devotees (Impure Ones) can't enter the Fortress because they can't make music, you just have to prove they do make music with a translation. The first line is "Devotee, Devotee, Not, Go." Then "Devotee, Devotee, Not, Make, Music." In answer, the Devotee will say: "Devotee, Devotee, Make, Music." The Warrior's answer needs to be translated with: "Warrior, Warrior, Love, Music."
After that, head into the Fortress and into the first main room with the spinning statue. The key to this door will blink faster the closer you get to the door, which should help if you get lost on the way. Head inside this door located below, then use the key to get inside the purple door.
Just like the last purple door, there will be a puzzle to get inside the Exile's chamber. This one is a picture of Warriors carrying a boat, so you need to use the glyphs for "Plural, Warrior, Carry, Vessel." This will unlock the door to get into the sneak puzzle room.
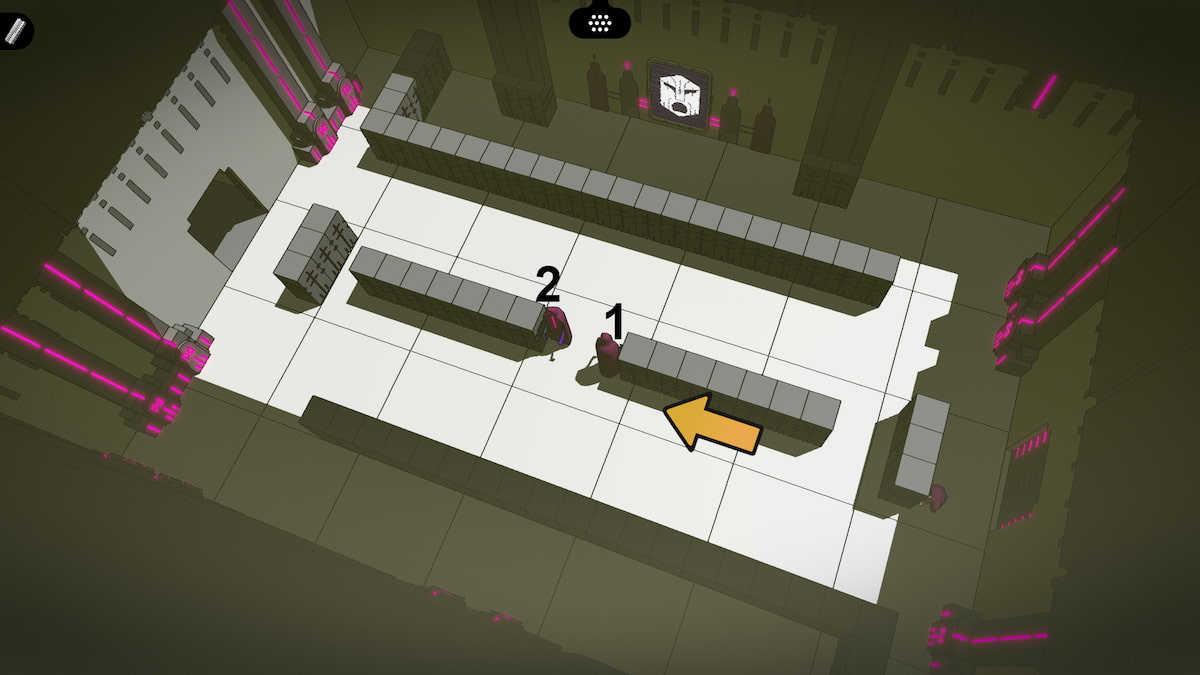
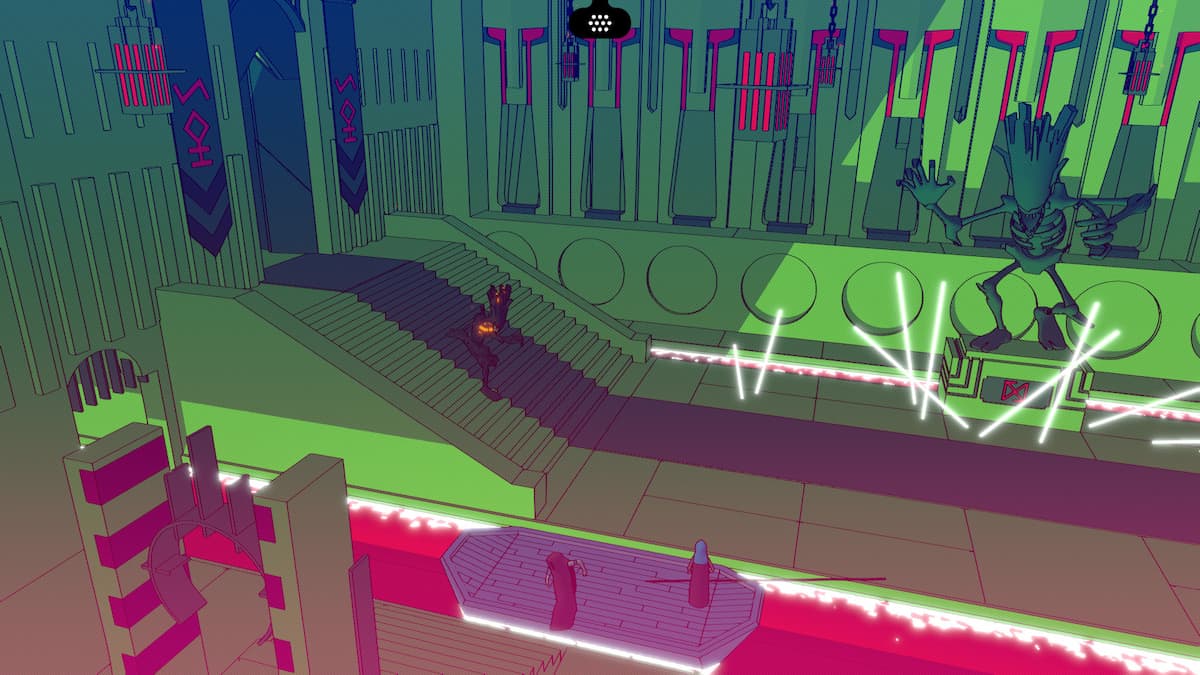
This guy patrolling the next room is up to no good; Exile know you are here to turn it off, and it won't go quietly. In order to get through this maze, you will need to wait until the robot guy is facing away, then move to the next location as indicated below.
Once you have given the robot guy the slip, it's time to turn Exile off with the button to the left of its screen face. You don't have to sneak on your way back as turning off Exile will also turn off the robot guy. Leave the area, and a Fairy person will stop you and thank you. This will complete the second connection for Terminal 3.
Terminal 4: Inside the Fortress
Terminal 4 is located in the Fortress in the Treasure area. In order to complete this one, you just need to translate some lines from Alchemist to Warrior. The Alchemists are asking for the Warriors to help them help the Monster, and the Warriors will reply that they are happy to help. Here are the Glyphs to choose for each of the lines below.
- Plural, Scientist, Want, Help, Impure.
- Plural, Scientist, Fear.
- Plural, Scientist, Not, Want, Death.
- Warrior, Plural, Not, Fear, Monster.
- Warrior, Plural, Help, Alchemist, Plural.
Terminal 5: The Garden Servants Passage
Terminal five is completed by finishing up the purple door close to Terminal 3, which is listed in the section on Terminal 3 above.
Achievement: Half the Way
Rebuild half of all the terminal links.
Terminal 6: Under the Theater in the Gardens
Once again, this Terminal 6 will have two things you have to do. First, you will need to translate between Bard and Devotee. Next, you will need to find the hidden purple door nearby and get rid of the Exile inside. Here is the solution to the Terminal 6 translation puzzle.
- Man, Salute, Me.
- Me, Me, Not, Man, Man.
- Me, Me, Not, Free.
- Free, Abbey, Be.
- Abbey, You, Plural, Go.
Once that is complete, head Up from the Terminal screen into the Servants Passage, then Up again, then to the Left. There will be the purple door needed for the next challenge. Use the key to open it up, then head inside.
Just like all the other rooms so far, you'll see a person sitting near a closed door with the Exile sign on it. To get it open, you'll have to solve the mini puzzle below. The glyphs in order needed to open the door are Theater, Bard, Plural, Go/Pass.
To sneak around the two robots now moving around, wait until they are in this formation. Robot 1 will be walking towards the top of the screen, and two will be walking south. Start moving along the wall, following Robot 2 until you can slip around the corner and through the door on the other side. Once you are in the other room, turn off Exile. This will free the Fairy behind this purple door.
Terminal 7: In the Galleries
There is nothing to do at Terminal 7; you'll need to continue onto Terminal 8 instead.
Terminal 8: The Silver Mine
The Silver Mine Terminal is another translation puzzle, going from Alchemist to Bard and back. In order to complete this puzzle, you'll need to input these glyphs in order:
- Me, Search, Brother, Plural.
- Warrior, Plural, Not, Brother, Plural.
- Book, Me, Find.
- Brother, Plural, Me, Plural, Be.
- Me, Plural, Brother, Plural.
Terminal 9: Behind the Library in the Factory
Terminal 9 features both a purple door to find and a translation puzzle. To get to the purple door, leave the Terminal south, then head down the stairs that will be immediately to your character's left. This will lead you right to the purple door, and you can head inside with the key.
The puzzle to enter the door is a picture of six books. In order to open it, you'll need to put in the symbols for 6, Book, then Plural. Then, you'll need to sneak around even more robot friends. When the first two robots aren't looking, sneak around the far side of the middle lane, then wait there for the way to be clear to the door. It looks really challenging, but it is actually quite easy to get through.
This will get you into Exile's room. It will threaten you, but it's pretty toothless at this point, so you will be able to turn it off without issue. Make sure to press the button, power him down, then have a chat with the Fairy you have released from Exile's control before heading out.
Once you're back at the terminal, you can solve the translation puzzle. The solution requires you to translate Warrior to Bard and the other way too. Here is the solution for this puzzle:
- Music, Warrior, Plural, Love.
- Fortress, Bard, Go.
- Plural, Chosen One, Possess, Plural, Instrument.
- Plural, Chosen One, Love, Make, Music.
- Plural, Chosen One, Go, Fortress.

Terminal 10: Exile
This terminal does not have any puzzles associated with it; it will be completed by completing the purple door near Terminal 9.
Achievement: Peace Walker
Rebuild all 10 terminal links.
Finishing up the last achievements to 100% Chants of Sennaar
There are a couple of achievements you will only be able to get after you finish up all the terminals as listed above. As soon as you start to open up the layers of the Tower, different people will cross over between different locations, allowing you to watch these people interact. Here's how to get all those achievements.
Achievement: Feels like Spring Time
Travel back to the Garden where you looked for the Preacher, and you can see how well the Alchemists potion worked to fix the dying plants. From Terminal 2, head Down, Right, and Right to get back to the garden.
Achievement: Open Door
Travel to the front door between the Abbey and the Fortress and see the door is opened. It's easiest to get here from Terminal 1.
Achievement: Free at Last

There is a Serf who is hanging out with the Beggar you met in Chapter 1 in front of the church. You can get there quickly from Terminal 2 if you head right away from the cemetery and then head north.
Achievement: A Great Audience
Attend the Bards' show in the Fortress the stairs up to the Bellman's house; you can get there by going to Terminal 4, then heading up the stairs, north, north, then climb the stairs toward the Bellman's place.
Achievement: For Its Own Good
If you leave from Terminal 8, heading out of the silver mine, you can keep heading right until you run into the Labs. Go into Lab 1 to see the captured monster getting worked on by the Alchemists.
Achievement: A Link to the Past
If you head to Terminal 9, you can get to the library by going right and up the stairs. Once inside, go up the stairs on the left side of the screen, then find the Bards hanging out on the upper floor of the library.
Achievement: Alchemists Express
Also from Terminal 9, you can see that there is a trolley that wasn't there before; you can ride it back down the Gardens.
After the End
As you head back up to the golden door in Exile, you will find two of the Robot guys you have been trying to avoid behind the purple doors. They will shoot you down, but you will come back. Use the key in the golden door, and then climb the Tower to the top. Interact with the console at the top, and the game will restart. But things will look a little different this time around.
Walk down from your respawn point and head down to the door where you first learned the Devotee words for Open, Door, and Close. If you interact with it, then head back toward the starting point, you'll come across the child you played with in Chapter 1. Walk further towards the bottom of the screen, and the child will open up the way for you to cross over.
You'll both end up in the Fortress. Head up the stairs and then down out of the door at the bottom of the screen. Head up the stairs, and look for what is different on the mural. It will give you the answer needed to open what used to be the Treasure door. Type in these four glyphs: Plural, Impure, Create, Music.
Next up is the Comedy Theatre. Go inside and grab the token out of the water fountain. Give it to the Bard outside, and then head inside.
The child will help you climb to the second floor, where you can watch the play again. But things are a little different. Once the play is over, go through the servant's door to the left, then look for the book stuck to the wall on the left side of the book sign. It will say "____ ____ Bard, Found."

Head down the stairs and then out the other door, then interact with the Terminal there. The glyphs for this puzzle are "Brother, Idiot, Bard, Find."
Now we are back in front of the Fortress' door in the Abbey. Head out and down. The Murals will all be there except one, which is the one you need. Keep heading to the left. You will eventually find a piece of the mural, and then most of it lying in the first location you started the game in.
In order to get in through the Fortress gate, you'll need to input what you saw on the mural, even though it was mostly unintelligible. But you should have an idea of what it says from your translation puzzle from Terminal 1: Alchemist, Plural, Make, Formula.
This will begin a chase scene with the Monster. Keep running and follow the child when prompted. You'll end up in a recreation of the maze from the space between the Abbey and the Fortress; you'll need to head Up, Right, Up, Up, Left, Up, Right.
After that, head down the hallway, and when the monster jumps out in front of you, make sure to take the route across the boat to the south. When you get to the rail, pull the lever to drop the Monster into the depths of the mine. After that, you'll just have to interact with the button, then head back to the golden door. Head to the top of the Tower for the good ending you worked so hard for.
Achievement: In This Together
Get the good ending.
What happpens in the bad ending in Chants of Sennaar?
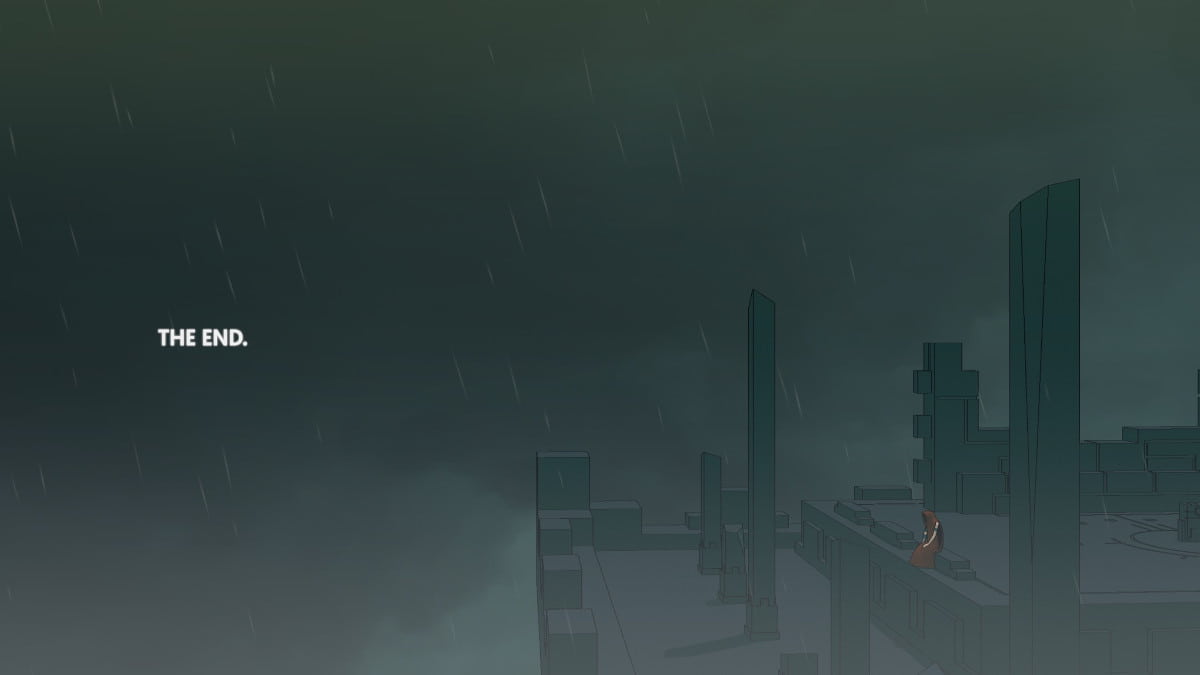
As noted above, there are two different endings in Chants of Sennaar. The fast ending, or the bad ending, happens if you don't complete all 10 terminals before heading to the top of the Tower. Rain pours from the sky, and you walk to the top, alone and without the power to light the apex. Instead, you sit in the rain, looking out over the world. You didn't complete your quest that you were made for, and you will have to just watch as the Tower, and everyone inside it, dies.
What happens in the good ending in Chants of Sennaar?
If you put in the time to do all the Terminals, you will get access to the good ending. It takes a lot longer to complete in comparison to the bad one, but it is worth the effort. Once you interact with the golden door in Exile, two robot guys (just like the ones behind the purple doors) will show up an shock your character to death in front of the open door. After a few moments, however, you manage to drag yourself back up somehow; walking up the Tower's apex shows that it's still raining, still dark and stormy, and the top of the Tower doesn't respond in the way you thought it would. "The End" shows up on the screen, but is it really the end?
You wake up at the beginning of the game again, but instead of the title of the game coming up on screen, it just says Exile, which is a bad sign. As you walk through the first chapter's beginning again, you'll start to notice some weird changes, extra doors, staircases, and jumbled letters. The child who you played hide and seek with will help you through the next locations, all mixed up and strange. You need to solve a couple of puzzles, then run away as the Monster from the Galleries chases you. After you shake him, you will find yourself in a weird location. It looks like a broken program, and Exile's face blips and shakes in the background. As you get to the end of the platform you are on, you find yourself face-to-face with your own body.
You are locked into one of the Exile's helmets. You have been playing Exile's game, and you are not out of the Matrix just yet. Next to your body that is hooked up to the ultimate VR machine, there is an off button. Once you turn the program off, you will wake up in the real world, where your body has been all along. You are now in the real Exile, and you have defeated the program Exile. Exile was keeping all the people of the Tower separated, keeping them all locked in the program to keep itself going, even if it was slowly killing all the people in the Tower off.
Finally, you walk out into Exile, and all the people who were locked into their VR helmets have been let go. You can finally walk up to the actual top of the Tower, and the sun has come out. At the top, a collection of people, a couple from each layer of the Tower, are present. You walk forward and turn on the machine at the top of the Tower, and it lights up with the symbol from the Terminals.
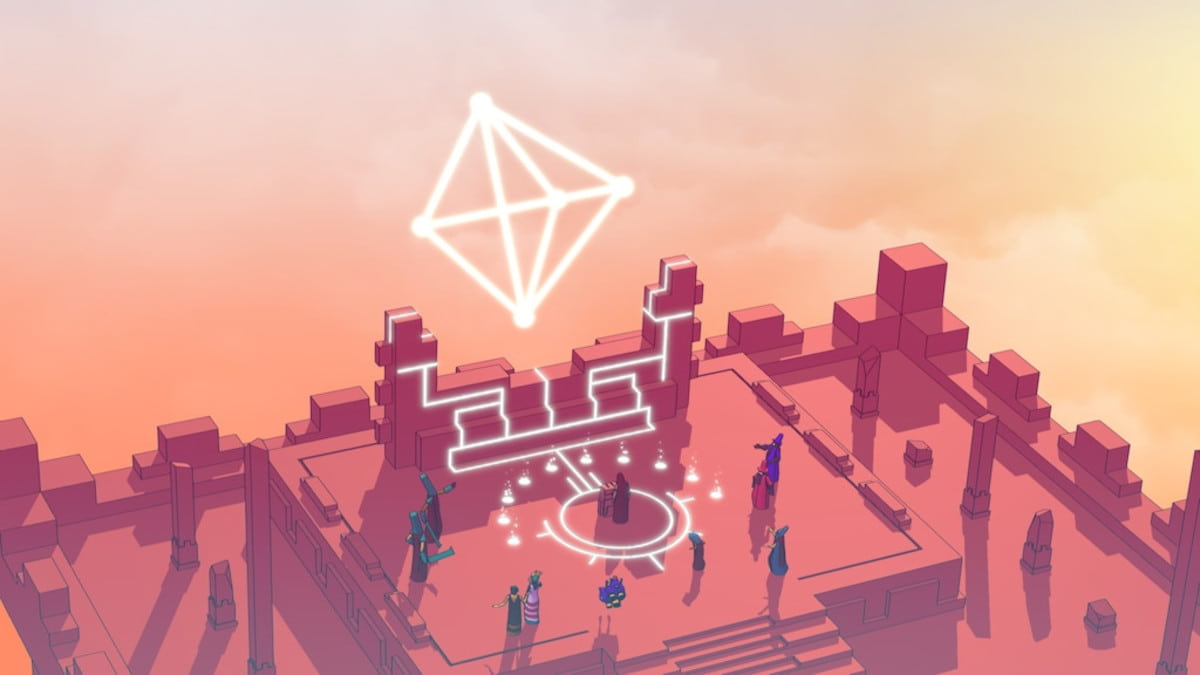
As the 3D diamond-shape turns, you can see that from different perspectives, it forms the glyphs that are most important to each of the groups: the symbol for God in the Devotee language, the symbol for Duty in the Warriors tongue, Beauty in Bard, Transformation in Alchemist, and finally, it tilts to make Exile in the Fairy language. The thing that was most powerful most important to all was the same thing, just from a different perspective. Here is a video of the full good ending for Chants of Sennaar.
For more indie games, check out What is Usual June? Release date, trailer, platforms, & more! on Pro Game Guides.
Write A Comment
Chants of Sennaar Walkthrough – 100% All Achievements
This site is protected by reCAPTCHA and the Google Privacy Policy and Terms of Service apply.